
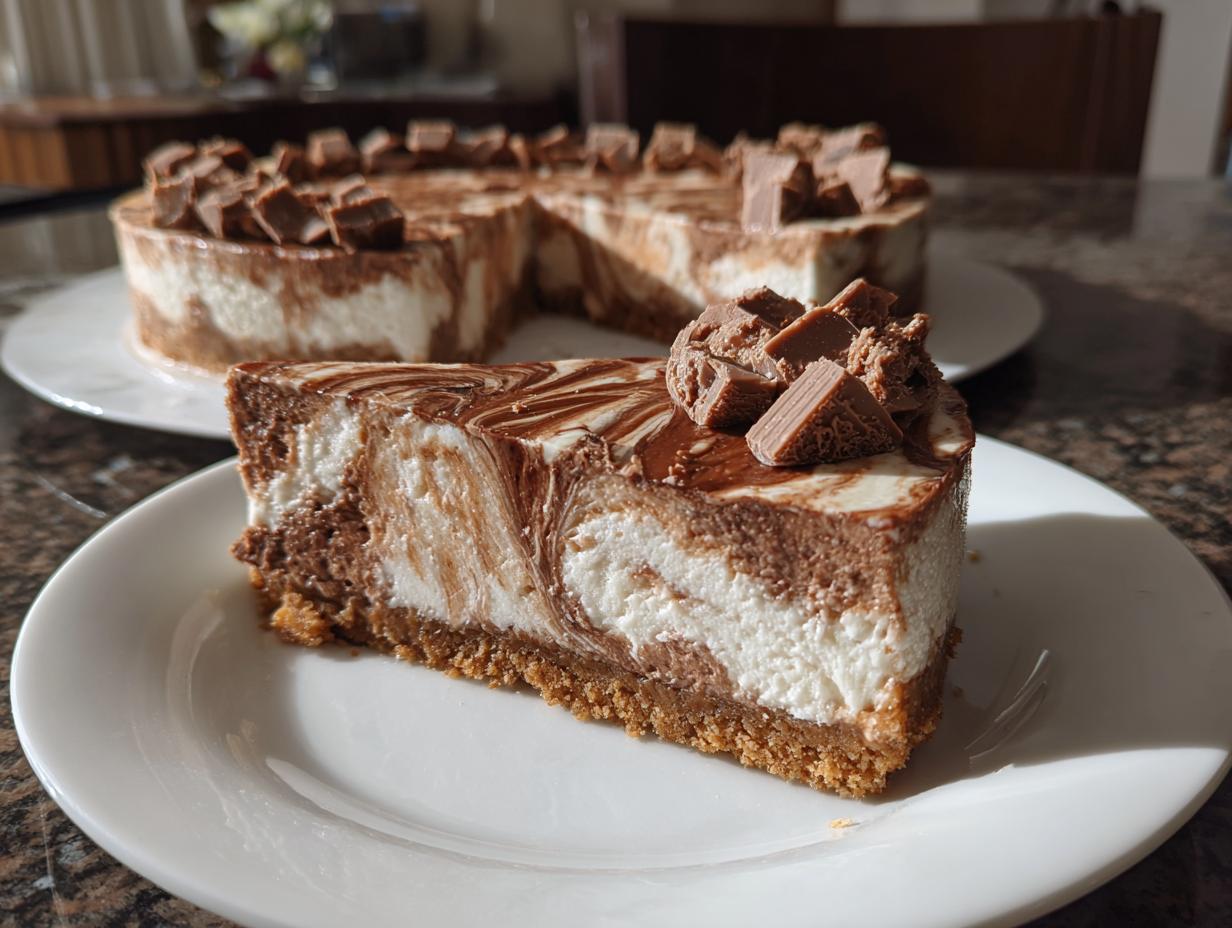
Okay, let me tell you about the dessert that completely changed my no-bake game – this viral no-bake Kinder Bueno cheesecake! I stumbled upon the idea last summer when I needed a showstopper dessert for a potluck but didn’t want to turn on my oven in the heat. Let me tell you, the first bite had me hooked – that creamy, dreamy texture with those crunchy hazelnut chocolate pieces? Absolute magic. What I love most (besides eating it) is how stupidly easy it is – just mix, chill, and watch people’s eyes light up when they taste it. It’s become my go-to for last-minute parties, and honestly? I’ve lost count of how many people have begged me for the recipe. The best part? You probably have most ingredients in your kitchen right now, except maybe the Kinder Bueno bars… but trust me, those are worth running to the store for!
Why You’ll Love This Viral No-Bake Kinder Bueno Cheesecake
Oh my goodness, where do I even start? This cheesecake is basically happiness in dessert form, and here’s why:
- No oven required – Seriously, just mix and chill. Perfect for summer when you can’t bear to turn on the oven!
- That Kinder Bueno magic – The crunchy wafer and creamy hazelnut filling take this from “good” to “can’t-stop-eating” levels.
- Foolproof – Even if you’re not a confident baker, you can absolutely nail this. I’ve taught my 12-year-old niece to make it!
- Crowd-pleaser – Every time I bring this to gatherings, people hover around the dessert table like bees to honey.
- Make-ahead dream – It actually gets better after chilling overnight, so no last-minute stress.
Honestly? The hardest part is waiting for it to set before digging in!
Ingredients for Viral No-Bake Kinder Bueno Cheesecake
Alright, let’s talk ingredients – and I mean the good stuff! Here’s exactly what you’ll need to make this dreamy dessert come to life:
- 200g digestive biscuits – These give that perfect buttery base. Graham crackers work too, but digestives have that special something.
- 100g unsalted butter, melted – No margarine shortcuts here! Real butter makes all the difference in the crust.
- 400g full-fat cream cheese – Room temperature, please! The full-fat version gives that luxuriously smooth texture we’re after.
- 100g powdered sugar – Sift it if yours is lumpy – we want silky smooth filling!
- 200ml heavy cream – Cold from the fridge, whipped to stiff peaks. This is what gives that cloud-like lightness.
- 4 Kinder Bueno bars – Chopped into chunks (plus extra for garnish if you’re feeling fancy).
- 1 tsp vanilla extract – The good stuff! It rounds out all the flavors beautifully.
Pro tip from my many trials: measure everything before you start. There’s nothing worse than realizing you’re short on cream cheese mid-mix! And yes, those Kinder Bueno bars are non-negotiable – they’re the star of the show.
How to Make Viral No-Bake Kinder Bueno Cheesecake
Okay, let’s get to the fun part – making this dreamy cheesecake! Don’t let the fancy look fool you; it’s seriously easy. Just follow these steps, and you’ll have a dessert that looks like it came from a fancy bakery!
Preparing the Crust
First things first – that buttery biscuit base! Here’s how I do it:
- Crush those digestive biscuits until they’re fine crumbs. I use a food processor for speed, but a rolling pin and zip-top bag work great too (and it’s oddly satisfying!).
- Mix the crumbs with melted butter until it looks like wet sand. You’ll know it’s right when you can pinch some between your fingers and it holds together.
- Press this mixture firmly into your springform pan. I mean really press it – use a glass or measuring cup to get it nice and compact. This prevents crumbling when you slice it later.
- Pop it in the fridge for at least 30 minutes to set. This chilling time is crucial – it gives the base structure so it won’t fall apart when you add the filling.
Making the Filling
Now for the creamy, dreamy part that makes this cheesecake so special:
- Beat the room-temperature cream cheese and powdered sugar together until completely smooth. No lumps allowed! Scrape down the bowl a few times to make sure everything’s incorporated.
- In a separate bowl, whip the cold heavy cream to stiff peaks. Pro tip: chill your bowl and beaters first – it helps the cream whip up faster!
- Gently fold the whipped cream into the cream cheese mixture. I use a spatula and make big, slow motions – we want to keep all that air in the cream for maximum fluffiness.
- Add the vanilla extract and most of the chopped Kinder Bueno (save some for garnish!). Fold just until everything’s evenly distributed. You’ll see those beautiful chocolate chunks peeking through!
Chilling and Serving
Almost there! Just a little patience required now:
- Pour the filling over your chilled crust and smooth the top with an offset spatula or the back of a spoon. Get it nice and even!
- Refrigerate for at least 4 hours, but overnight is even better. I know, the wait is torture, but trust me – it makes all the difference in texture.
- When you’re ready to serve, run a hot knife around the edge before releasing the springform pan. Garnish with extra Kinder Bueno pieces – I like to chop some extra fine and sprinkle them over the top for that bakery-worthy finish.
There you have it! The easiest, most impressive dessert you’ll make all year. Just try not to eat the whole thing yourself – though I won’t judge if you do!
Tips for the Perfect Viral No-Bake Kinder Bueno Cheesecake
After making this cheesecake more times than I can count (no regrets!), here are my foolproof tips:
- Room temp cream cheese is non-negotiable – Cold cheese = lumpy filling. Leave it out for 2 hours before starting.
- Chill your whipping bowl – 15 minutes in the freezer makes the cream whip up faster and fluffier.
- Hot knife trick – Dip your knife in hot water and wipe dry between slices for picture-perfect cuts.
- Patience pays – That 4-hour chill time? Worth every minute for the perfect creamy texture.
- Taste as you go – Sneak a bit of the filling before adding chocolate to adjust sweetness if needed.
Follow these, and you’ll have cheesecake magic every single time!
Ingredient Substitutions and Variations
Okay, let’s talk about playing with this recipe – because sometimes you gotta improvise when the pantry isn’t cooperating! Here are my favorite swaps and twists that still deliver amazing results:
Biscuit Base Alternatives
Out of digestives? No problem! Try these:
- Oreo crumbs (with the filling removed) make a gorgeous chocolatey base – just reduce the butter slightly since the filling adds moisture.
- Graham crackers work beautifully for that classic cheesecake vibe.
- Shortbread cookies create an extra buttery, rich crust that’s divine.
Just remember – whatever you use, crush it fine and pack it tight!
When You Can’t Find Kinder Bueno
I know, I know – they’re the star! But in a pinch:
- Ferrero Rocher give that same hazelnut crunch (chop them rough for texture).
- Crunchy hazelnut chocolate bars (like Toblerone or any wafer chocolate) work too.
- White chocolate bars with chopped toasted hazelnuts make a lovely twist.
Fair warning – milk chocolate alone won’t give that signature wafer crunch, but it’ll still taste delicious!
Cream Cheese Considerations
If you’re dairy-free or just out of cream cheese:
- Full-fat coconut cream (chilled overnight) can work, but the texture will be softer.
- Mascarpone makes it extra rich and decadent – reduce the powdered sugar slightly.
Whatever you do, avoid low-fat cream cheese – it just doesn’t set properly!
The beauty of this recipe? It’s super forgiving. Just keep the ratios roughly the same, and you’ll still end up with something amazing. My motto? Any cheesecake is better than no cheesecake!
Storing and Serving Suggestions
Okay, let’s talk about keeping this beauty fresh and making it look extra special when you serve it – because presentation matters almost as much as taste!
How to Store Your Cheesecake
Here’s the deal – this cheesecake keeps beautifully in the fridge for up to 3 days (if it lasts that long!). Just follow these simple steps:
- Keep it covered with plastic wrap or in an airtight container – you don’t want it picking up any fridge smells.
- If you’ve already sliced it, press plastic wrap directly against the cut sides to prevent drying out.
- Pro tip: Store any extra Kinder Bueno pieces separately and add them just before serving so they stay crunchy.
Fair warning – the texture gets even creamier by day two, so leftovers are actually a good thing!
Serving Suggestions That Wow
Now for the fun part – making it look as good as it tastes! Here are my go-to presentation tricks:
- Serve chilled – the colder it is, the cleaner your slices will be.
- Garnish with extra Kinder Bueno pieces – I like to chop some fine and leave others whole for texture contrast.
- Drizzle with melted chocolate or caramel sauce right before serving for that bakery-worthy finish.
- Add a dollop of whipped cream and a sprinkle of cocoa powder for extra elegance.
- For parties, cut into smaller squares or rectangles – they look fancier and are easier to grab.
The best part? You can customize the toppings based on your mood or occasion. Sometimes I go all out with chocolate shavings and gold leaf (yes, really!), and other times I keep it simple with just those extra Kinder Bueno pieces. Either way, it’s guaranteed to disappear fast!
Viral No-Bake Kinder Bueno Cheesecake FAQs
I get so many questions about this cheesecake (probably because everyone who tries it becomes obsessed!), so let me answer the most common ones for you:
Can I freeze this cheesecake?
Oh honey, no! The texture turns all weird and grainy when thawed. This beauty is strictly a fridge-only dessert. But trust me, it never lasts long enough to need freezing anyway!
What if I can’t find Kinder Bueno bars?
First – gasp! But okay, emergencies happen. Ferrero Rocher or any hazelnut wafer chocolate will work in a pinch. Just know it won’t taste exactly the same, but it’ll still be delicious.
Can I use milk chocolate instead?
You can, but you’ll miss that signature crunch from the wafer layers. If you do swap, maybe add some chopped toasted hazelnuts for texture.
Why did my filling turn out runny?
Three likely culprits: 1) Cream cheese wasn’t room temp, 2) You overmixed after adding the whipped cream, or 3) It needed more chilling time. Patience is key!
How do I know when it’s set properly?
Give the pan a gentle wiggle after 4 hours – the center should jiggle slightly but hold its shape. If it looks liquidy, give it more time. Overnight is always safest!
Can I make this in individual portions?
Absolutely! Use small jars or ramekins. Just reduce the chilling time to about 2 hours. They’re adorable for parties!
Nutritional Information
Okay, let’s be real for a second – we’re not making this cheesecake because it’s a health food! But since people ask, here’s the deal:
The nutritional values will vary depending on the exact brands you use and how big you slice your portions (no judgment if yours are… generous). This is a rich, indulgent dessert meant to be enjoyed in moderation (or not – I won’t tell!).
That said, a typical slice contains a good amount of calcium from the cream cheese and dairy, plus hazelnuts do provide some healthy fats. But let’s be honest – we’re here for that creamy, chocolatey, Kinder Bueno magic, not the vitamins!
If you’re watching specific dietary needs, always check your ingredient labels carefully. And remember – life’s too short not to enjoy dessert sometimes!
Share Your Viral No-Bake Kinder Bueno Cheesecake Creations
Alright, I’ve spilled all my cheesecake secrets – now it’s your turn! Nothing makes me happier than seeing your versions of this recipe come to life. Did you add a special twist? Maybe some caramel drizzle or a sprinkle of sea salt? I want to see it all!
Snap a pic of your masterpiece (bonus points if you catch someone mid-bite with that “OMG this is amazing” face) and tag me @CheesecakeObsessed. I live for your kitchen victories and creative spins – last week someone made mini versions in espresso cups, and I nearly died from the cuteness!
Got questions while making it? Drop them below – I check comments daily because let’s be honest, I’m always thinking about cheesecake. And if you loved it? Well, a five-star rating makes my day brighter than a freshly opened Kinder Bueno bar!
Print
Irresistible Viral No-Bake Kinder Bueno Cheesecake in 4 Hours
- Total Time: 4 hours 30 minutes
- Yield: 8 servings 1x
- Diet: Vegetarian
Description
A delicious no-bake cheesecake with Kinder Bueno flavor, perfect for any occasion.
Ingredients
- 200g digestive biscuits
- 100g unsalted butter, melted
- 400g cream cheese
- 100g powdered sugar
- 200ml heavy cream
- 4 Kinder Bueno bars, chopped
- 1 tsp vanilla extract
Instructions
- Crush the digestive biscuits into fine crumbs and mix with melted butter.
- Press the mixture into the bottom of a springform pan and refrigerate for 30 minutes.
- Beat the cream cheese and powdered sugar until smooth.
- Whip the heavy cream until stiff peaks form, then fold into the cream cheese mixture.
- Add vanilla extract and chopped Kinder Bueno, then mix well.
- Pour the filling over the biscuit base and smooth the top.
- Refrigerate for at least 4 hours or overnight.
- Garnish with extra Kinder Bueno pieces before serving.
Notes
- Use full-fat cream cheese for best results.
- Chill the cheesecake thoroughly before slicing.
- Store leftovers in the fridge for up to 3 days.
- Prep Time: 20 minutes
- Cook Time: 0 minutes
- Category: Dessert
- Method: No-Bake
- Cuisine: International
Nutrition
- Serving Size: 1 slice
- Calories: 450
- Sugar: 30g
- Sodium: 200mg
- Fat: 35g
- Saturated Fat: 20g
- Unsaturated Fat: 10g
- Trans Fat: 0g
- Carbohydrates: 40g
- Fiber: 2g
- Protein: 5g
- Cholesterol: 80mg


