
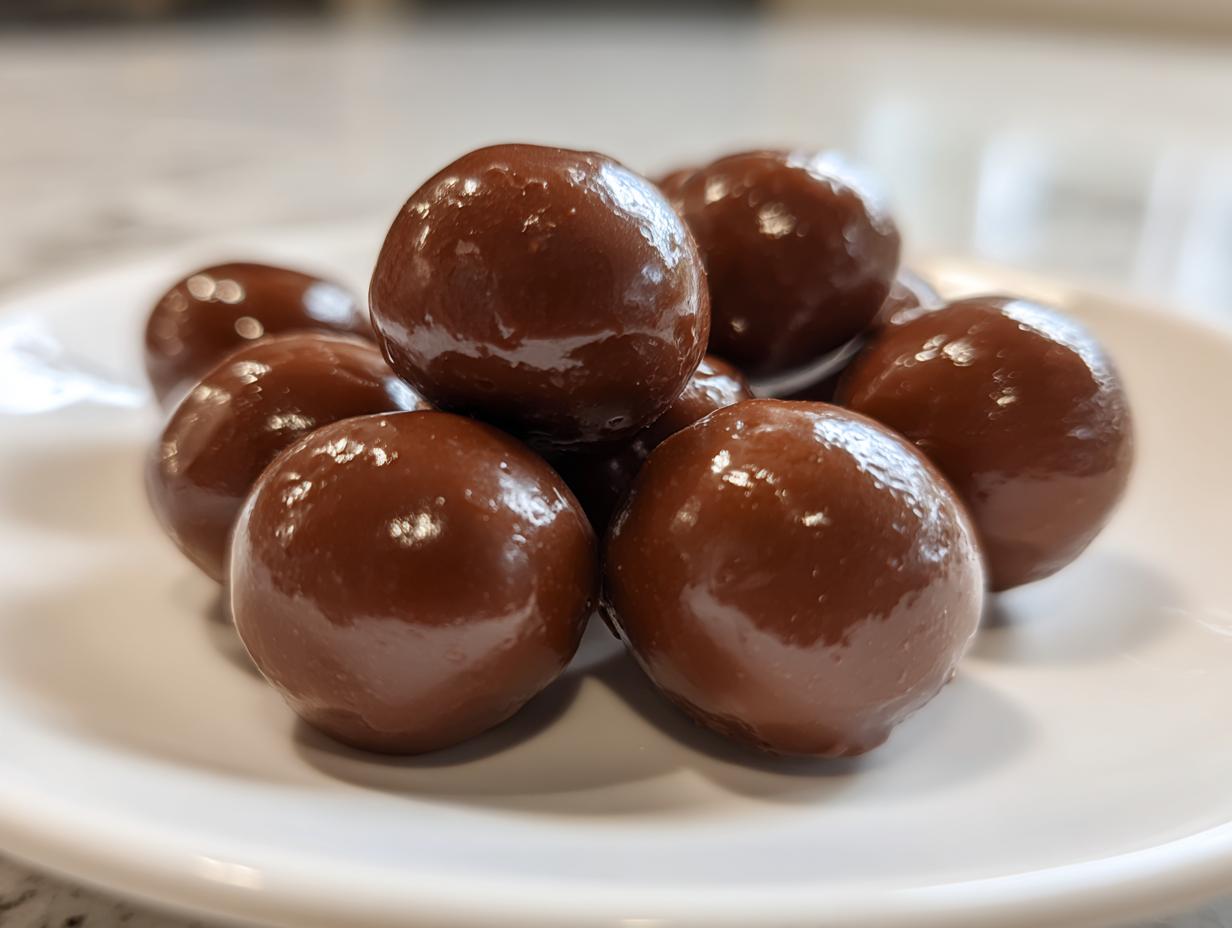
Remember those magical malted milk balls from childhood birthday parties? The ones that disappeared from the bowl faster than you could grab a handful? I’ve spent years chasing that perfect balance of creamy malt filling and crisp chocolate shell – and friends, this Party Malted Chocolate Milk Balls recipe is it. My grandma used to sneak these into my lunchbox (wrapped in wax paper like treasure), and now they’re my go-to for every potluck and movie night.
What makes these special? That irresistible “snap” when you bite into the shell gives way to a melt-in-your-mouth malted center that’s not too sweet, not too heavy – just right. Forget store-bought versions with their waxy coatings. Homemade lets you control the chocolate quality (I’m partial to semi-sweet) and adjust the malt intensity to your taste. Plus, they’re ridiculously fun to make – my kids love rolling the centers into little balls while I handle the chocolate dipping (pro tip: keep a bowl of ice water nearby for sticky fingers).
Why You’ll Love These Party Malted Chocolate Milk Balls
Trust me, once you try these homemade malted milk balls, you’ll never go back to the store-bought kind. Here’s why they’re a must-make:
- No-bake magic: No oven required – just mix, roll, and dip! Perfect for hot summer days when you don’t want to turn on the oven.
- Endless fun flavors: Swap the semi-sweet for dark or white chocolate, or add a pinch of espresso powder to the malt mixture for grown-up flair.
- Party superstar: These disappear faster than you can say “malted milk” at every gathering I bring them to – kids and adults alike go crazy for them.
- Gift-worthy: Pack them in cute boxes or jars with ribbon – they make the sweetest (and most delicious) homemade presents.
Seriously, the hardest part is not eating them all yourself before sharing!
Ingredients for Party Malted Chocolate Milk Balls
Gathering the right ingredients is half the battle with these treats – and I’ve learned through trial and error (oh, the too-sweet batches I’ve eaten!) what makes them perfect. Here’s your shopping list with all my little notes:
- 1 cup malted milk powder (the plain kind, not chocolate malt – trust me, it makes all the difference in flavor)
- 1/2 cup powdered sugar (sifted if yours is lumpy – nobody wants sugar lumps in their smooth centers)
- 1/4 cup unsalted butter, softened (leave it out for 30 minutes – too cold and it won’t cream, too warm and your mixture gets greasy)
- 1 tsp vanilla extract (the real stuff, please – imitation vanilla just doesn’t give that rich depth)
- 1/4 cup heavy cream (cold is best – it helps the mixture firm up faster when chilling)
- 2 cups semi-sweet chocolate chips (splurge on good quality here – cheaper chips don’t melt as smoothly for dipping)
1 tbsp coconut oil (this is my secret for that perfect glossy shell – vegetable oil works in a pinch but adds flavor)
See that butter note? That’s from the time I got impatient and microwaved it “just a little” – ended up with malted soup instead of rollable dough! Now I set my butter out with my morning coffee so it’s perfect by baking time.
How to Make Party Malted Chocolate Milk Balls
Okay, let’s get to the fun part! Making these little chocolate-covered treasures is easier than you think, but I’ve got some tricks to make sure they turn out perfect every time. Follow these steps closely, and you’ll be the malted milk ball hero at your next gathering.
Step 1: Prepare the Malted Mixture
First things first – grab your biggest mixing bowl (trust me, you’ll want the space). Cream together the softened butter and powdered sugar until they’re light and fluffy – about 2 minutes with a hand mixer or 3-4 minutes if you’re going old-school with a wooden spoon like I sometimes do. Now here’s where the magic happens: gradually add the malted milk powder while mixing. The texture should look like wet sand at first, then come together into a smooth, almost play-dough consistency when you press it between your fingers. If it’s too crumbly? Add cream a teaspoon at a time. Too sticky? A sprinkle more powdered sugar. This is your foundation – get it right, and the rest is easy!
Step 2: Shape and Freeze the Balls
Now for the part my kids always fight over – rolling time! Scoop out teaspoon-sized portions (I use my smallest cookie scoop for consistency) and roll them between your palms into smooth 1-inch balls. Pro tip: if your hands are warm, rinse them in cold water first to prevent sticking. Arrange the balls on a parchment-lined baking sheet – not touching! – and pop them in the freezer for exactly 30 minutes. Don’t skip this step! That firm chill is what keeps them from melting when you dip them in warm chocolate later. I learned this the hard way when I got impatient once – let’s just say I ended up with chocolate-covered malted puddles instead of perfect spheres!
Step 3: Melt the Chocolate
About 10 minutes before your freezer timer goes off, start melting your chocolate. I swear by the double boiler method – just place a heatproof bowl over a pot of barely simmering water (make sure the bowl doesn’t touch the water!). Add chocolate chips and coconut oil, stirring constantly with a silicone spatula. Watch closely – chocolate seizes up faster than you’d think! When it’s about 75% melted, remove from heat and keep stirring until completely smooth. That residual heat will finish the job without burning. If your kitchen’s warm, I sometimes add an extra teaspoon of coconut oil to keep the chocolate fluid for dipping.
Step 4: Coat and Set
Time for the grand finale! Pull your chilled malt balls from the freezer. Here’s my foolproof dipping method: spear a ball with a toothpick (go about halfway in), dunk it in chocolate, twist gently to coat completely, then lift and let excess chocolate drip off. Use a second toothpick to gently push the coated ball onto a clean parchment sheet. If chocolate starts to thicken, just pop the bowl back over warm water for 30 seconds. Pro tip: keep a bowl of ice water nearby to chill your fingers between dippings – warm hands make the balls soften too fast! Let them set at room temperature (about 15 minutes) or speed things up in the fridge for 5 minutes. That satisfying “snap” when you bite into them? That’s your reward for patience!
Tips for Perfect Party Malted Chocolate Milk Balls
After making countless batches (some glorious, some… not so much), I’ve picked up tricks that’ll guarantee your malted milk balls turn out flawless every time. These are the little things that make all the difference!
- Chill out: If your kitchen’s warmer than 75°F, freeze those balls for a full 45 minutes instead of 30. The extra chill time prevents meltdowns (literally) during chocolate dipping.
- Double-dip delight: For an extra-thick chocolate shell, let the first coat set completely (about 10 minutes), then give them a quick second dip. This is how I get that professional candy-shop crunch!
- Flavor boosters: Try adding a pinch of flaky sea salt on top right after dipping, or mix 1/4 tsp cinnamon into the malt powder for a subtle spice twist that’ll have people asking, “What’s that amazing flavor?”
- The toothpick trick: After dipping, gently twist the toothpick as you lift to minimize that little “foot” of chocolate at the base. Then use a clean toothpick to nudge the ball off onto parchment – no fingerprints!
- Chocolate rescue: If your melted chocolate starts thickening, don’t panic! Stir in 1/2 tsp more coconut oil to bring it back to dipping consistency. I’ve saved many batches this way.
Remember my disastrous “speedy dipping” phase? Yeah, rushing leads to lumpy chocolate and misshapen balls. Take your time – good things come to those who wait (especially when chocolate’s involved)!
Variations for Party Malted Chocolate Milk Balls
Once you’ve mastered the classic version, it’s time to play! These Party Malted Chocolate Milk Balls are like a blank canvas waiting for your creative touches. Here are my favorite twists that always impress – some invented during late-night kitchen experiments (the best ideas often come when you’re supposed to be sleeping!).
Chocolate Swaps That Wow
Don’t get me wrong – I adore the classic semi-sweet coating. But sometimes I like to mix it up:
- Dark chocolate dream: Use 70% dark chocolate chips for a sophisticated, slightly bitter contrast to the sweet malt center. My book club goes nuts when I bring these!
- White chocolate magic: Swap in white chocolate and add 1/4 tsp orange zest to the malt mixture – suddenly you’ve got creamsicle flavor bombs that disappear instantly.
- Peanut butter twist: Melt 1/4 cup peanut butter into your chocolate coating for a malted take on buckeyes. (Confession: I may have eaten an entire batch of these while watching Netflix.)
Crunchy Surprise Centers
Who says the filling has to be smooth? Some of my favorite versions add texture:
- Pretzel power: Mix 2 tbsp finely crushed pretzels into the malt mixture before rolling. The salty crunch makes people do that “wait, what IS this?” double-take.
- Toasted coconut: Fold in 3 tbsp toasted coconut flakes with the malt powder – tropical vibes that pair perfectly with dark chocolate coating.
- Espresso kick: Add 1 tsp instant espresso powder to the dry ingredients for grown-up mocha balls. Perfect with after-dinner coffee!
Decorative Finishes
The fun doesn’t stop at flavor – dressing these up is half the joy:
- Drizzle effect: After the first chocolate coat sets, melt contrasting chocolate (white on dark, or vice versa) and drizzle artistically with a fork. Suddenly they look professional!
- Sparkle dust: Before the chocolate sets, sprinkle with edible glitter or colored sugar for holiday versions. My niece calls these “fairy candy.”
- Sea salt sprinkle: A tiny pinch of flaky sea salt on top right after dipping creates that perfect sweet-salty balance everyone loves.
See? The possibilities are endless! My advice? Make a double batch – one classic, one experimental. That way when people rave (and they will), you can casually say, “Oh, that’s just my little variation.” Let them think you slaved for hours – our little secret!
How to Store Party Malted Chocolate Milk Balls
Now that you’ve created these little chocolate-covered treasures, let’s talk about keeping them at their absolute best. I learned the hard way that how you store these makes all the difference between “Oh my gosh these are amazing!” and “Why is my chocolate sweating?” Here’s how I keep mine perfect for days (if they last that long!).
First things first – always use an airtight container. I’m partial to glass containers with silicone seals (those cute vintage-inspired ones work great), but any sealed container will do. Line the bottom with parchment paper – this prevents sticking and makes it easy to grab just one (or five). If you’re stacking layers, separate each with another sheet of parchment. No one wants to pry apart stuck-together chocolate balls!
For storage spots, I’ve got options:
- Room temperature: If your kitchen stays below 70°F, they’ll keep beautifully in a cool dark spot for 3-4 days. My pantry shelf works perfectly.
- Refrigerator: In hotter weather or for longer storage (up to 1 week), the fridge is your friend. Just let them sit at room temperature for 10 minutes before serving – that brings back the perfect snap.
- Freezer: For make-ahead magic? Freeze them in a single layer until solid (about 2 hours), then transfer to a freezer bag. They’ll keep for 2 months! Thaw in the fridge overnight when ready to serve.
One crucial tip: avoid temperature swings! Moving them repeatedly from fridge to counter causes condensation that makes the chocolate “bloom” (those white streaks). Still safe to eat, just not as pretty. If you spot any bloom, a quick re-drizzle of melted chocolate covers it right up – my little party trick!
And if you’re gifting them? Nestle them in tissue-lined tins with parchment between layers. I always include a little note saying “Best enjoyed within 5 days” – though let’s be real, they never last that long!
Nutritional Information
Okay, let’s be real – we’re not eating chocolate malt balls for their health benefits! But because I know some folks like to keep track (or need to for dietary reasons), here’s the general scoop on what’s in these sweet little treats. Remember, these numbers are estimates – your exact counts will vary based on the specific brands of chocolate or malt powder you use.
Each 1-inch ball (if you make about 24 from this recipe) clocks in at roughly:
- 120 calories (perfect for when you just need “a little something sweet”)
- 7g fat (that rich, creamy goodness has to come from somewhere!)
- 12g carbs (mostly from the malt powder and chocolate)
- 2g protein (thank the malted milk powder for that)
Now, I’m no nutritionist – I’m just a home cook who loves sharing delicious treats! If you need precise numbers for medical reasons, definitely plug your exact ingredients into a calculator. But for the rest of us? Enjoy in moderation (or not – I won’t judge if you sneak a few extra!). Life’s too short not to savor the sweet stuff.
Frequently Asked Questions
Over the years, I’ve gotten so many questions about these Party Malted Chocolate Milk Balls – and made every mistake imaginable while figuring out the answers! Here are the most common things people ask, along with my hard-won wisdom from countless batches (and a few delicious disasters).
Can I use milk chocolate instead of semi-sweet?
Absolutely! Milk chocolate makes a sweeter, creamier shell. Just know it sets softer than semi-sweet, so keep them refrigerated until serving. I sometimes add an extra 1/2 tsp coconut oil to help it firm up better.
How far ahead can I make these for a party?
The sweet spot is 1-3 days ahead – they’re freshest but still have that perfect texture. Make the balls up to a week in advance and freeze them uncoated, then dip in chocolate the day before your event. (This is my go-to move for holiday parties!)
Help! My chocolate coating cracked after dipping – what went wrong?
Oh honey, I’ve been there! This usually happens when the malt balls are too cold. Let them sit at room temp for 5 minutes after removing from freezer before dipping. The slight warming prevents thermal shock to the chocolate.
Can I make these without a double boiler?
You bet! Microwave the chocolate in 30-second bursts at 50% power, stirring between each. Just watch closely – chocolate burns faster than you’d think. (Ask me how I know…)
Why did my malt mixture turn out grainy?
This breaks my heart because it’s usually from not creaming the butter and sugar long enough. Beat them for a full 3 minutes until fluffy before adding other ingredients. If it’s already mixed, try pressing the dough through a fine mesh strainer – it’s tedious but saves the batch!
Got more questions? Slide into my DMs anytime – I love troubleshooting baking adventures! Nothing makes me happier than helping someone master these little chocolate-covered treasures.
For more delicious recipes and inspiration, check out Samantha Charllies’ Pinterest.
Print
31 Irresistible Party Malted Chocolate Milk Balls Recipe
- Total Time: 1 hour 15 minutes
- Yield: 24 balls 1x
- Diet: Vegetarian
Description
Delicious homemade chocolate malt balls perfect for parties or as a sweet treat.
Ingredients
- 1 cup malted milk powder
- 1/2 cup powdered sugar
- 1/4 cup unsalted butter, softened
- 1 tsp vanilla extract
- 1/4 cup heavy cream
- 2 cups semi-sweet chocolate chips
- 1 tbsp coconut oil
Instructions
- Mix malted milk powder, powdered sugar, and butter in a bowl until creamy.
- Add vanilla extract and heavy cream, then stir until smooth.
- Roll the mixture into small balls and place them on a baking sheet.
- Freeze the balls for 30 minutes to firm up.
- Melt chocolate chips and coconut oil in a double boiler.
- Dip each ball into the melted chocolate, then place back on the sheet.
- Refrigerate until the chocolate hardens, about 15 minutes.
Notes
- Store in an airtight container for up to a week.
- Use a toothpick for easier dipping.
- For a richer flavor, use dark chocolate.
- Prep Time: 20 minutes
- Cook Time: 10 minutes
- Category: Dessert
- Method: No-Bake
- Cuisine: American
Nutrition
- Serving Size: 1 ball
- Calories: 120
- Sugar: 10g
- Sodium: 25mg
- Fat: 7g
- Saturated Fat: 4g
- Unsaturated Fat: 2g
- Trans Fat: 0g
- Carbohydrates: 12g
- Fiber: 1g
- Protein: 2g
- Cholesterol: 10mg


