
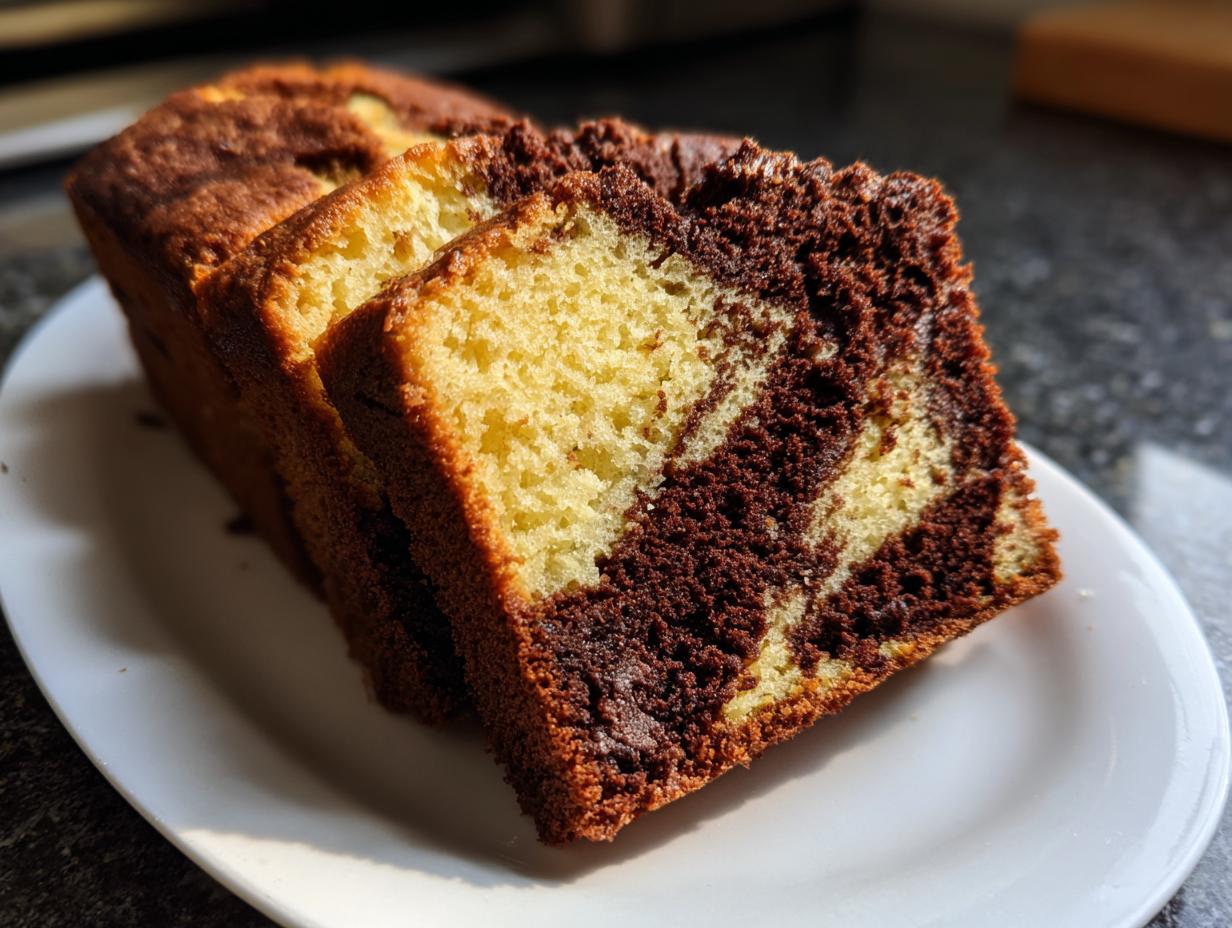
Oh, just the smell of this Nostalgic Chocolate Marble Pound Cake baking takes me straight back to my grandma’s kitchen – those lazy Saturday afternoons when she’d let me swirl the batters together with a butter knife. I can still see her smile when I’d inevitably make a mess, chocolate batter smudged on my cheeks like war paint. This cake isn’t just dessert; it’s buttery, chocolatey nostalgia in every slice. The way the vanilla and cocoa dance together in those perfect swirls, the crackly sugar crust giving way to that dense, moist crumb… It’s the kind of cake that makes you close your eyes after the first bite. And the best part? It’s shockingly simple to make – just like grandma always said, “Good baking doesn’t need to be fussy.”
Why You’ll Love This Nostalgic Chocolate Marble Pound Cake
Trust me, this isn’t just any pound cake – it’s a hug in dessert form. Here’s why it’ll steal your heart:
- That perfect swirl: Every slice reveals a new chocolate-vanilla masterpiece – like edible abstract art!
- No-fuss baking: Just one bowl (okay, maybe two) and basic ingredients you probably already have.
- Texture magic: Dense yet tender crumb with that signature crackly sugar crust on top – pure heaven.
- Memory trigger: One bite and you’re six years old again, licking the spoon while the cake cools on the counter.
Seriously, it’s the kind of cake that makes people ask, “Wait… you made this?!” while reaching for a second slice.
Ingredients for Nostalgic Chocolate Marble Pound Cake
Here’s the beautiful part – this cake needs nothing fancy! Just honest, simple ingredients that come together like magic:
- 2 cups all-purpose flour: Spoon and level it, friends – no packing!
- 1 cup unsalted butter, softened: Leave it out until your finger leaves a gentle dent (about 1 hour).
- 1 cup granulated sugar: Plain white sugar works perfectly here.
- 4 large eggs: Room temp eggs blend smoother – trust me on this.
- 1 tsp vanilla extract: The good stuff – no imitation here!
- 1/2 cup milk: Whole milk makes it extra rich, but any works.
- 1/4 cup cocoa powder: Sift it first – no one wants lumpy chocolate swirls.
- 1 tsp baking powder: Check the date – old powder won’t give you that perfect rise.
- 1/2 tsp salt: Just enough to make all the flavors pop.
See? Nothing weird or hard-to-find – just pantry staples ready to become something extraordinary.
Equipment You’ll Need
Gather these trusty kitchen tools – nothing fancy required! You probably have most already:
- 9×5 inch loaf pan: The classic shape for that perfect pound cake height
- Large mixing bowl: Where the magic begins
- Hand mixer or sturdy wooden spoon: Grandma used her arms, I use my mixer – your call!
- Rubber spatula: For scraping every last bit of batter (waste not!)
- Small bowl: Just for mixing the cocoa powder into half the batter
- Butter knife or skewer: Your swirl-making wand
That’s it! No special gadgets needed for this old-school beauty.
How to Make Nostalgic Chocolate Marble Pound Cake
Ready to create some magic? Here’s exactly how I make this beauty – just like grandma taught me, with a few of my own little tricks sprinkled in. Follow these steps, and you’ll have a cake that’ll make your whole house smell like childhood happiness.
Preparing the Batter
First things first – preheat that oven to 350°F (175°C). While it’s warming up, let’s get our batter ready. In your big mixing bowl, cream together the softened butter and sugar until it’s light and fluffy – about 3 minutes with a mixer or 5 if you’re going old-school with a spoon. This step is crucial! You want it pale and almost whipped looking.
Now add those room temperature eggs one at a time, mixing well after each. Don’t rush this – we want each egg fully incorporated before adding the next. Stir in the vanilla, then set this aside.
In another bowl, whisk together the flour, baking powder, and salt. Alternate adding this dry mix and the milk to your butter mixture, starting and ending with the flour. Mix just until combined – overmixing makes tough cake, and nobody wants that!
Creating the Marble Effect
Here’s where the fun begins! Scoop out about half the batter into another bowl. Sift the cocoa powder over one portion and stir gently until it’s smooth and chocolatey. Now grab your loaf pan (greased well, of course!) and alternate dropping spoonfuls of each batter – vanilla, chocolate, vanilla, chocolate.
Take a butter knife or skewer and make figure-eight motions through the batter just 3-4 times. More than that, and you’ll lose those beautiful swirls! The batter should look streaky, not fully blended.
Baking and Cooling
Slide that beauty into your preheated oven and set your timer for 50 minutes. Don’t peek before then! At 50 minutes, do the toothpick test – it should come out with just a few moist crumbs, not wet batter. Might need up to 60 minutes total depending on your oven.
Here’s the hard part – let it cool in the pan for 15 minutes before turning it out onto a rack. I know, the smell is torture! But this patience pays off with perfect slices. Wait until it’s completely cool before cutting – about 2 hours. The anticipation makes that first bite even sweeter!
Tips for the Best Nostalgic Chocolate Marble Pound Cake
After making this cake more times than I can count, here are my all-time favorite tricks for marble pound cake perfection:
- Butter temperature is everything: Too cold won’t cream right, too warm makes greasy batter. Look for that perfect “thumbprint” softness.
- The swirl secret: Less is more! Just 3-4 figure-eight motions with your knife keeps those dramatic swirls intact.
- Room temp eggs matter: Cold eggs can make the batter separate. I put mine in warm water for 5 minutes if I forgot to take them out.
- Sift that cocoa: Lumpy chocolate batter is the worst – take the extra 30 seconds to sift it first.
- Don’t rush cooling: That tempting smell will test you, but cutting too soon makes crumbly slices. Set a timer if you must!
Follow these simple tips, and you’ll have a bakery-worthy marble cake every single time – promise!
Variations for Nostalgic Chocolate Marble Pound Cake
While I adore the classic version, sometimes I can’t resist playing with this recipe! Try stirring a handful of chocolate chips into the cocoa batter for extra decadence, or add 1 tsp espresso powder to intensify the chocolate flavor. Feeling fancy? Swap the vanilla extract for almond – it’s like a whole new cake! Just don’t tell Grandma I messed with her recipe.
Serving and Storing Nostalgic Chocolate Marble Pound Cake
Oh, the joy of slicing into this beauty! My favorite way? Thick slices still slightly warm from the oven, maybe with a dollop of whipped cream melting over those gorgeous swirls. For breakfast (don’t judge!), I toast slices lightly – the edges get crispy while the inside stays dreamily soft.
To keep it fresh, wrap cooled cake tightly in plastic wrap or foil. It’ll stay moist at room temp for 3 days – if it lasts that long! For longer storage, freeze whole or sliced (wrap individual pieces in parchment first). Thaw overnight on the counter – perfect with your morning coffee. Pro tip: The flavors actually deepen by day two, making it even more irresistible!
Nutritional Information
Now, let’s be real – we don’t eat pound cake for its health benefits! But since some folks like to know, here’s the scoop for one generous slice (based on 10 slices per loaf):
- Calories: 320 (worth every one!)
- Sugar: 20g (mostly from that glorious crust)
- Fat: 18g (butter makes it better, right?)
- Carbohydrates: 35g (aka pure happiness)
- Protein: 5g (surprise bonus!)
Important note: These values are estimates and can vary based on specific ingredients and slice sizes. Using different brands of butter or flour, adding chocolate chips, or cutting thicker slices will change the numbers. But honestly? When that first bite of warm, buttery cake hits your tongue, none of this math matters one bit!
Frequently Asked Questions
Over the years, I’ve gotten so many questions about this nostalgic chocolate marble pound cake – here are the ones that pop up most often with my tried-and-true answers:
Can I freeze this marble pound cake?
Absolutely! Wrap the completely cooled cake tightly in plastic wrap, then foil. It’ll keep beautifully for up to 3 months. Thaw overnight on the counter – no microwave needed! I actually love freezing half the loaf for future me to discover.
Why did my swirls disappear during baking?
Oh honey, we’ve all been there! Usually it means you swirled too vigorously. Next time, use just 3-4 gentle figure-eight motions with your knife – the batter should look streaky, not fully blended. Also, make sure your oven isn’t running too hot.
Can I use Dutch process cocoa powder?
You sure can! It’ll give you richer chocolate flavor and darker swirls. Just skip any baking soda in the recipe since Dutch process is already neutralized. Regular cocoa works great too though – this cake isn’t picky!
How do I know when it’s done baking?
That toothpick test is your best friend! Insert it near the center – it should come out with a few moist crumbs, not wet batter. The top should be golden with a crackly crust, and the edges will pull slightly from the pan.
Share Your Experience
Did this nostalgic chocolate marble pound cake bring back sweet memories for you too? I’d love to hear about your baking adventures! Snap a photo of your gorgeous swirls, tell me about your grandma’s version, or share what made your taste buds dance. Your stories and tips make this recipe even more special – just like those chocolatey swirls in every slice.
Print
Nostalgic Chocolate Marble Pound Cake: 5 Secrets to Perfect Swirls
- Total Time: 1 hour 10 minutes
- Yield: 1 loaf (10 slices) 1x
- Diet: Vegetarian
Description
A classic chocolate marble pound cake that brings back childhood memories with its rich, buttery flavor and beautiful swirls.
Ingredients
- 2 cups all-purpose flour
- 1 cup unsalted butter, softened
- 1 cup granulated sugar
- 4 large eggs
- 1 tsp vanilla extract
- 1/2 cup milk
- 1/4 cup cocoa powder
- 1 tsp baking powder
- 1/2 tsp salt
Instructions
- Preheat oven to 350°F (175°C). Grease a loaf pan.
- Cream butter and sugar until light and fluffy.
- Add eggs one at a time, mixing well after each.
- Stir in vanilla extract.
- In a separate bowl, whisk flour, baking powder, and salt.
- Alternately add dry ingredients and milk to the butter mixture.
- Divide batter in half. Mix cocoa powder into one half.
- Drop spoonfuls of both batters into the pan, then swirl with a knife.
- Bake for 50-60 minutes or until a toothpick comes out clean.
- Cool before slicing.
Notes
- Use room temperature ingredients for best results.
- Do not overmix the batter to keep the cake tender.
- For extra richness, add chocolate chips to the cocoa batter.
- Prep Time: 15 minutes
- Cook Time: 55 minutes
- Category: Dessert
- Method: Baking
- Cuisine: American
Nutrition
- Serving Size: 1 slice
- Calories: 320
- Sugar: 20g
- Sodium: 150mg
- Fat: 18g
- Saturated Fat: 11g
- Unsaturated Fat: 6g
- Trans Fat: 0g
- Carbohydrates: 35g
- Fiber: 1g
- Protein: 5g
- Cholesterol: 110mg


