
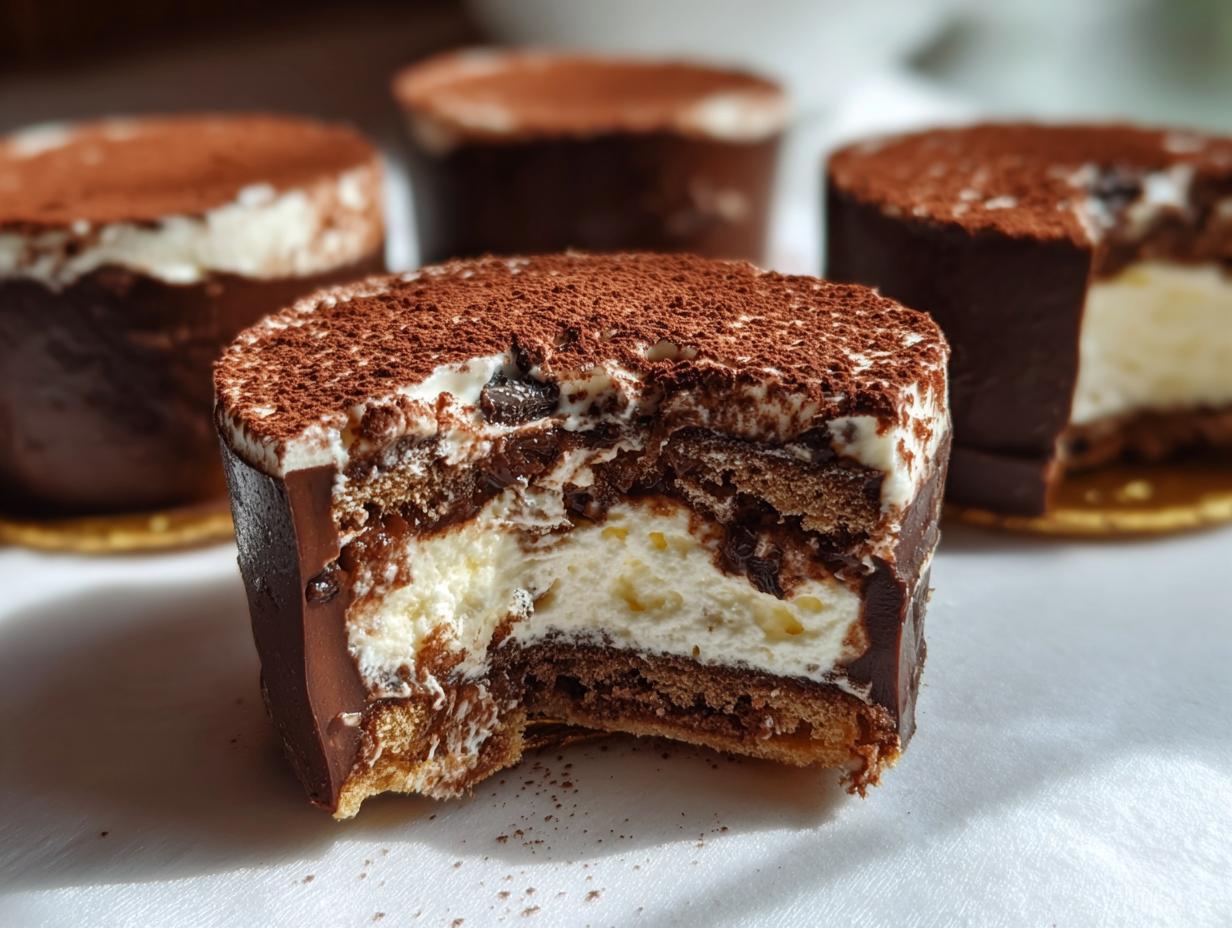
Oh my gosh, you have to try these no-bake tiramisu chocolate cups! They’ve become my absolute go-to when I need an impressive dessert in a hurry. Picture this: rich, velvety chocolate cups filled with coffee-kissed ladyfingers and the creamiest mascarpone filling – all without turning on your oven. I first made these for a last-minute dinner party when my oven decided to quit on me (typical, right?), and now they’re requested at every gathering. The best part? You can whip them up in about 20 minutes hands-on time, then let the fridge do the rest of the work while you relax. Trust me, these little cups pack all the elegance of traditional tiramisu with none of the fuss!
Why You’ll Love These No-Bake Tiramisu Chocolate Cups
Listen, these little beauties are about to become your new dessert obsession. Here’s why:
- No oven drama: Because who wants to heat up the kitchen? These come together with just your fridge and a little counter space.
- Quick magic: From start to chilling in under 30 minutes – perfect for when surprise guests show up (or when your sweet tooth attacks).
- Flavor fireworks: That moment when bitter coffee, sweet mascarpone, and rich chocolate all collide? Absolute perfection.
- Fancy vibes, zero effort: They look like you spent hours, but we’ll keep your secret safe.
Ingredients for No-Bake Tiramisu Chocolate Cups
Okay, let’s gather our goodies! Here’s what you’ll need to make these dreamy little cups (and trust me, quality matters here):
- 6 oz dark chocolate – melted (I use 70% cacao for that perfect balance of bitter and sweet)
- 12 ladyfingers – those crisp little sponge fingers that soak up coffee like magic
- 1/2 cup strong coffee – cooled (I make mine extra bold because I love that coffee punch!)
- 1 cup mascarpone cheese – at room temperature (this makes it so much easier to whip)
- 1/4 cup powdered sugar – sifted (no lumps in our creamy filling!)
- 1 tsp vanilla extract – the good stuff, not imitation
- Cocoa powder – for that gorgeous dusting on top
See? Simple ingredients, but when they come together… wowza!
Equipment You’ll Need
Don’t worry, no fancy gadgets required! You probably have everything already:
- Muffin tin – regular size works great
- Cupcake liners – makes removal a breeze
- Mixing bowls – one for chocolate, one for mascarpone
- Whisk – or a fork in a pinch!
- Measuring cups/spoons – for perfect proportions
That’s it! Now let’s make some magic happen.
How to Make No-Bake Tiramisu Chocolate Cups
Alright, let’s dive into the fun part! I promise this is easier than it looks – just follow these simple steps and you’ll have restaurant-worthy desserts in no time.
Step 1: Prepare the Chocolate Cups
First, line your muffin tin with cupcake liners – this is key for easy removal later. Melt your dark chocolate gently (I do 30-second bursts in the microwave, stirring between each). Now here’s my trick: use the back of a spoon to spread the melted chocolate up the sides of each liner, creating little cups. Pop them in the fridge for 15 minutes to set. Don’t skip this chilling step – it makes all the difference for that perfect snap when you bite in!
Step 2: Layer the Coffee-Soaked Ladyfingers
While the chocolate sets, dip your ladyfingers in the cooled coffee. Quick tip: don’t soak them too long or they’ll get mushy – just a quick 1-2 second dip per side does the trick. Break them into pieces that fit snugly in your chocolate cups. This layer soaks up all that delicious coffee flavor and gives that classic tiramisu texture we love.
Step 3: Assemble the Tiramisu Filling
Now for the creamy magic! In a bowl, whisk together the mascarpone, powdered sugar, and vanilla until smooth and dreamy. If it’s too thick, a tiny splash of cream helps. Spoon this heavenly mixture over your ladyfinger layer, filling each cup nearly to the top. Want extra decadence? Add another layer of coffee-dipped ladyfingers and more mascarpone filling!
Step 4: Chill and Serve
Pop the whole tray back in the fridge for at least 2 hours (overnight is even better). When you’re ready to impress your guests, gently peel off the liners and dust with cocoa powder through a fine sieve. That gorgeous cocoa snowfall makes them look straight from a fancy bakery!
Tips for Perfect No-Bake Tiramisu Chocolate Cups
After making these dozens of times (okay, maybe hundreds – no judgment!), here are my foolproof tips:
- Chocolate matters: Splurge on good quality dark chocolate – it makes the cups hold their shape and gives that rich flavor. Cheap chocolate tends to melt too easily.
- Coffee control: Taste your coffee first! Too weak and the flavor disappears; too strong and it overpowers. I like mine somewhere between breakfast blend and espresso.
- Patience pays: Don’t rush the chilling steps. That 15-minute initial set and 2-hour final chill make all the difference in texture.
- Room temp mascarpone: Cold cheese = lumpy filling. Let it sit out for 30 minutes before mixing for silky smooth perfection.
Follow these, and your cups will be absolute showstoppers every time!
Variations and Substitutions
Oh, the fun part – making these tiramisu cups your own! Here are my favorite twists:
- White chocolate dream: Swap dark chocolate for white chocolate cups – they make such a pretty contrast with the cocoa dusting!
- Espresso boost: Add 1/2 tsp espresso powder to your coffee for serious coffee lovers (my husband begs for this version).
- Dairy-free delight: Use coconut milk mascarpone and dairy-free chocolate – you’d never guess it’s not traditional!
- Boozy kick: Swap 1 tbsp coffee for Kahlúa or amaretto (adults-only, obviously).
See? Endless ways to play with this recipe!
Serving and Storing No-Bake Tiramisu Chocolate Cups
These little beauties deserve a grand entrance! I love serving them on a pretty platter with extra cocoa dusting and maybe a few coffee beans scattered around for that café vibe. Keep them chilled until the last minute – the chocolate cups stay firmer that way. Store any leftovers (if you’re lucky enough to have some!) in an airtight container in the fridge. They’re best within 2 days, though I doubt they’ll last that long. Pro tip: the flavors actually get better after a few hours as everything melds together!
Nutritional Information
Just so you know, each chocolate cup comes in around 320 calories – but who’s counting when it’s this delicious? Remember, these are estimates and will vary based on your specific ingredients. Enjoy every bite!
Frequently Asked Questions
You’ve got questions? I’ve got answers! Here are the things people ask me most about these tiramisu chocolate cups:
Can I make these ahead of time?
Absolutely! These actually taste better after chilling overnight as the flavors meld together. Just wait to dust with cocoa powder until right before serving so it stays pretty.
How long do they last in the fridge?
They’ll stay delicious for about 2 days – though in my house they never last that long! Keep them covered to prevent them from absorbing other fridge smells.
Can I freeze them?
I don’t recommend it – the texture of the mascarpone changes when frozen. But hey, they’re so quick to make fresh when the craving hits!
My chocolate cups cracked – what did I do wrong?
No worries! Probably just spread the chocolate too thin. Next time, make sure you’ve got a nice thick layer (about 1/8 inch) when coating the liners.
Can I use something besides ladyfingers?
In a pinch, sponge cake or pound cake cubes work, but they won’t soak up the coffee quite as beautifully as proper ladyfingers.
Share Your No-Bake Tiramisu Chocolate Cups
I’d love to see your creations! Snap a pic of your gorgeous chocolate cups and tag me – nothing makes me happier than seeing your kitchen successes. Leave a comment below if you tried any fun variations or have questions. Happy no-bake baking, friends!
Print
“20-Minute No-Bake Tiramisu Chocolate Cups You’ll Crave”
- Total Time: 2 hrs 35 mins
- Yield: 6 servings 1x
- Diet: Vegetarian
Description
A quick and easy no-bake dessert featuring layers of coffee-soaked ladyfingers and creamy mascarpone in chocolate cups.
Ingredients
- 6 oz dark chocolate, melted
- 12 ladyfingers
- 1/2 cup strong coffee, cooled
- 1 cup mascarpone cheese
- 1/4 cup powdered sugar
- 1 tsp vanilla extract
- Cocoa powder for dusting
Instructions
- Line muffin tin with cupcake liners.
- Spread melted chocolate inside each liner to form cups. Chill for 15 minutes.
- Dip ladyfingers in coffee and place at the bottom of each chocolate cup.
- Mix mascarpone, powdered sugar, and vanilla. Spoon over ladyfingers.
- Repeat layers. Chill for 2 hours.
- Dust with cocoa powder before serving.
Notes
- Use high-quality chocolate for best results.
- Chill chocolate cups before assembling.
- Adjust coffee strength to your preference.
- Prep Time: 20 mins
- Cook Time: 0 mins
- Category: Dessert
- Method: No-Bake
- Cuisine: Italian
Nutrition
- Serving Size: 1 cup
- Calories: 320
- Sugar: 18g
- Sodium: 45mg
- Fat: 22g
- Saturated Fat: 14g
- Unsaturated Fat: 6g
- Trans Fat: 0g
- Carbohydrates: 28g
- Fiber: 2g
- Protein: 5g
- Cholesterol: 40mg


