
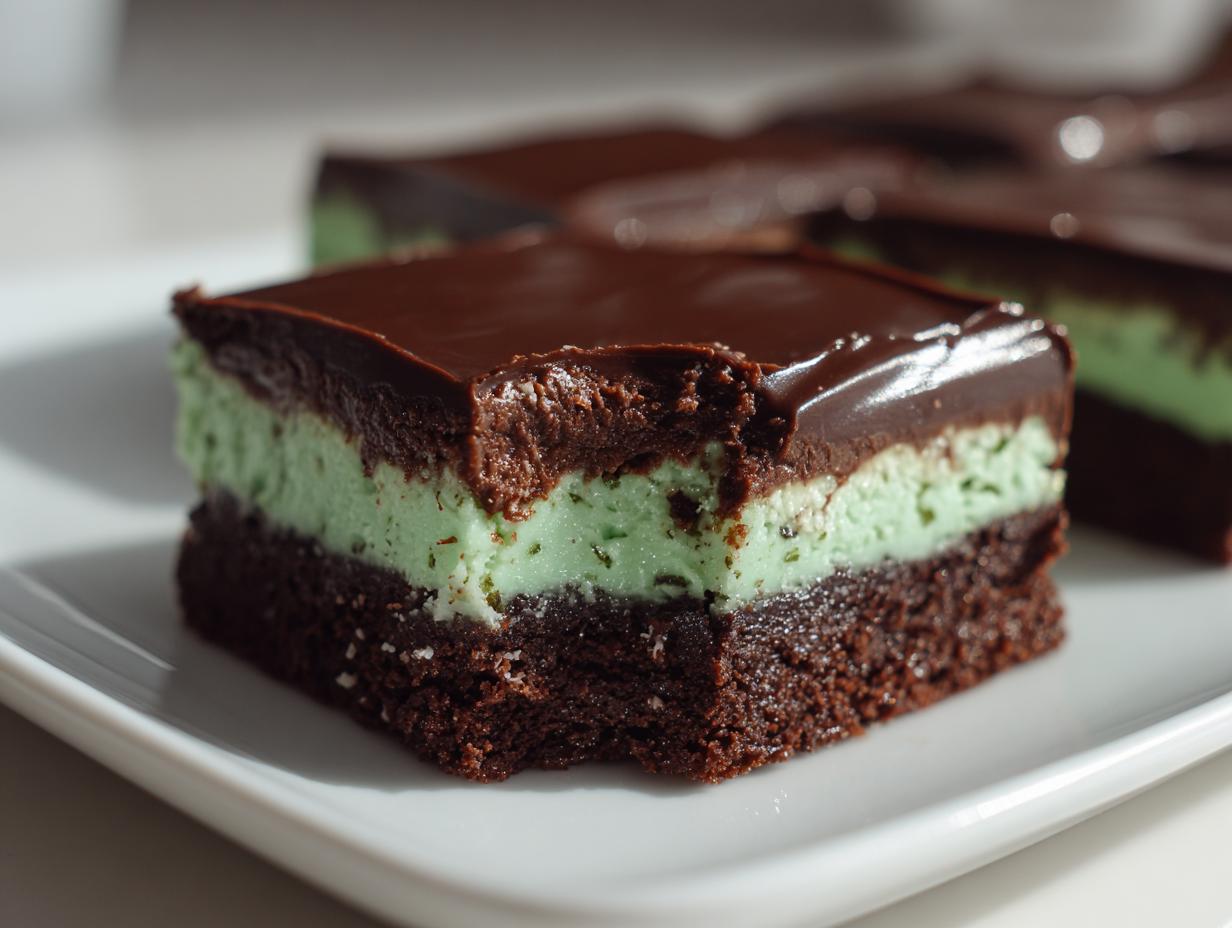
Oh my gosh, you guys—these no-bake chocolate mint brownie bars are my go-to emergency dessert! You know those days when you need something rich and indulgent but don’t want to turn on the oven? This is it. I first made these during a heatwave last summer when baking sounded like torture, and now my friends beg me to bring them to every potluck. The fudgy chocolate crust, that creamy mint layer, and the silky ganache topping? Absolute magic. Plus, they come together with just a bowl and a fridge—no sweat (literally). Trust me, once you try these, you’ll keep the ingredients stocked at all times.
Why You’ll Love These No-Bake Chocolate Mint Brownie Bars
Listen, these bars aren’t just good—they’re dangerously easy to fall in love with. Here’s why:
- Zero oven time: Perfect for hot days or when you’re just too lazy to bake (no judgment here).
- That mint-chocolate magic: The combo is refreshing yet decadent—like a fancy dessert without the fuss.
- Seriously fast: 15 minutes of active work, then let the fridge do the rest while you Netflix binge.
- Crowd-pleaser: Kids, potlucks, last-minute guests? These bars save the day every time.
- Foolproof texture: Crunchy crust, creamy middle, glossy topping—each bite is a little symphony.
I’ve made these at 2 AM during a chocolate craving emergency. They’re that forgiving.
Ingredients for No-Bake Chocolate Mint Brownie Bars
Okay, let’s talk ingredients – because using the right stuff makes all the difference here. I’ve learned the hard way that substitutions can throw off the texture, so let’s get it right from the start. Here’s what you’ll need:
- 2 cups chocolate cookie crumbs (that’s about 20 Oreos or similar cookies, filling included – just blitz them in a food processor until sandy)
- 1/2 cup melted unsalted butter (melt it gently so it doesn’t separate, and please don’t use margarine – the flavor won’t be the same!)
- 1/4 cup cocoa powder (I prefer Dutch-process for richer flavor, but any unsweetened cocoa works)
- 1 can (14 oz) sweetened condensed milk (this is the magic glue – don’t try substituting evaporated milk!)
- 1 tsp peppermint extract (not mint extract – trust me, there’s a big difference in flavor)
- 1 cup semi-sweet chocolate chips (splurge on good quality here – it’s the top layer people taste first)
- 1/4 cup heavy cream (for ganache – don’t skimp with milk, it won’t set properly)
- 1/2 tsp vanilla extract (just a splash to round out all those bold flavors)
See? Nothing too fancy, just pantry staples done right. I always double-check my condensed milk can size – that 14 oz measurement is crucial. Too little and your mint layer won’t set properly. Now let’s get our hands dirty!
Equipment You’ll Need
Don’t worry—you won’t need any fancy gadgets for these bars. Just grab these basics from your kitchen (I bet you already have most of them!):
- 8×8-inch baking pan (glass or metal both work—just no weird sizes, or your layers will be too thin or thick)
- Parchment paper (for easy lifting—trust me, you don’t want to skip this and risk a crumbly mess)
- Mixing bowls (one medium for the crust, one small for the ganache—I like to use glass so I can microwave the ganache right in it)
- Spatula (silicone is my hero for scraping every last bit of that minty goodness into the pan)
- Measuring cups/spoons (no eyeballing—those extracts are powerful!)
- Food processor or zip-top bag + rolling pin (for crushing cookies if you didn’t buy pre-crumbed)
That’s it! No stand mixer, no double boiler—just simple tools for maximum chocolatey payoff. Now let’s make some magic.
How to Make No-Bake Chocolate Mint Brownie Bars
Alright, let’s get to the fun part! These bars come together in three simple layers, but there are a few tricks I’ve learned over dozens of batches that make all the difference. Follow these steps, and you’ll have perfect mint-chocolate bliss every time.
Step 1: Prepare the Crust
First, line that 8×8 pan with parchment paper – leave some overhang so you can lift the whole slab out later. Now, take your chocolate cookie crumbs, melted butter, and cocoa powder and mix them in a bowl until it looks like wet sand. No dry spots!
Here’s the key: dump this into your prepared pan and press it down HARD with your fingers or the back of a measuring cup. I mean really pack it in there – this prevents that sad crumbly crust situation. Get it nice and even across the bottom. Pop it in the fridge for 10 minutes while you make the next layer. This quick chill helps set the base.
Step 2: Make the Mint Layer
In a clean bowl, pour your whole can of sweetened condensed milk and add the peppermint extract. Stir gently – just enough to combine. Overmixing makes it too runny, and we want that luscious thick texture.
Pull your chilled crust from the fridge and pour this minty goodness right over the top. Spread it carefully with a spatula, going all the way to the edges. Now the patience test: refrigerate for a full hour. I know, I know – but this sets the mint layer so the chocolate topping won’t sink in. Set a timer and walk away!
Step 3: Add the Chocolate Topping
When that hour’s up, make your ganache: heat the heavy cream until it’s steaming (about 45 seconds in the microwave works), then pour it over your chocolate chips in a heatproof bowl. Let it sit for 2 minutes – this softens the chocolate perfectly. Add the vanilla, then stir slowly until it’s glossy and smooth.
If your chocolate seizes up (it happens!), just zap it for 5 more seconds and stir again. Pour this liquid gold over your chilled mint layer and tilt the pan to cover completely. Back in the fridge it goes for 2 hours – no cheating! This final chill gives you those clean cuts when you slice them.
Pro tip: for extra pretty bars, run your knife under hot water before cutting. Wipe between slices for those Instagram-worthy edges!
Tips for Perfect No-Bake Chocolate Mint Brownie Bars
After making these bars more times than I can count (okay fine, at least 30 batches), I’ve picked up some game-changing tricks. These little details take them from good to “oh-my-gosh-what-is-this-sorcery” level:
- Chill between layers like your dessert depends on it (because it does!). That 10-minute crust chill prevents crumbling, and the full hour for the mint layer keeps the ganache from sinking in.
- Splurge on good chocolate chips – that top layer deserves real semi-sweet, not waxy baking chips. I swear by Ghirardelli or Guittard.
- Room temp extracts blend better – if your peppermint extract has been in the fridge, let it warm up first so it incorporates evenly.
- Press, don’t pat the crust – use serious pressure with the back of a measuring cup to compact those crumbs. Loose crust = messy slices.
- Score the topping before full chilling – after 30 minutes in the fridge, lightly mark your cutting lines with a knife. Makes clean cuts easier later.
- Hot knife = clean slices – dip your knife in hot water and wipe dry between cuts for those perfect, crumb-free edges.
Oh! And if your ganache ever gets grainy (it happens to the best of us), add a teaspoon of warm cream and stir gently – it’ll smooth right out. Now go forth and make mint-chocolate magic!
Ingredient Substitutions & Notes
Look, I get it – sometimes you’re staring at your pantry thinking “I don’t have that exact thing!” Don’t panic. Here’s how to adapt without losing that perfect texture and flavor we worked so hard for:
- Cookie crumbs: No chocolate cookies? Digestive biscuits or graham crackers work in a pinch – just add an extra tablespoon of cocoa powder to the mix. For gluten-free, use GF chocolate sandwich cookies (the filling helps bind everything).
- Butter: If you must go dairy-free, coconut oil works (use refined for no coconut taste). But please – no margarine! That weird aftertaste ruins the chocolate magic.
- Peppermint extract: Mint oil is stronger – use HALF the amount! Taste as you go. And never use toothpaste-like “mint extract” – it’s a whole different beast.
- Sweetened condensed milk: There’s no real substitute here, friends. Evaporated milk won’t set, and DIY versions never quite work. Just buy the can – it lasts forever in your pantry!
- Chocolate chips: In emergencies, chop up a chocolate bar (aim for 55-70% cacao). White chocolate works too, but reduce cream to 3 tbsp since it melts thinner.
A few warnings from my trial-and-error disasters:
- Don’t swap heavy cream with milk in the ganache – it won’t set properly and you’ll have a sad, runny mess.
- Adding food coloring to the mint layer? Use gel, not liquid – otherwise it thins out your condensed milk.
- If you’re doubling the recipe, use a 9×13 pan – deeper layers won’t set correctly.
See? Flexibility without compromise. Now you’ve got no excuses not to make these beauties!
Storage & Serving Suggestions
Alright, let’s talk about keeping these minty-chocolate beauties at their best – and more importantly, how to serve them for maximum wow factor. Because let’s be real, presentation is half the fun with a dessert this pretty!
Storing your bars: These keep beautifully in an airtight container in the fridge for up to 5 days. I like layering them between parchment paper so the ganache doesn’t stick together. For longer storage, freeze them solid first on a baking sheet (about 2 hours), then wrap individually in plastic wrap. They’ll keep for 2 months frozen – just thaw in the fridge overnight when the craving hits. Pro tip: the mint layer actually gets more flavorful by day 2!
Serving ideas that’ll impress:
- The classic: Chilled straight from the fridge with a hot cup of coffee – the contrast is magical.
- Dinner party upgrade: Place each square on a dollop of whipped cream with fresh mint leaves.
- Ice cream sandwich: Sandwich slightly softened vanilla bean ice cream between two small squares (freeze 30 minutes before serving).
- Holiday twist: Crush candy canes over the ganache before it sets for festive crunch.
- Bonus fancy: Drizzle with melted white chocolate right before serving for bakery-worthy stripes.
One warning – if it’s super humid or hot, serve these chilled. That ganache can get melty at room temperature after about 20 minutes. Not that they’ll last that long once people get a taste!
Nutritional Information
Okay, let’s be real—these are dessert bars, not health food. But hey, knowledge is power, right? Here’s the nutritional breakdown per bar (based on cutting into 16 squares, because let’s face it—you’re gonna want more than a tiny piece!). Keep in mind these are estimates since ingredient brands can vary:
- Calories: 280 (worth every single one)
- Fat: 16g (9g saturated—thank that glorious butter and chocolate)
- Carbs: 30g (22g sugars—mostly from the condensed milk and cookies)
- Protein: 4g (surprising little boost from the milk and cocoa!)
- Fiber: 2g (those cookie crumbs count for something!)
- Sodium: 180mg (not bad for such a decadent treat)
Important note: I calculate this using a nutrition app with standard ingredients—your exact numbers might shift slightly depending on your cookie brand or chocolate quality. And hey, if you’re watching portions, these bars are rich enough that you can cut them smaller (but good luck stopping at just one!).
My philosophy? Life’s too short not to enjoy desserts like these in moderation. The joy they bring is nutritional value too, if you ask me!
FAQs About No-Bake Chocolate Mint Brownie Bars
After years of making these bars (and fielding frantic texts from friends attempting them), I’ve heard every question imaginable. Here are the answers you need before you dig in:
Q1. Can I freeze these bars?
Absolutely! Freeze them solid first on a baking sheet (about 2 hours), then wrap tightly in plastic wrap. They’ll keep for 2 months. Thaw overnight in the fridge—the mint layer actually tastes even better after freezing!
Q2. Why did my chocolate topping crack when cutting?
This usually means your ganache got too cold. Next time, let the bars sit at room temp for 5 minutes before slicing. If it’s already happened? No worries—just call them “artisanal cracks” and drizzle with extra chocolate to disguise them. Tastes the same!
Q3. Can I use fresh mint instead of extract?
I love the idea, but fresh mint won’t give you that punchy flavor. However! Steep 1/4 cup chopped mint leaves in the warm cream for your ganache, then strain—it adds a lovely herbal note alongside the extract.
Q4. My mint layer seems runny—what went wrong?
Either the condensed milk was stirred too vigorously (be gentle!) or the crust wasn’t chilled before adding it. Pop the whole pan back in the fridge for an extra 30 minutes—it should firm right up.
Q5. Help! My ganache seized into a lumpy mess.
Don’t panic—this happens if water gets in or it overheats. Add 1 tsp warm cream at a time, stirring gently between additions, until it smooths out. If all else fails? Microwave in 5-second bursts, stirring after each.
Made these bars? Rate the recipe below and tell me how they turned out—I live for your kitchen triumphs (and funny disasters)!
Print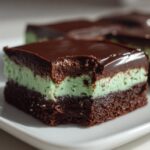
15-Minute No-Bake Chocolate Mint Brownie Bars to Die For
- Total Time: 3 hours 15 minutes
- Yield: 16 bars 1x
- Diet: Vegetarian
Description
Easy no-bake chocolate mint brownie bars with a rich, fudgy texture and refreshing mint flavor.
Ingredients
- 2 cups chocolate cookie crumbs
- 1/2 cup melted butter
- 1/4 cup cocoa powder
- 1 can (14 oz) sweetened condensed milk
- 1 tsp peppermint extract
- 1 cup semi-sweet chocolate chips
- 1/4 cup heavy cream
- 1/2 tsp vanilla extract
Instructions
- Line an 8×8 inch pan with parchment paper.
- Mix cookie crumbs, melted butter, and cocoa powder in a bowl.
- Press the mixture firmly into the prepared pan.
- Combine condensed milk and peppermint extract, then spread over the crust.
- Refrigerate for 1 hour.
- Melt chocolate chips with heavy cream, stir in vanilla, then pour over the mint layer.
- Chill for 2 hours before cutting into bars.
Notes
- Store in an airtight container in the fridge for up to 5 days.
- For a stronger mint flavor, add an extra 1/2 tsp peppermint extract.
- Prep Time: 15 minutes
- Cook Time: 0 minutes
- Category: Dessert
- Method: No-Bake
- Cuisine: American
Nutrition
- Serving Size: 1 bar
- Calories: 280
- Sugar: 22g
- Sodium: 180mg
- Fat: 16g
- Saturated Fat: 9g
- Unsaturated Fat: 5g
- Trans Fat: 0g
- Carbohydrates: 30g
- Fiber: 2g
- Protein: 4g
- Cholesterol: 25mg


