
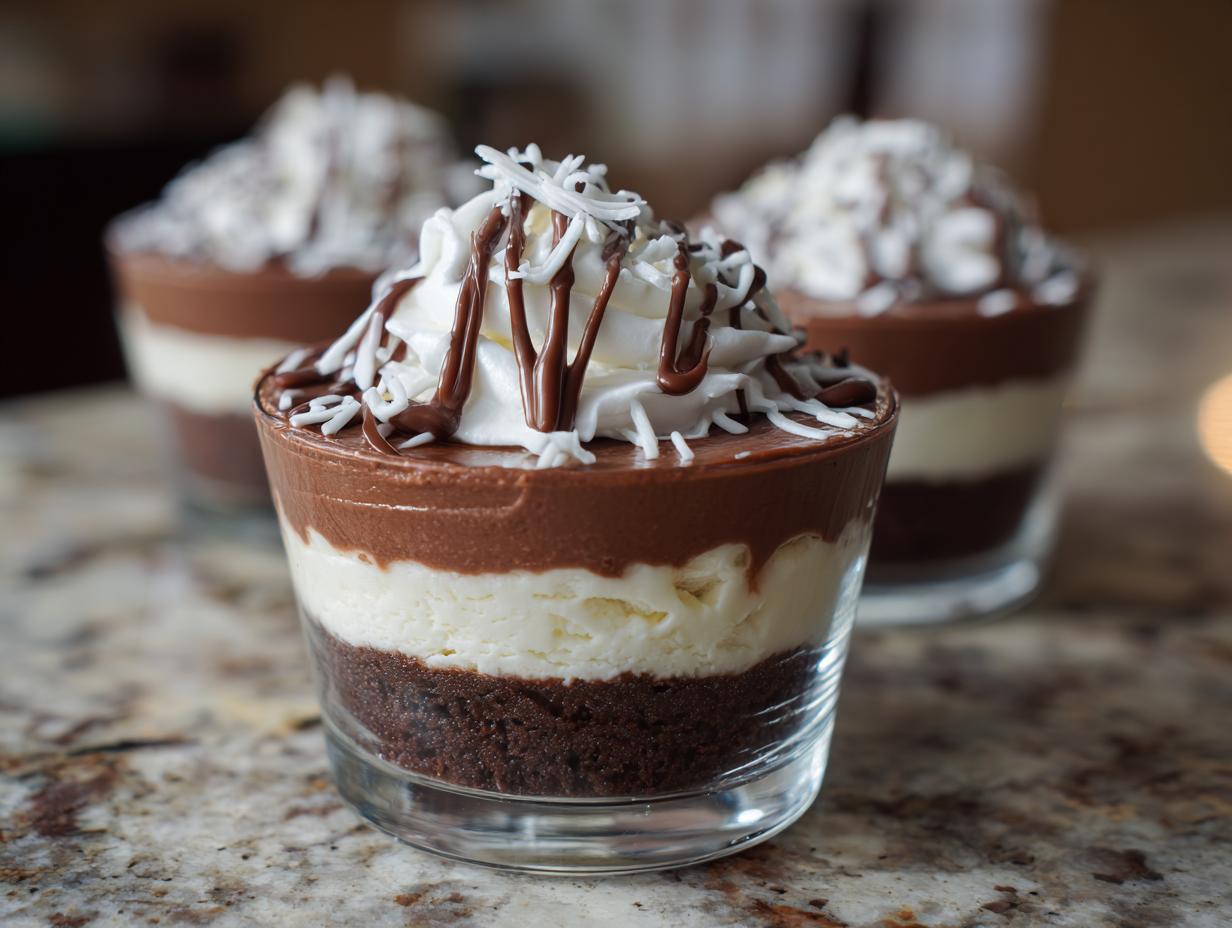
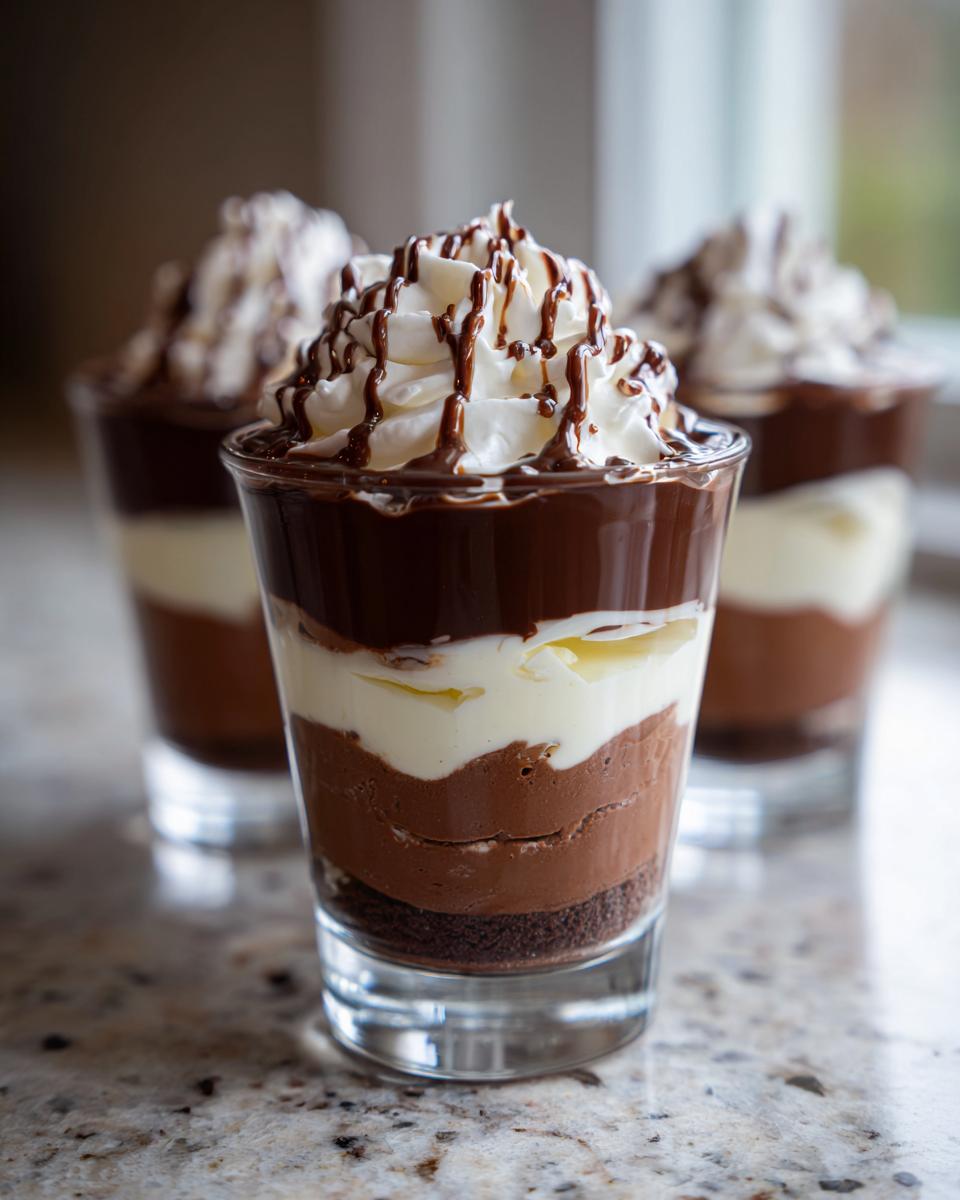
You know those moments when you need something showstopping but don’t want to turn on the oven? That’s where these Luxe No-Bake Tuxedo Cheesecake Cups come in—my go-to for effortless elegance. After years of testing desserts (and eating way too many spoonfuls of batter), I can confidently say these little cups are magic. Picture this: rich chocolate cookie crust, layers of velvety cheesecake swirled with dark and white chocolate, all topped with a glossy drizzle. They look like you spent hours, but the secret? Just 20 minutes of active work. Perfect for last-minute dinner parties or when that sweet tooth demands something fancy.
Why You’ll Love These Luxe No-Bake Tuxedo Cheesecake Cups
Let me count the ways these little beauties will steal your heart:
- No oven required – Perfect for hot summer days or when you’re just too tired to bake
- Elegant enough for company – The tuxedo layers make them look so fancy with minimal effort
- Creamy dreamy texture – That whipped cream folded into the cheesecake is pure magic
- Individual portions – No slicing needed, just grab and go (or elegantly serve on your best china)
- Chocolate lover’s dream – Rich dark chocolate and sweet white chocolate in every bite
Trust me, once you try these, they’ll become your secret weapon for every occasion!
Ingredients for Luxe No-Bake Tuxedo Cheesecake Cups
Here’s everything you’ll need to create these little cups of heaven – and yes, every ingredient matters! I’ve learned through trial and error (mostly error) that quality makes all the difference here.
- 1 cup chocolate cookie crumbs – I use Oreo crumbs (filling removed) but any chocolate wafer works
- 3 tbsp melted butter – Unsalted, please! We’ll control the salt ourselves
- 8 oz cream cheese, softened – Must be room temp or you’ll get lumps (learned that the hard way)
- 1/4 cup sugar – Granulated works best for that smooth texture
- 1 tsp vanilla extract – The good stuff, not imitation
- 1 cup heavy cream – Cold is crucial for whipping
- 1/2 cup semi-sweet chocolate chips – I prefer Ghirardelli 60% cacao
- 1/4 cup white chocolate chips – Look for real cocoa butter in the ingredients
Pro tip: Set your cream cheese out 2 hours before starting – it makes all the difference in getting that silky smooth texture we’re after!
Equipment You’ll Need
Don’t worry – you won’t need any fancy gadgets for these cheesecake cups! Here’s what I always grab from my kitchen:
- Mixing bowls – One large, one medium (glass works best for whipping cream)
- Electric mixer – Hand mixer or stand mixer both work great
- Spatula – For folding in that whipped cream gently
- 6 dessert cups – I use clear glass ones to show off those pretty layers
- Measuring cups/spoons – Because eyeballing never works for me!
That’s it! No piping bags or special tools required – unless you want to get fancy with that white chocolate drizzle.
How to Make Luxe No-Bake Tuxedo Cheesecake Cups
Okay, let’s get to the fun part! These cheesecake cups come together in a few simple steps, but the magic is in the layers. Follow along, and you’ll have restaurant-worthy desserts in no time.
Preparing the Crust
First, grab those chocolate cookie crumbs and melted butter. Mix them together until they look like wet sand – you want all the crumbs coated. Now, spoon about 2 tablespoons into each cup and press firmly with the back of a spoon. I like to use a small glass to really pack it down. Pop these in the fridge while you make the filling – this helps the crust set so it won’t crumble later.
Making the Cheesecake Filling
Here’s where the magic happens! Beat that softened cream cheese until it’s completely smooth – no lumps allowed! Add the sugar and vanilla, mixing until fluffy. In another bowl, whip the cold heavy cream to stiff peaks (tip: chill your bowl first for better results). Now, gently fold the whipped cream into the cream cheese mixture. Be patient – we want to keep all that air in for the lightest texture.
Creating the Tuxedo Layers
Divide your beautiful batter in half. Melt the semi-sweet chocolate chips (I do 30-second bursts in the microwave, stirring between each), then fold it into one half of the batter. Now comes the fun part – layering! Alternate spoonfuls of chocolate and vanilla batter into your cups. I like to do three layers of each for that fancy tuxedo effect. Use a toothpick to swirl slightly if you’re feeling artistic.
Adding the Final Touches
Almost there! Melt the white chocolate chips (go slow – they burn easily) and drizzle over the tops. I like to use a fork or piping bag for this. If you’re feeling extra, add a few fresh berries on top. Now, the hardest part – chilling for at least 2 hours (overnight is even better). Trust me, the wait is worth it when you see those perfect layers and take that first creamy bite!
Tips for Perfect Luxe No-Bake Tuxedo Cheesecake Cups
After making these dozens of times (purely for “quality control,” of course), here are my can’t-skip secrets:
- Chill everything cold – Your bowl, beaters, even the cream cheese (before softening) makes whipping easier
- Don’t rush the melting – Chocolate burns fast! Microwave in 15-second bursts, stirring between each
- Press crust firmly – Really pack it down so it holds together when you dig in
- Fresh berries = instant glam – A raspberry on top makes these look bakery-worthy
- Patience pays – That 2-hour chill isn’t optional! It transforms the texture from good to “wow”
Follow these, and you’ll get perfect cups every single time – promise!
Serving Suggestions
Oh, these cheesecake cups deserve a proper presentation! I love serving them with a dusting of cocoa powder and fresh raspberries – the tart berries cut through the richness perfectly. They’re ideal for:
- Dinner parties – Arrange on a pretty tray for instant sophistication
- Brunch – Pair with strong coffee for a sweet morning treat
- Holiday gatherings – The tuxedo theme makes them perfect for New Year’s Eve
- Girls’ night in – Because sometimes you need chocolate therapy with friends
Pro tip: Let them sit at room temperature for 10 minutes before serving – the flavors really pop!
Storing and Freezing Instructions
Good news – these cheesecake cups actually get better after a day in the fridge! They’ll keep beautifully for up to 3 days covered with plastic wrap. Want to make them ahead? Freeze them (without toppings) for up to a month – just thaw overnight in the fridge. The texture stays perfect! A little trick: add fresh berries and chocolate drizzle right before serving so everything looks picture-perfect.
Nutritional Information
Okay, let’s be real – we’re not eating cheesecake cups for their health benefits! But since you asked, here’s the scoop per serving (values are estimates):
- Calories: 320 (worth every single one)
- Sugar: 22g
- Fat: 24g (14g saturated – it’s dessert, not salad!)
- Carbs: 28g
- Protein: 4g
Remember, these can vary based on your exact ingredients. My philosophy? Enjoy every indulgent bite guilt-free – life’s too short to skip the good stuff!
Frequently Asked Questions
I get asked about these cheesecake cups all the time – here are the answers to the most common questions that pop up!
Can I use milk chocolate instead of semi-sweet?
Absolutely! While I love the rich depth of semi-sweet, milk chocolate works beautifully if you prefer sweeter desserts. Just reduce the sugar in the filling by a tablespoon since milk chocolate is sweeter. White chocolate fans – go ahead and swap all the chocolate for white chocolate for a “white tuxedo” version!
How long do these cheesecake cups last in the fridge?
They’ll stay perfect for 3 days when covered tightly. The crust might soften slightly by day 3, but the flavor actually improves! Pro tip: If you’re making them ahead, wait to add the white chocolate drizzle until just before serving so it stays pretty.
Can I make these without an electric mixer?
You can, but it’s a workout! For the whipped cream, chill a metal bowl and whisk in the freezer first, then whisk vigorously by hand until stiff peaks form. The cream cheese mixture needs thorough beating – I’ve used a fork in a pinch, but it takes elbow grease. Worth it though!
What can I use instead of chocolate cookie crumbs?
Graham cracker crumbs work in a pinch, though they won’t be as chocolatey. For a nutty twist, try crushed chocolate-covered almonds or hazelnuts. Gluten-free? Any GF chocolate cookie will do – just make sure to measure after crushing.
Can I make these vegan?
Yes! Use vegan cream cheese, coconut cream instead of heavy cream, and dairy-free chocolate. The texture will be slightly different, but still delicious. My vegan friends rave about this version with Miyoko’s cream cheese and Enjoy Life chocolate chips.
Share Your Creation!
I’d love to see your beautiful cheesecake cups! Snap a photo and tag me on Instagram @dessertobsessed – nothing makes me happier than seeing your creations. Bonus points if you get fancy with that drizzle!
For more dessert inspiration, check out Samantha Charllies’ Pinterest.
Print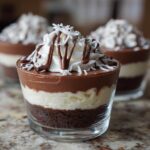
Luxe No-Bake Tuxedo Cheesecake Cups in Just 20 Minutes
- Total Time: 2 hours 20 mins
- Yield: 6 servings 1x
- Diet: Vegetarian
Description
Indulge in these elegant no-bake tuxedo cheesecake cups. A perfect blend of rich chocolate and creamy cheesecake.
Ingredients
- 1 cup chocolate cookie crumbs
- 3 tbsp melted butter
- 8 oz cream cheese, softened
- 1/4 cup sugar
- 1 tsp vanilla extract
- 1 cup heavy cream
- 1/2 cup semi-sweet chocolate chips
- 1/4 cup white chocolate chips
Instructions
- Mix cookie crumbs with melted butter. Press into cups.
- Beat cream cheese, sugar, and vanilla until smooth.
- Whip heavy cream until stiff peaks form. Fold into cream cheese mixture.
- Divide batter in half. Melt semi-sweet chocolate and mix into one half.
- Layer chocolate and vanilla batters in cups.
- Melt white chocolate and drizzle on top.
- Chill for 2 hours before serving.
Notes
- Use room temperature cream cheese for smoother texture.
- Chill mixing bowl before whipping cream.
- Garnish with fresh berries if desired.
- Prep Time: 20 mins
- Cook Time: 0 mins
- Category: Dessert
- Method: No-Bake
- Cuisine: American
Nutrition
- Serving Size: 1 cup
- Calories: 320
- Sugar: 22g
- Sodium: 180mg
- Fat: 24g
- Saturated Fat: 14g
- Unsaturated Fat: 8g
- Trans Fat: 0g
- Carbohydrates: 28g
- Fiber: 1g
- Protein: 4g
- Cholesterol: 65mg


