
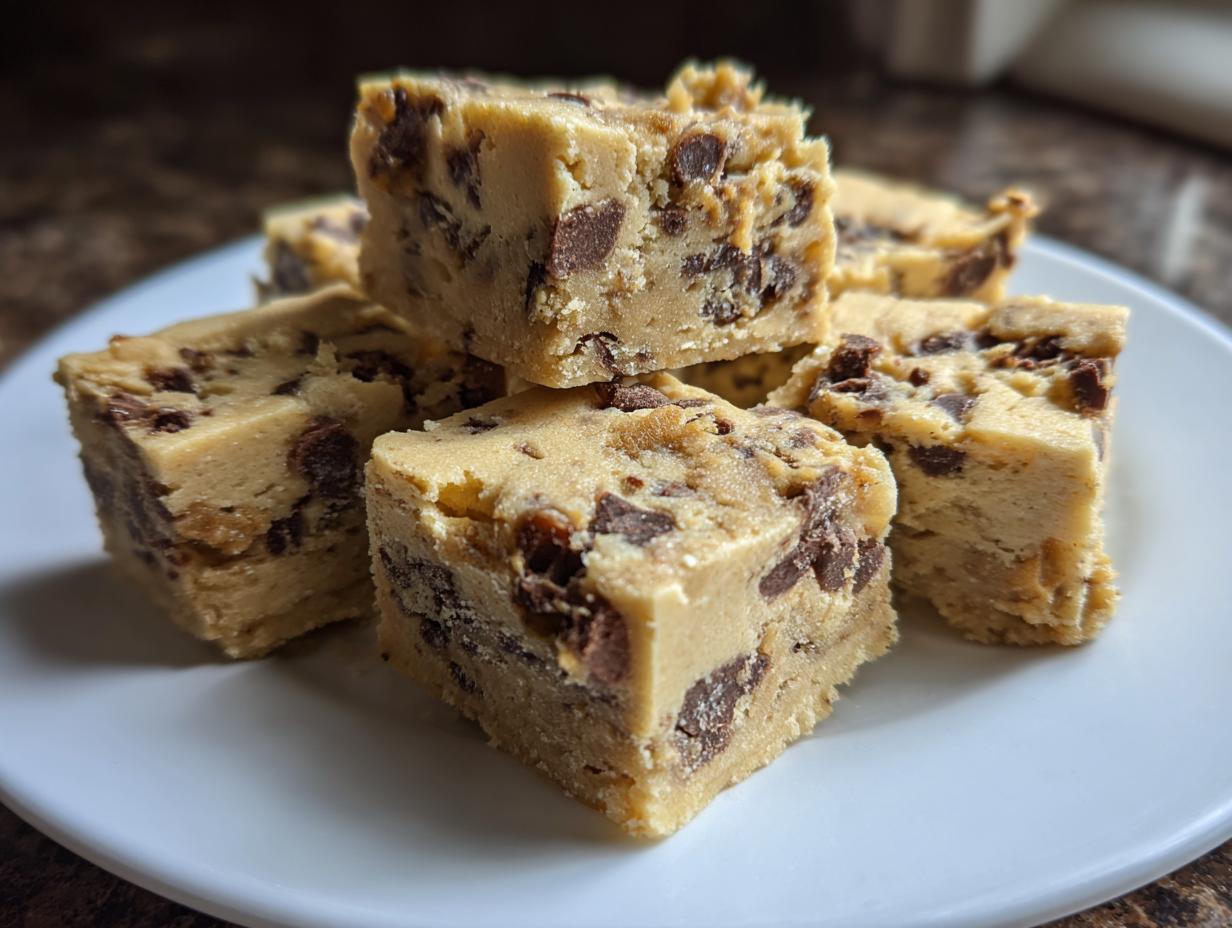
I’ll never forget the thrill of sneaking spoonfuls of raw cookie dough when my mom wasn’t looking—that buttery, chocolate-studded goodness was my childhood weakness. Now, with these no-bake Chocolate Chip Cookie Dough Bars, I get to indulge guilt-free (and without the side-eye from Mom). They’re everything you love about cookie dough—soft, chewy, and packed with melty chocolate chips—but safe to eat thanks to heat-treated flour and no eggs. The best part? You don’t even need to turn on the oven. Just mix, press, chill, and dive into squares of pure nostalgia. Trust me, one bite and you’ll be hooked.
Why You’ll Love These Chocolate Chip Cookie Dough Bars
Let me tell you why these bars are about to become your new obsession:
- No oven required: Who wants to heat up the kitchen? These come together in minutes without baking—perfect for summer days or when you’re craving something sweet fast.
- That irresistible texture: Soft, chewy, and just firm enough to hold its shape—exactly like licking the spoon, but in tidy little squares.
- Chocolate in every bite: Mini chips distribute perfectly so you never hit a “dry spot” (we’ve all been there with bad cookie dough).
- Nostalgia factor: All the childhood joy of sneaking raw dough, now socially acceptable to serve at parties!
Ingredients for Chocolate Chip Cookie Dough Bars
Grab these simple ingredients—I bet you have most in your pantry already! Every item plays a special role in creating that perfect cookie dough texture we all crave:
- 1 1/2 cups all-purpose flour (heat-treated for safety—just bake at 350°F for 5 minutes to kill bacteria)
- 1/2 cup unsalted butter, softened (leave it out for 30 minutes—it should dent easily when pressed)
- 1/2 cup packed brown sugar (pack it tight in the measuring cup for that caramel-like moisture)
- 1/4 cup granulated sugar (the white sugar gives that classic cookie dough crispness)
- 2 tablespoons milk (any kind works, even almond milk for dairy-free)
- 1 teaspoon vanilla extract (use the real stuff—imitation just won’t give the same depth)
- 1/2 teaspoon salt (balances the sweetness perfectly)
- 1 cup mini chocolate chips (they distribute better than regular chips—but use what you’ve got!)
Gluten-free? Swap the all-purpose flour with almond flour 1:1 for a nuttier twist that’s just as delicious.
How to Make Chocolate Chip Cookie Dough Bars
Don’t let the simplicity fool you—these bars are all about technique. I’ve made this recipe dozens of times (okay, maybe hundreds), and these steps ensure perfect texture every time. Just follow along, and you’ll have a pan of irresistible cookie dough goodness ready in no time!
Step 1: Prep the Pan
First, grab that 8×8-inch pan—it’s the perfect size for thick, bakery-style bars. Line it with parchment paper, leaving some overhang on two sides. This creates little “handles” so you can lift the whole slab out later. No wrestling with stuck-on dough! If you’re out of parchment, a light butter greasing works in a pinch.
Step 2: Mix Dry Ingredients
In a big bowl, whisk together the flour (remember, heat-treated if you’re being extra careful), both sugars, and salt. Get ’em really combined—you don’t want any sugar pockets hiding in there! This step is crucial because it distributes the salt evenly, so every bite has that perfect sweet-salty balance.
Step 3: Combine Wet Ingredients
Now, add your softened butter (it should dent like a firm pillow when you poke it), milk, and vanilla. Here’s my trick: use a wooden spoon to mash the butter into the dry mix first, then stir until it looks like wet sand. Scrape the bowl well—those butter bits at the bottom love to hide!
Step 4: Fold in Chocolate Chips
Mini chips are my go-to because they spread evenly, but regular chips work too (just chop them roughly if they’re huge). Fold gently—don’t overmix, or your bars might get tough. The dough will be thick, almost like Play-Doh, with chocolate peeking out everywhere. That’s when you know it’s perfect!
Step 5: Chill and Cut
Press the dough firmly into your prepped pan—I use the bottom of a measuring cup to get it perfectly even. Now, the hardest part: walk away! Chill for at least 2 hours (overnight is even better). When you’re ready, lift out the slab using the parchment handles and slice into squares. Pro tip: run your knife under hot water between cuts for clean edges!
Tips for Perfect Chocolate Chip Cookie Dough Bars
After making these bars more times than I can count, here are my can’t-miss secrets for cookie dough bar bliss:
- Butter temperature is key: Too cold and it won’t cream properly; too warm and your bars will be greasy. Look for that sweet spot where your finger leaves a clear dent.
- Press, don’t pat: Really work the dough into the pan’s corners with firm pressure—this prevents crumbly edges when slicing.
- Freeze for clean cuts: If you’re impatient (no judgment!), pop the pan in the freezer for 20 minutes before slicing with a warm knife.
- Toast the flour: For extra nutty flavor, bake your flour at 350°F for 5 minutes before mixing—it’s a game changer!
Ingredient Substitutions & Variations
Listen, I’m all about making recipes work with what’s in your pantry—here are my favorite tweaks that still deliver that dreamy cookie dough texture:
- Flour swaps: Almond flour makes a killer gluten-free version (use 1:1), but expect slightly crumblier bars. For nut-free, oat flour works—just pulse oats in a blender first.
- Butter blues: Vegan butter substitutes fine, but coconut oil will make bars firmer when chilled. Reduce milk by 1 tbsp if using oil.
- Chocolate adventures: Dark chocolate chips cut sweetness beautifully, while chopped peanut butter cups? Absolute magic. Just keep add-ins to 1 cup total.
- Flavor twists: Swap vanilla for almond extract or add 1/2 tsp cinnamon. My cousin swears by a pinch of espresso powder!
Remember—every swap changes texture slightly, but that’s how new favorites are born!
Storage & Serving Suggestions for Chocolate Chip Cookie Dough Bars
These bars are almost too easy to keep around—you’ll want to stash them properly so they last! I always use an airtight container with parchment between layers (they stick otherwise) and keep them chilled. They’ll stay perfect for up to 1 week in the fridge—if they last that long!
Now for the fun part: serving. My family loves them straight from the fridge with a cold glass of milk. For parties, try warming them slightly (10 seconds in the microwave) and topping with vanilla ice cream—the contrast of cold ice cream and soft dough is unreal. Drizzle with melted chocolate or caramel if you’re feeling fancy. Pro tip: Cut them small—they’re rich, and guests always come back for “just one more” bite!
Nutritional Information for Chocolate Chip Cookie Dough Bars
Okay, let’s be real—these bars are a treat, not health food! But here’s the scoop per bar (based on cutting into 12 squares): about 180 calories, 9g fat (5g saturated), and 14g sugar. Remember, these are estimates—your exact numbers will dance a bit depending on your butter brand or chocolate choice. The good news? No eggs means no cholesterol worries from raw dough!
FAQs About Chocolate Chip Cookie Dough Bars
Got questions? I’ve got answers! Here are the most common things folks ask me about these irresistible bars—straight from my kitchen to yours.
Can I Bake These Bars?
Technically, yes—but they’re meant to be no-bake! If you prefer a baked version, press the dough into the pan and bake at 350°F for 15-18 minutes until the edges are golden. They’ll be more like blondies—delicious, but not that classic cookie dough texture we love. My advice? Stick to chilling for the real deal!
How Do I Make Them Vegan?
Easy-peasy! Swap the butter for plant-based sticks (I like Country Crock or Earth Balance) and use dairy-free chocolate chips. For the milk, any almond or oat milk works great. Just check that your chocolate chips are vegan—some sneaky brands still use milk solids.
Can I Double the Recipe?
Absolutely! Double everything and use a 9×13-inch pan instead. You might need to chill them a bit longer (try 3 hours) since the slab will be thicker. Perfect for potlucks or when your cookie dough craving hits hard!
Why Use Heat-Treated Flour?
Raw flour can carry bacteria—gross but true! Baking it at 350°F for 5 minutes kills any nasties while keeping that floury texture we want. It’s a small step that lets you enjoy that “raw” dough safely. (P.S. Store-bought heat-treated flour exists if you’re short on time!)
Can I Freeze Them?
Yes! These bars freeze like champs for up to 3 months. Slice them first, then layer with parchment in an airtight container. Thaw in the fridge overnight—or eat them semi-frozen for an ice cream sandwich vibe!
Final Thoughts
There you have it—my foolproof way to enjoy cookie dough by the square, no sneaking required! I’d love to hear if these bars bring back childhood memories for you too. Tag me when you make them—I live for those melty chocolate chip close-up shots. Now go grab a spoon (or just your fingers) and dig in!
Print
Indulgent Chocolate Chip Cookie Dough Bars in 5 Easy Steps
- Total Time: 2 hours 15 minutes
- Yield: 12 bars 1x
- Diet: Vegetarian
Description
Chocolate chip cookie dough bars are a delicious no-bake treat with a soft, chewy texture and rich chocolate flavor.
Ingredients
- 1 1/2 cups all-purpose flour
- 1/2 cup unsalted butter, softened
- 1/2 cup brown sugar, packed
- 1/4 cup granulated sugar
- 2 tablespoons milk
- 1 teaspoon vanilla extract
- 1/2 teaspoon salt
- 1 cup mini chocolate chips
Instructions
- Line an 8×8-inch baking pan with parchment paper.
- In a bowl, mix flour, brown sugar, granulated sugar, and salt.
- Add softened butter, milk, and vanilla extract. Mix until combined.
- Fold in mini chocolate chips.
- Press the dough evenly into the prepared pan.
- Refrigerate for at least 2 hours before cutting into bars.
Notes
- Store in an airtight container in the refrigerator for up to 1 week.
- For a gluten-free version, substitute all-purpose flour with almond flour.
- Prep Time: 15 minutes
- Cook Time: 0 minutes
- Category: Dessert
- Method: No-Bake
- Cuisine: American
Nutrition
- Serving Size: 1 bar
- Calories: 180
- Sugar: 14g
- Sodium: 100mg
- Fat: 9g
- Saturated Fat: 5g
- Unsaturated Fat: 3g
- Trans Fat: 0g
- Carbohydrates: 24g
- Fiber: 1g
- Protein: 2g
- Cholesterol: 20mg


