
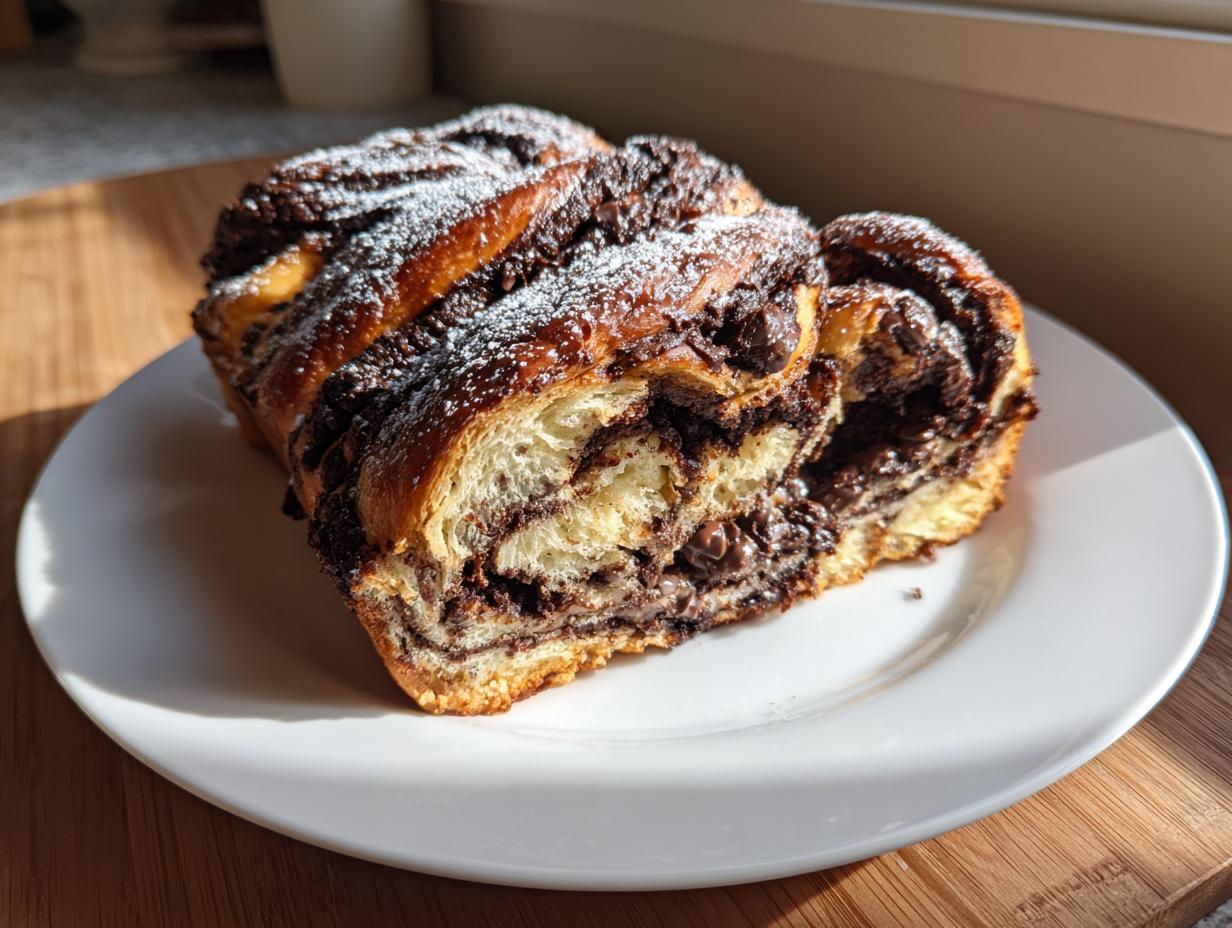
There’s something magical about pulling a warm Chocolate Babka Swirl from the oven—the scent of melted chocolate and butter filling the kitchen, the way those perfect spirals peek through the golden crust. This isn’t just any sweet bread; it’s a Jewish tradition turned family favorite in my home, equally at home on a brunch table as it is with an evening coffee. I still remember my aunt teaching me to twist the dough just right, her hands guiding mine as chocolate smudged our fingertips. One bite of this rich, swirled beauty, and you’ll understand why it’s been cherished for generations.
Why You’ll Love This Chocolate Babka Swirl
Trust me, this isn’t your average sweet bread. Once you try this Chocolate Babka Swirl, you’ll be hooked. Here’s why:
- Rich, chocolatey layers that melt in your mouth with every bite
- Stunning swirl pattern that looks bakery-perfect (but is surprisingly easy to make)
- Perfect for sharing – it’s always the star of brunch gatherings
- Endless customizations – swap fillings or add nuts to make it your own
Key Features of This Chocolate Babka Swirl
What makes my version special? First, the texture – tender but sturdy enough to hold those beautiful layers. Then there’s the chocolate intensity – we’re not skimping here! The method? Foolproof. Even if you’ve never worked with yeast dough before, my step-by-step instructions will guide you to babka perfection.
Chocolate Babka Swirl Ingredients
Gathering the right ingredients is half the battle when it comes to making the perfect Chocolate Babka Swirl. I’ve learned through trial and error (and a few chocolate disasters!) that quality matters here. Let’s break it down:
For the Dough:
- 4 cups all-purpose flour (spooned and leveled – don’t scoop!)
- 1/2 cup granulated sugar (the fine crystals help activate the yeast)
- 1 packet (2 1/4 tsp) active dry yeast (check the expiration date!)
- 1/2 cup warm milk (110°F – too hot kills yeast, too cold won’t activate it)
- 2 large eggs (room temperature blends smoother)
- 1/2 cup unsalted butter, melted and slightly cooled (real butter only – no substitutes!)
- 1 tsp salt (balances all that sweetness)
For the Chocolate Filling:
- 1 cup chocolate chips (60% cacao recommended for that perfect bittersweet balance)
- 1/4 cup cocoa powder (Dutch-processed gives deeper flavor)
- 1/4 cup powdered sugar (helps thicken the filling so it doesn’t ooze out)
A quick warning from my kitchen fails: don’t be tempted to swap ingredients! Bread flour makes the dough too tough, and margarine just won’t give you that rich, tender crumb we’re after. And please – no chocolate syrup or Nutella shortcuts here. The magic is in those real chocolate layers!
Equipment You’ll Need
Before we dive into making this glorious Chocolate Babka Swirl, let’s talk tools! You don’t need anything fancy, but having the right equipment makes all the difference between “good” and “oh-my-goodness-I-made-this?!” results.
The Must-Haves:
- Stand mixer with dough hook (optional but SO helpful – though I’ve made this by hand when the mood strikes)
- 9×5-inch loaf pan (metal gives the best crust, but glass works too)
- Rolling pin (my grandma’s wooden one is my favorite, but any will do)
- Parchment paper (trust me, you’ll want this for easy removal)
Nice-to-Haves:
- Kitchen scale (for perfectly measured flour every time)
- Pastry brush (for that post-bake butter glaze)
- Dough scraper (helps with clean-up and portioning)
Pro tip from my messy learning days: If you don’t have parchment paper, butter and flour your pan REALLY well. That chocolate filling loves to stick! And if your rolling pin tends to stick to dough, keep a little flour nearby for dusting – just don’t overdo it or your babka will get tough.
How to Make Chocolate Babka Swirl
Okay, let’s get to the fun part – making that gorgeous Chocolate Babka Swirl! Don’t let the fancy look intimidate you. I’ll walk you through each step just like my aunt did for me. The secret? Take your time and enjoy the process. Before you know it, you’ll be twisting dough like a pro!
Preparing the Dough
First things first – let’s wake up that yeast! I always test my yeast by sprinkling it over the warm milk with a pinch of sugar. If it doesn’t get foamy after 5 minutes, start over – dead yeast means flat babka.
Now, mix your flour, sugar, and salt in the bowl of your stand mixer (or a large bowl if kneading by hand). Add the yeast mixture, eggs, and melted butter. Mix on low until everything comes together – the dough will look shaggy at first, but don’t panic!
Here’s my kneading secret: 8 minutes with the dough hook (or 10 by hand) until the dough is smooth and slightly tacky but not sticky. It should pass the “windowpane test” – stretch a small piece between your fingers; if you can see light through it without tearing, you’re golden!
Let it rise in a greased bowl covered with a damp towel for about 1 hour in a warm spot (I use my oven with just the light on). The dough should double in size – poke it gently; if the indentation stays, it’s ready for the next step.
Assembling the Chocolate Babka Swirl
This is where the magic happens! Punch down the dough and roll it out on a lightly floured surface into a 16×12-inch rectangle. Don’t stress about perfect edges – rustic is charming!
Now, the chocolate: mix your chips, cocoa powder, and powdered sugar, then sprinkle evenly over the dough, leaving a 1/2-inch border. Here’s my pro tip: gently press the filling into the dough so it doesn’t all fall out when rolling.
Starting from the long side, roll it up tightly like a jelly roll. Pinch the seam to seal – this keeps all that chocolatey goodness inside! Now, here comes the fun part: with a sharp knife, cut the roll lengthwise down the middle to expose the layers.
Twist the two halves together with the cut sides up, keeping the layers visible. Don’t overthink it – a few messy twists look beautiful too! Carefully transfer to your prepared loaf pan, tucking the ends under.
Baking and Finishing
Let your beautiful creation rise again for 30 minutes while your oven preheats to 350°F. Position your rack in the center – no peeking for at least 25 minutes! You’ll know it’s done when the top is deep golden brown and the internal temperature hits 190°F.
The best part? That post-bake butter brush! Melt a tablespoon of butter and gently brush it over the hot babka – this gives it that gorgeous bakery shine. Resist slicing for at least 30 minutes (I know, torture!) to let the chocolate set.
See? Not so scary after all! The smell alone will have your family gathering in the kitchen, peeking over your shoulder. Wait till they see those perfect chocolate swirls when you slice it – pure magic!
Tips for the Perfect Chocolate Babka Swirl
After making countless Chocolate Babka Swirls (and yes, a few flops along the way!), I’ve learned some tricks that make all the difference between “good” and “knock-your-socks-off amazing.” Here are my hard-earned secrets:
- Don’t overfill! That tempting pile of chocolate chips? Resist adding extra. Too much filling causes leaks during baking and makes the dough harder to roll. The perfect amount creates defined layers without oozing out.
- Room temp is best for eggs and butter. Cold ingredients don’t incorporate as well, leading to uneven texture. I pull mine out 2 hours before baking – or in a pinch, warm eggs in a bowl of warm water for 5 minutes.
- Yeast check is a must. Before adding to flour, proof your yeast in the warm milk with a pinch of sugar. If it doesn’t foam within 5 minutes, toss it and start fresh. Nothing worse than a dense babka because your yeast was past its prime!
- Roll tightly, but gently. You want snug layers without squeezing out the filling. My trick? Use both hands to guide the roll, applying even pressure as you go. If chocolate starts escaping, just tuck it back in – no one will know!
- Let it cool (mostly). I know it’s hard with that incredible aroma filling your kitchen, but slicing too soon causes the chocolate to gush out. Wait at least 30 minutes – the texture sets perfectly and you’ll get those gorgeous clean slices.
Remember – even imperfect babka is delicious babka! My first attempt looked more like a chocolate landslide than elegant swirls, but it still disappeared in minutes. The more you make it, the more intuitive it becomes. Soon you’ll be tweaking the recipe like a pro!
Chocolate Babka Swirl Variations
Oh, the possibilities! While my classic Chocolate Babka Swirl will always have my heart, sometimes I love mixing things up. Here are my favorite twists that still keep that gorgeous swirled magic intact:
Cinnamon Sugar Swirl
When I’m craving something warm and cozy, I swap the chocolate for a simple cinnamon sugar mix. Combine 1/2 cup brown sugar with 2 tablespoons cinnamon and 1/4 cup melted butter – spread it just like the chocolate filling. The aroma while baking? Absolute heaven! My kids call this “cinnamon roll’s fancy cousin.”
Nutella Hazelnut Twist
For days when I want to be extra indulgent (or impress guests), I use Nutella instead of the chocolate chips. Spread about 3/4 cup evenly over the dough, then sprinkle with chopped toasted hazelnuts. Warning: this version disappears suspiciously fast!
Citrus-Infused Dough
Here’s my springtime favorite: add the zest of one orange or lemon to the dough when mixing. The bright citrus notes cut through the richness beautifully. Pair it with dark chocolate for an elegant flavor combo that’ll make you feel like a professional pastry chef.
Other fun experiments I’ve loved:
- Swapping half the chocolate chips for peanut butter chips
- Adding a layer of raspberry jam beneath the chocolate
- Sprinkling coarse sea salt on top before baking for that sweet-salty kick
The beauty of babka is how adaptable it is! Once you’ve mastered the basic dough and swirling technique, you can let your imagination run wild. Just remember – whatever filling you choose, keep the quantity similar to the original recipe so your swirls stay perfectly defined.
Storing and Reheating
Now, let’s talk about keeping that gorgeous Chocolate Babka Swirl tasting fresh – because let’s be honest, it rarely lasts long in my house! Here’s how I store mine to keep that perfect texture:
Room Temperature Storage
For short-term storage (if you can resist eating it all at once!), wrap your cooled babka tightly in plastic wrap or foil. It’ll stay fresh at room temperature for about 2 days. I like to slice mine before storing – that way, I can grab a piece with my morning coffee without wrestling with the whole loaf!
Freezing for Later
Babka freezes beautifully! Here’s my method: once completely cooled, slice it thickly and wrap each piece individually in plastic wrap, then pop them in a freezer bag. They’ll keep for up to 3 months this way. When the craving hits, just pull out a slice – no need to thaw the whole loaf.
Reheating Like a Pro
Want that just-baked taste? Here’s my secret: reheat slices in a toaster oven at 300°F for about 5 minutes. The gentle heat revives the chocolate’s melty goodness without drying out the bread. If you’re feeling extra indulgent (and why wouldn’t you be?), spread a thin layer of butter on the cut side before toasting. Absolute perfection!
One word of caution from experience: don’t microwave your babka unless you enjoy rubbery bread! The microwave zaps all the moisture right out. If you must use one, wrap the slice in a damp paper towel and heat for just 10-15 seconds – but really, the toaster oven method is worth the extra minute.
Chocolate Babka Swirl FAQs
Over the years, I’ve gotten so many questions about my Chocolate Babka Swirl – and I’ve made enough mistakes to answer them all! Here are the ones that pop up most often in my kitchen (and my inbox):
Can I make the babka ahead of time?
Absolutely! Here’s my favorite make-ahead trick: prepare the dough through the first rise, then punch it down, wrap tightly in plastic, and refrigerate overnight. The next morning, let it sit at room temp for 30 minutes before rolling and filling. The slow fermentation actually deepens the flavor beautifully!
Why did my swirls separate during baking?
Oh honey, I’ve been there! Usually it’s one of three things: 1) The dough wasn’t rolled tightly enough (give it a good pinch when sealing!), 2) Too much filling caused slippage (stick to the measurements!), or 3) You sliced too soon after baking (let it set completely!). Don’t worry – even “messy” babka tastes incredible!
What’s the best chocolate to use?
After testing dozens of varieties, I swear by 60% cacao chocolate chips – they melt perfectly without becoming greasy. But here’s a secret: sometimes I chop up a good dark chocolate bar for extra texture! Just avoid milk chocolate – it’s too sweet and makes the filling runny.
Can I freeze the unbaked babka?
You bet! After shaping, wrap the unbaked loaf tightly in plastic, then foil, and freeze for up to a month. When ready to bake, let it thaw overnight in the fridge, then proof at room temp for 1-2 hours before baking as usual. Works like a charm for holiday prep!
Why is my babka dry?
First, check your oven temp with a thermometer – overbaking is the usual culprit. Also, be sure to measure flour correctly (spoon and level!). And don’t skip that post-bake butter brush – it keeps the crust tender. My aunt would say “More butter fixes most baking sins!”
Nutritional Information
Now, let’s be real – we’re not eating Chocolate Babka Swirl for its health benefits! But I know some folks like to keep track, so here’s the scoop based on my standard recipe. Remember, these are estimates – your exact numbers will vary depending on specific ingredients and slice size.
Per slice (1/12 of loaf):
- 280 calories
- 12g fat (7g saturated)
- 38g carbohydrates
- 2g fiber
- 5g protein
- 150mg sodium
A little tip from my baking adventures: if you’re watching sugar, you can reduce the chocolate filling by about 25% without sacrificing too much flavor. But honestly? This is a special treat – I say enjoy every delicious bite! After all, life’s too short to skip the chocolate swirls.
There you have it – my tried-and-true Chocolate Babka Swirl that’s been bringing smiles to my family for years! I’d love to hear how yours turns out. Did those swirls come out bakery-perfect? Did you try any fun variations? Snap a photo and share your creation in the comments below – nothing makes me happier than seeing your babka successes! And if you have any questions, ask away. After all, we’re all just home bakers learning together, one chocolatey swirl at a time. Happy baking!
Print
Irresistible Chocolate Babka Swirl: 3 Keys to Perfect Layers
- Total Time: 2 hours 5 minutes
- Yield: 1 loaf 1x
- Diet: Vegetarian
Description
A rich, sweet bread with layers of chocolate filling, twisted into a beautiful swirl. Perfect for breakfast or dessert.
Ingredients
- 4 cups all-purpose flour
- 1/2 cup sugar
- 1 packet active dry yeast
- 1/2 cup warm milk
- 2 eggs
- 1/2 cup butter, melted
- 1 tsp salt
- 1 cup chocolate chips
- 1/4 cup cocoa powder
- 1/4 cup powdered sugar
Instructions
- Mix flour, sugar, yeast, and salt in a bowl.
- Add warm milk, eggs, and melted butter. Knead into a smooth dough.
- Let the dough rise for 1 hour.
- Roll out the dough into a rectangle.
- Spread chocolate chips, cocoa powder, and powdered sugar evenly.
- Roll the dough tightly and twist into a swirl.
- Place in a loaf pan and let rise for 30 minutes.
- Bake at 350°F for 30-35 minutes.
- Cool before slicing.
Notes
- Use high-quality chocolate for best flavor.
- Let the dough rise in a warm place.
- Brush with melted butter after baking for extra shine.
- Prep Time: 1 hour 30 minutes
- Cook Time: 35 minutes
- Category: Dessert
- Method: Baking
- Cuisine: Jewish
Nutrition
- Serving Size: 1 slice
- Calories: 280
- Sugar: 15g
- Sodium: 150mg
- Fat: 12g
- Saturated Fat: 7g
- Unsaturated Fat: 4g
- Trans Fat: 0g
- Carbohydrates: 38g
- Fiber: 2g
- Protein: 5g
- Cholesterol: 45mg


