

You know those days when you’re craving something decadent but don’t want to turn on the oven? That’s exactly how these indulgent no-bake chocolate cheesecake cups were born in my kitchen! I was hosting a last-minute girls’ night and needed a showstopper dessert—fast. These little cups saved the day with their rich, creamy texture and that perfect balance of chocolatey goodness. The best part? They come together in minutes with just a handful of ingredients. No baking, no fuss—just pure chocolate bliss. Trust me, once you try these, you’ll keep the recipe handy for every impromptu celebration (or just because it’s Tuesday).
Why You’ll Love These Indulgent No-Bake Chocolate Cheesecake Cups
Let me count the ways these little cups of joy will steal your heart:
- Speed: Ready in under 15 minutes of hands-on work (plus chilling time)
- No oven magic: Perfect for summer when turning on the oven feels like a crime
- Rich yet light: That silky chocolate-cream cheese combo feels luxe without weighing you down
- Party-perfect: Individual servings mean no messy slicing – just grab and go!
- Beginner-friendly: If you can stir and fold, you’ve got this
I’ve made these for book clubs, potlucks, and even as a “just because” treat – they never last long!
Ingredients for Indulgent No-Bake Chocolate Cheesecake Cups
Here’s everything you’ll need to make these heavenly little cups – trust me, you probably have most of this in your pantry already!
For the Crust:
- 1 1/2 cups chocolate cookie crumbs (I use Oreo crumbs with the filling scraped out)
- 1/4 cup melted butter (salted works great here for balance)
For the Filling:
- 8 oz cream cheese, softened (leave it out for 30 minutes – this is crucial!)
- 1/4 cup granulated sugar
- 1 tsp pure vanilla extract (the good stuff makes a difference)
- 1 cup heavy cream, very cold
- 1/2 cup melted dark chocolate (about 3 oz)
Optional Toppings:
- Whipped cream
- Chocolate shavings
- Fresh raspberries
- Caramel drizzle
Ingredient Notes & Substitutions
Here’s where I’ve experimented over the years – these swaps all work beautifully:
- Cookie crumbs: Graham crackers make a milder crust, or try Biscoff cookies for a spiced twist
- Chocolate: Use high-quality dark chocolate (I love Ghirardelli 60%) – milk chocolate works but makes a sweeter filling
- Dairy-free: Coconut cream can replace heavy cream, and vegan cream cheese substitutes work surprisingly well
- Sweetener: Maple syrup or honey can replace sugar – reduce to 3 tbsp and add slowly to taste
Pro tip: If your chocolate seizes when melting, add a teaspoon of coconut oil to smooth it out – I learned this the hard way after a few lumpy batches!
How to Make Indulgent No-Bake Chocolate Cheesecake Cups
Okay, let’s get to the fun part! These cheesecake cups come together like magic – just follow these simple steps and you’ll be scooping up creamy chocolate heaven in no time.
Step 1: Prepare the Crust
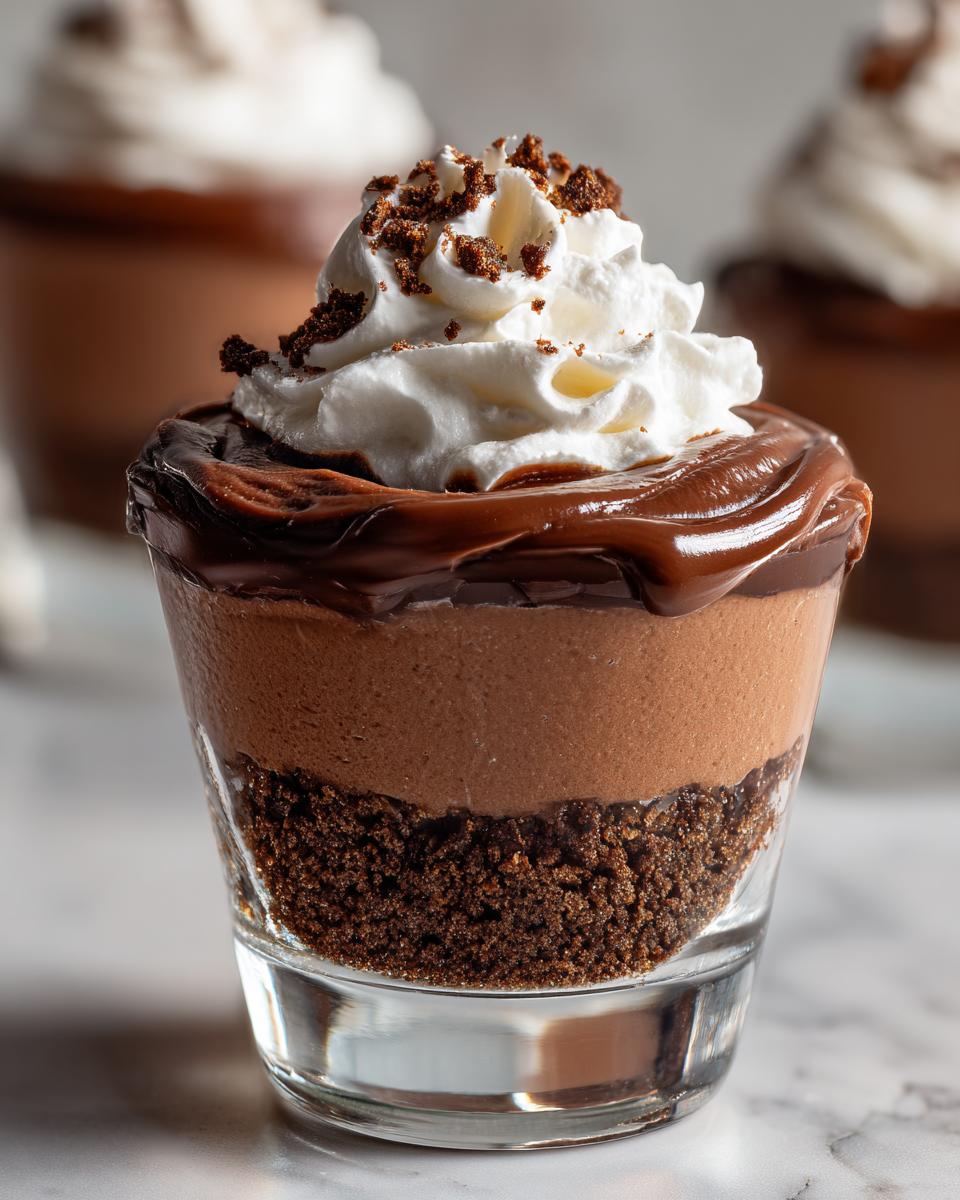
First, grab your favorite little cups or ramekins – I use 6 oz glass dessert cups, but even mason jars work in a pinch! Mix those chocolate cookie crumbs with melted butter until it looks like wet sand. Now here’s my secret: use the bottom of a small glass to press the crumbs firmly into each cup. You want it packed tight so it doesn’t crumble when you take that first glorious bite. Pop these in the fridge while you make the filling – this helps them set up nicely.
Step 2: Make the Cheesecake Filling
Now for the star of the show! Beat that softened cream cheese (I can’t stress enough how important it is to let it sit out first – cold cream cheese equals lumpy filling) with sugar and vanilla until it’s completely smooth. No lumps allowed! In another bowl, whip that heavy cream until stiff peaks form – pro tip: chill your bowl and beaters first for quicker whipping. Gently fold the whipped cream into the cream cheese mixture, then drizzle in your melted chocolate while folding. The batter should be billowy and dreamy – if it looks grainy, keep folding gently until smooth.
Step 3: Layer and Chill
Time to assemble! Spoon that luscious filling over your chilled crusts, leaving about 1/4 inch at the top so you have room for toppings later. Smooth the tops with the back of a spoon – I sometimes make little swirls for a fancy touch. Now comes the hardest part: waiting! Chill these beauties for at least 2 hours, though overnight is even better if you can resist. The filling firms up perfectly, creating that irresistible creamy-yet-light texture we all love.
Quick warning: don’t be tempted to skip the chilling time – I once served these too soon and they were delicious but messy (not that anyone complained!). Patience rewards you with perfect little cheesecake cups that hold their shape beautifully.
Tips for Perfect Indulgent No-Bake Chocolate Cheesecake Cups
After making these cheesecake cups more times than I can count (seriously, my friends request them constantly), I’ve picked up some game-changing tricks:
- Chill everything cold: Pop your mixing bowl and beaters in the freezer for 10 minutes before whipping the cream. Cold tools = faster, fluffier peaks that hold their shape beautifully.
- The finger test for cream cheese: Press your finger into the cream cheese – it should leave an indent but not feel greasy. Too soft? It’ll make the filling runny. Too firm? Hello, lumps!
- Melt chocolate gently: I microwave mine in 20-second bursts, stirring between each. Burnt chocolate is tragic – trust me, I’ve been there. Add a splash of cream if it gets too thick.
- Layer toppings strategically: Add fresh berries right before serving so they don’t bleed. Chocolate shavings? Those can go on right after chilling for maximum pretty factor.
Oh, and one last thing – always make extra! These disappear faster than you’d believe. My husband once hid a cup in the veggie drawer (nice try, babe – I always find them).
Serving Suggestions for Indulgent No-Bake Chocolate Cheesecake Cups
Oh, the fun part – dressing these beauties up! My go-to is a dollop of fresh whipped cream and chocolate shavings, but get creative:
- Fresh raspberries or strawberries for a tart contrast
- Caramel drizzle and sea salt flakes for that sweet-salty kick
- Crushed cookies or toffee bits for extra crunch
- A dusting of cocoa powder or espresso powder for grown-up flair
I sometimes let guests customize their own – it makes dessert feel extra special. Just set out toppings in little bowls and watch the magic happen!
Storage & Reheating Instructions
Here’s the beautiful thing about these cheesecake cups – they actually get better after a night in the fridge! I always make them a day ahead when hosting. Just cover each cup tightly with plastic wrap (press it right against the surface to prevent drying) or store them in an airtight container. They’ll keep happily in the fridge for up to 3 days, though let’s be real – they never last that long in my house.
Now, about reheating – you don’t need to! These are meant to be served chilled. If they’ve been in the fridge awhile and seem too firm, just let them sit on the counter for 5-10 minutes before serving. The texture will be perfect – creamy but still holding its shape.
Freezing works too if you’re planning ahead. Wrap each cup individually in plastic, then foil, and freeze for up to a month. Thaw overnight in the fridge when you’re ready to indulge. The texture changes slightly (a bit denser), but it’s still delicious. My niece actually prefers them frozen – she says they taste like chocolate cheesecake ice cream!
Nutritional Information
Okay, let’s talk numbers – but remember, these are estimates based on exactly how I make these indulgent no-bake chocolate cheesecake cups. Your exact counts might vary depending on your specific ingredients (especially if you go wild with toppings like I sometimes do!). Here’s the breakdown per serving (about one 6oz cup):
- Calories: 380
- Total Fat: 28g
- Saturated Fat: 16g
- Carbohydrates: 30g
- Fiber: 2g
- Sugar: 22g
- Protein: 5g
Now, I’m not a nutritionist – I’m just a chocolate lover sharing what my recipe calculator spits out! If you’re watching specific macros, you can tweak things like using low-fat cream cheese or reducing the sugar slightly. But personally? I believe desserts should be enjoyed as treats, and these cups are worth every luscious bite. Everything in moderation, right?
Frequently Asked Questions
Over the years, I’ve gotten so many questions about these chocolate cheesecake cups – here are the ones that pop up most often with my tried-and-true answers!
Can I Use Milk Chocolate Instead of Dark?
Absolutely! I’ve tested this both ways – dark chocolate gives that rich, sophisticated flavor I love, but milk chocolate makes a sweeter, more kid-friendly version. Just know that milk chocolate will make the filling slightly softer since it has more dairy. If you go this route, you might want to chill the cups an extra hour to help them firm up. My niece actually prefers the milk chocolate version – she says it tastes like chocolate pudding’s fancy cousin!
How Long Do They Need to Set?
Here’s the deal – 2 hours is the minimum, but overnight is magic. The first time I made these, I couldn’t wait and dug in after just an hour. Delicious? Yes. A bit messy? Also yes! The filling needs time to stabilize properly. If you’re serving these for a dinner party, I always make them the night before. That extra time lets all the flavors meld beautifully and gives you that perfect sliceable-but-creamy texture we all crave in a cheesecake.
Can I Freeze These?
You bet! These freeze surprisingly well – just wrap each cup tightly in plastic wrap, then foil (this prevents freezer burn). They’ll keep for about a month. When you’re ready to serve, thaw them overnight in the fridge. The texture changes slightly – it becomes denser, almost like chocolate mousse ice cream. My brother actually eats them partially frozen straight from the freezer – says it reminds him of his favorite ice cream shop treats!
What If My Filling Turns Out Runny?
Don’t panic! This usually happens if the cream cheese wasn’t soft enough or the whipped cream wasn’t stiff enough. Here’s my quick fix: pop the whole mixture in the fridge for 20 minutes, then gently fold it again. The chill helps everything firm up. If it’s still too loose, you can add a tablespoon of powdered sugar to help stabilize it. And remember – even if they’re a bit soft, they’ll still taste amazing spooned over ice cream (not that I’ve done this multiple times or anything…).
Can I Make One Big Cheesecake Instead of Cups?
Of course! Just press the crust into a 9-inch springform pan (use 2 cups crumbs and 1/3 cup butter for this size). Spread the filling evenly, then chill for at least 4 hours. The slices won’t hold quite as neatly as the individual cups, but they’re just as delicious. Pro tip: run a hot knife under water before slicing for cleaner edges. I made this version for my mom’s birthday last year, and she still talks about it!
Final Thoughts
Honestly, these little cups of chocolatey joy have become my secret weapon for every occasion – from “I need chocolate NOW” moments to impromptu dinner parties. There’s something magical about how simple ingredients transform into such an elegant dessert with barely any effort. I still remember the first time I made them – my friends thought I’d spent hours in the kitchen when really, I’d just thrown everything together between episodes of my favorite show!
If you’re on the fence about trying them, just do it. The worst that can happen? You’ll have to “test” a few extra spoonfuls of filling (not that I’d judge!). I’d love to hear how yours turn out – tag me if you share pics, or better yet, invite me over to taste test! Whether you stick to my classic version or get creative with toppings, I promise these no-bake cheesecake cups will become your new go-to dessert. Now go grab that cream cheese and get mixing – your future self (and anyone lucky enough to snag a cup) will thank you!
If you’re on the fence about trying them, just do it. The worst that can happen? You’ll have to “test” a few extra spoonfuls of filling (not that I’d judge!). I’d love to hear how yours turn out – tag me if you share pics, or better yet, invite me over to taste test! Whether you stick to my classic version or get creative with toppings, I promise these no-bake cheesecake cups will become your new go-to dessert. Now go grab that cream cheese and get mixing – your future self (and anyone lucky enough to snag a cup) will thank you!
Print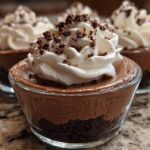
Irresistible 15-Minute No-Bake Chocolate Cheesecake Cups
- Total Time: 2 hours 15 mins
- Yield: 6 servings 1x
- Diet: Vegetarian
Description
A rich and creamy no-bake chocolate cheesecake in individual cups. Perfect for quick desserts with minimal effort.
Ingredients
- 1 1/2 cups chocolate cookie crumbs
- 1/4 cup melted butter
- 8 oz cream cheese, softened
- 1/4 cup sugar
- 1 tsp vanilla extract
- 1 cup heavy cream
- 1/2 cup melted chocolate
Instructions
- Mix cookie crumbs and melted butter. Press into the bottom of cups.
- Beat cream cheese, sugar, and vanilla until smooth.
- Whip heavy cream until stiff peaks form.
- Fold whipped cream and melted chocolate into the cream cheese mixture.
- Spoon the filling over the crusts.
- Chill for at least 2 hours before serving.
Notes
- Use dark chocolate for a richer flavor.
- Let the cheesecake cups set fully before serving.
- Top with whipped cream or chocolate shavings if desired.
- Prep Time: 15 mins
- Cook Time: 0 mins
- Category: Dessert
- Method: No-Bake
- Cuisine: American
Nutrition
- Serving Size: 1 cup
- Calories: 380
- Sugar: 22g
- Sodium: 180mg
- Fat: 28g
- Saturated Fat: 16g
- Unsaturated Fat: 9g
- Trans Fat: 0g
- Carbohydrates: 30g
- Fiber: 2g
- Protein: 5g
- Cholesterol: 65mg


