
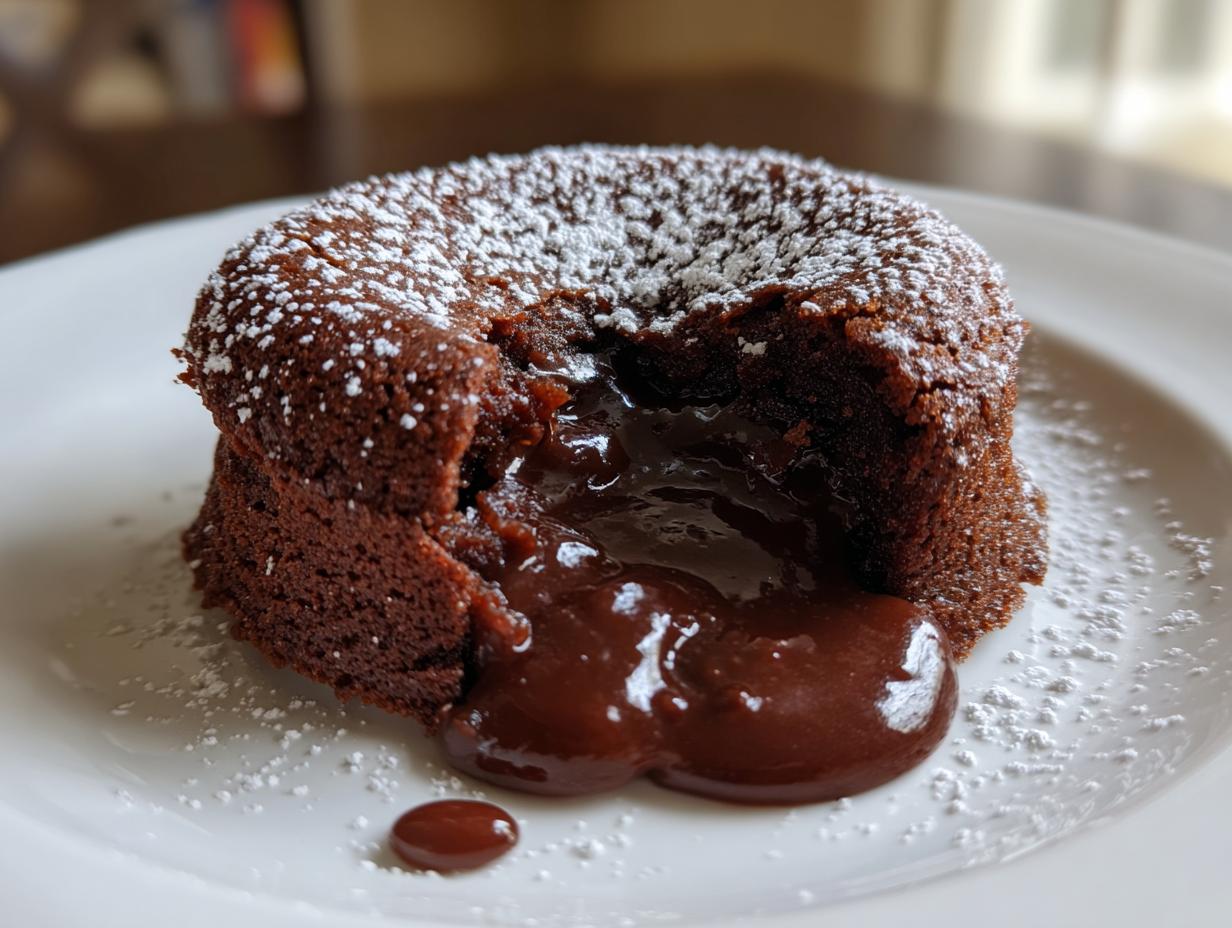
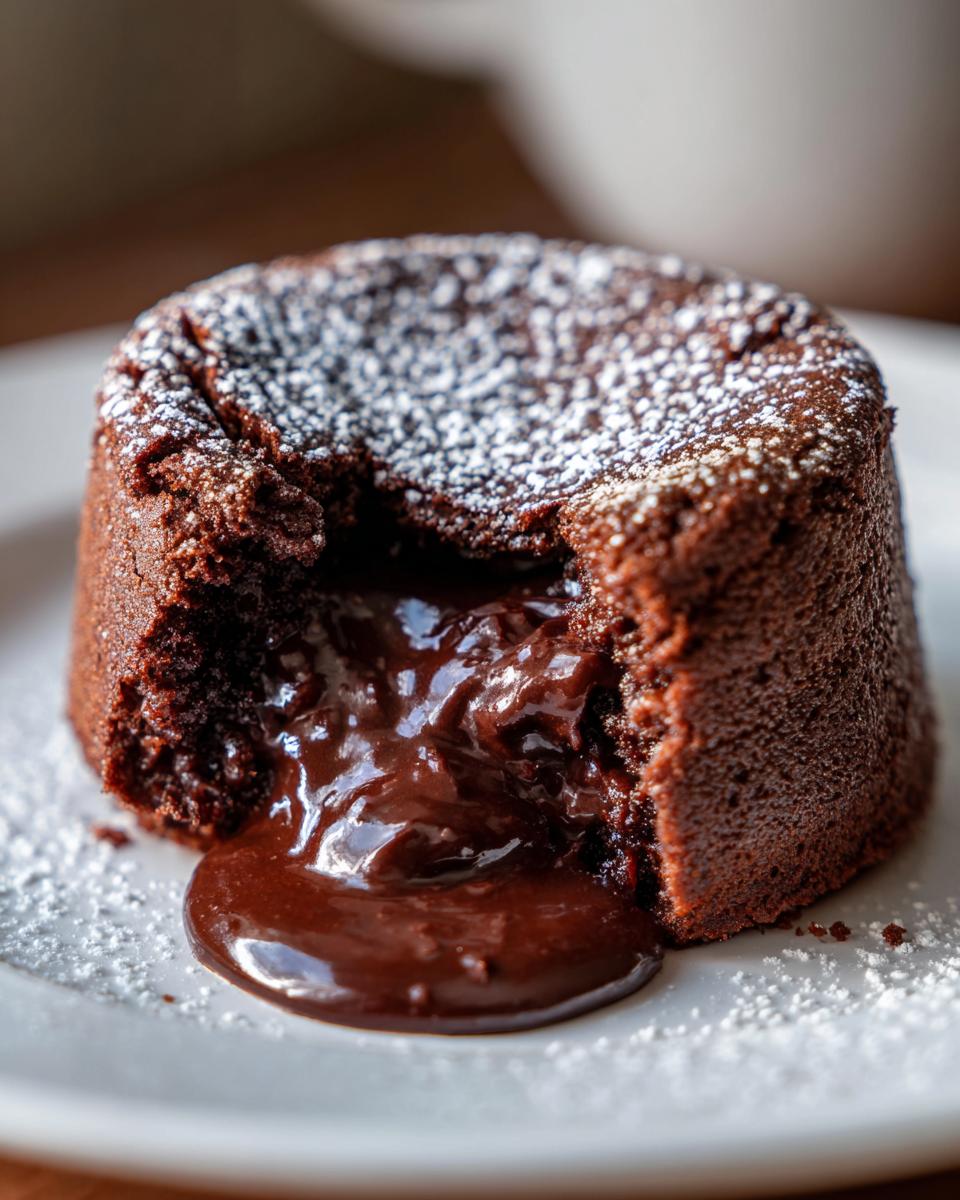
Oh, chocolate lava cake—just saying those words makes my mouth water! The first time I tried this decadent dessert, I was hooked. That moment when your spoon cracks through the delicate outer shell and molten chocolate oozes out? Pure magic. And here’s the best part: it’s shockingly easy to make at home.
I’ll never forget my disaster attempt years ago—overbaked, dry, zero lava. But after tweaking ratios and mastering the timing (12 minutes is *key*!), I finally nailed it. Now it’s my go-to when I need something impressive fast—like when friends show up unannounced or I’m craving a midnight treat. With just butter, chocolate, eggs, and a whisper of flour, you’re minutes away from restaurant-quality indulgence. Trust me, once you taste that warm, gooey center paired with vanilla ice cream melting into the cracks, you’ll be making this weekly. Let’s get baking!
Why You’ll Love This Chocolate Lava Cake
Oh, where do I even start? This chocolate lava cake recipe is the little black dress of desserts – simple, elegant, and always a showstopper. Here’s why it never fails to impress:
- Decadent beyond belief: That first spoonful of warm, molten chocolate flowing from the center? Pure bliss. The rich dark chocolate paired with that cakey exterior is absolute perfection.
- Ready in under 30 minutes: From mixing bowl to table faster than you can say “dessert emergency”! Most of that time is just baking – active prep takes mere minutes.
- Foolproof technique: My years of trial and error mean I’ve worked out all the kinks. Follow my timing exactly, and you’ll get that perfect oozy center every single time.
- Minimal ingredients: Just butter, chocolate, eggs, sugar and a bit of flour – probably things you already have in your pantry right now!
- Instant wow factor: Guests will think you spent hours on this, when really it’s one of the easiest desserts you’ll ever make. Shhh, I won’t tell if you don’t!
Seriously, this chocolate lava cake has saved my bacon more times than I can count – last-minute dinner parties, date nights at home, or just when that chocolate craving hits hard. It’s my not-so-secret weapon for looking like a baking rockstar with minimal effort.
Ingredients for Chocolate Lava Cake
Here’s everything you’ll need to create that magical molten center we all crave. I promise, you don’t need anything fancy – just quality ingredients measured with love (and maybe a little extra chocolate because… why not?).
- 1/2 cup (1 stick) unsalted butter – Cut into chunks so it melts evenly. I always use European-style butter when I can – that extra fat content makes the cake extra luscious!
- 4 oz dark chocolate – Chopped roughly so it melts smoothly. I use 60-70% cacao – enough depth without being too bitter. My secret? A chocolate bar tastes better than chips here.
- 1/2 cup granulated sugar – Measure this exactly – too much and the cake becomes cloying, too little and the chocolate can overwhelm.
- 2 large eggs + 2 egg yolks – Room temperature, please! The yolks add richness while the whites give just enough structure. I crack mine into a bowl first in case of shell fragments.
- 1/4 cup all-purpose flour – Spoon it in lightly and level off – we want just enough to hold everything together without making the cake dense.
- 1/4 teaspoon salt – Just a pinch to balance the sweetness. I use fine sea salt – it dissolves better than kosher here.
- 1 teaspoon vanilla extract – The real stuff, not imitation! It enhances the chocolate flavor beautifully.
See? Nothing weird or hard-to-find. Pro tip: measure everything before you start – this recipe moves fast once the chocolate’s melted!
Equipment You’ll Need
Here’s the beauty of chocolate lava cakes – you don’t need fancy gadgets! Just a few basic kitchen tools that you probably already have. I’ve made these in college dorm kitchens and fancy chef’s kitchens – they turn out perfect every time with these essentials:
- 4 (6-ounce) ramekins – The classic vessel for lava cakes. I prefer ceramic over metal – they bake more evenly. No ramekins? Oven-safe mugs work in a pinch!
- Medium mixing bowl – For whisking eggs and sugar to that perfect pale yellow stage. Glass or metal works best – plastic can hold odors.
- Small saucepan or microwave-safe bowl – My grandma swore by a double boiler for melting chocolate, but I confess – I usually just zap it in the microwave at 50% power. Both work!
- Whisk – A good old-fashioned wire whisk is better than a fork here – you want to incorporate air into those eggs.
- Rubber spatula – For gently folding in the flour so you don’t deflate all that lovely air you just whisked in.
- Small sieve or flour sifter – Okay, this one’s optional, but I always sift my flour for the lightest texture. A fine-mesh strainer works great if you don’t have a sifter.
- Pastry brush – Makes greasing the ramekins a breeze, but your fingers work too (just be thorough!).
That’s it! No stand mixer, no special pans. In fact, the simpler the tools, the better – this is one recipe where fussy equipment just gets in the way of that perfect molten magic.
How to Make Chocolate Lava Cake
Alright, let’s dive into the magic of creating that perfect molten center! I’ll walk you through each step carefully – timing is everything here. Follow along, and you’ll have restaurant-worthy chocolate lava cakes ready before you know it.
Preparing the Ramekins
First things first – we need to make sure our little cakes will slide out beautifully. Grab those ramekins and let’s get them ready:
- Brush every nook and cranny with softened butter using your pastry brush (or fingers!). Pay special attention to the bottom edges.
- Dust with flour, tapping out the excess. I like to add about a teaspoon to each, swirl it around, then turn them upside down and tap gently.
- Place them on a baking sheet – this makes handling them much easier later when they’re hot.
This step takes just minutes but saves you from heartbreak later when unmolding!
Melting the Chocolate and Butter
This is where the magic begins. You’ve got two options here – choose your adventure:
- Double boiler method: Simmer 2 inches of water in a saucepan, place a heatproof bowl on top (don’t let it touch the water!), and melt butter and chocolate together, stirring occasionally until smooth.
- Microwave method: My lazy-but-effective way! Combine butter and chocolate in a microwave-safe bowl and zap at 50% power in 30-second bursts, stirring between each, until melted (usually takes about 1½ minutes total).
Whichever method you choose, let the mixture cool slightly before adding to eggs – we don’t want scrambled eggs in our dessert!
Mixing the Batter
Now comes the fun part – bringing everything together:
- Whisk eggs, yolks, sugar and vanilla in your mixing bowl until pale and slightly thickened – about 2 minutes of vigorous whisking should do it.
- Slowly drizzle in the warm chocolate mixture while whisking constantly.
- Sift flour and salt over the top, then gently fold in with a rubber spatula until just combined – some small lumps are okay!
The batter will be thick but pourable – like a loose brownie batter. Resist the urge to overmix here!
Baking and Serving
Here’s where precision matters most:
- Divide batter evenly among prepared ramekins (about ½ cup each).
- Bake at 425°F for exactly 12-14 minutes. At 12 minutes, the centers will be gloriously molten. By 14 minutes, you’ll get a slightly thicker but still deliciously gooey center.
- Let rest for exactly 1 minute – this helps the edges pull away slightly.
- Place a plate upside down over each ramekin, then flip confidently! Give it a gentle shake if needed – they should release beautifully.
Serve immediately while that molten center is piping hot! Pro tip: Have your plates warmed and garnishes ready before baking – timing is everything with these beauties.
Pro Tips for Perfect Chocolate Lava Cake
After making hundreds of these little chocolate miracles (and yes, a few flops along the way), I’ve learned all the tricks to guarantee lava
Variations of Chocolate Lava Cake
Now that you’ve mastered the classic version, let’s play with some fun twists! The beauty of chocolate lava cake is how easily it adapts to different flavors. Here are my favorite ways to mix it up—all simple but oh-so impressive.
Espresso Lava Cake
For coffee lovers, this is pure heaven. Just add 1 teaspoon of instant espresso powder to the dry ingredients—it deepens the chocolate flavor without making it taste like coffee. My aunt swears this version is what got her through college finals! The hint of bitterness balances the sweetness beautifully.
Orange-Chocolate Lava Cake
Grandma’s secret? Add 1 tablespoon of fresh orange zest to the batter and substitute 1 tablespoon of the vanilla extract with orange liqueur. The citrus brightens up all that rich chocolate. I always make these around the holidays—they taste like Christmas in dessert form.
Peanut Butter Lava Cake
Here’s my guilty pleasure: drop 1 teaspoon of creamy peanut butter into the center of each ramekin before adding batter. As it bakes, the peanut butter melts into its own secret lava layer. Serve with a sprinkle of sea salt—trust me, it’s life-changing.
Mint Chocolate Lava Cake
Perfect for St. Patrick’s Day! Add ½ teaspoon peppermint extract with the vanilla. For extra flair, top the baked cakes with crushed candy canes in December or fresh mint leaves in summer. My kids call these “magic mint volcanoes.”
Berry Coulis Swirl
Before baking, make a quick sauce by simmering raspberries or strawberries with a splash of water and sugar. Spoon a tablespoon into each ramekin, then pour batter on top. The fruit sinks slightly, creating pockets of tartness that cut through the richness.
The key with all these variations? Start with the classic recipe—it’s the perfect canvas. Most additions work best when kept simple and added in small quantities. Now go wild and make these lava cakes your own! What flavor combo will you try first? Check out more ideas!
Serving Suggestions
Oh, the joy of watching that first spoonful of warm chocolate lava cake meet its perfect partner! After years of testing (and eating), I’ve found these pairings that take this dessert from great to unforgettable. Here’s how to serve it like a pro:
Classic Vanilla Ice Cream
My absolute must-have! The cold creaminess melting into the warm chocolate is pure magic. Use high-quality vanilla bean ice cream—that real vanilla flavor makes all the difference. Scoop it right next to the cake so it starts melting immediately. Bonus points if you use my grandma’s trick—lightly warm your ice cream scoop in hot water first for perfect rounds.
Fresh Whipped Cream
For a lighter touch, whip heavy cream with just a tablespoon of powdered sugar until soft peaks form. Dollop it on right before serving—the slight tang cuts through the richness beautifully. I sometimes add a whisper of cinnamon or orange zest to the cream for extra flair.
Seasonal Berries
In summer, nothing beats fresh raspberries or strawberries scattered around the plate. Their bright acidity balances the chocolate perfectly. In winter, try quickly sautéed frozen cherries with a splash of brandy—they make the whole dessert feel extra special.
Crunchy Contrasts
For texture lovers, sprinkle chopped toasted hazelnuts or almonds around the plate. Or go all out with my favorite combo—crushed pretzels for salty crunch and caramel sauce drizzled over everything. The sweet-salty contrast is insane!
Adult Upgrades
For dinner parties, I sometimes add a splash of Grand Marnier to the whipped cream or serve with a small glass of port wine. The alcohol enhances the chocolate’s depth without overpowering it. Just enough to make guests feel fancy!
Pro tip: Have all your garnishes ready before the cakes come out of the oven—you’ll want to serve them piping hot. And don’t forget the final touch—a dusting of powdered sugar or cocoa powder makes even the simplest presentation look restaurant-worthy!
Storing and Reheating
Okay, let’s be real – these chocolate lava cakes are best fresh from the oven when that molten center is at its ooey-gooiest peak. But life happens! Here’s how to handle leftovers (if you’re lucky enough to have any):
Storing Your Lava Cakes
If you’ve got uneaten cakes (how?!), let them cool completely first. Then wrap each ramekin tightly in plastic wrap – I press it directly onto the surface to prevent a skin from forming. They’ll keep in the fridge for 2-3 days. The texture changes a bit – the outside stays cakey but the center firms up. It’s still delicious, just different!
Reheating Magic
Want to bring back that molten magic? Here’s my tried-and-true method:
- Remove plastic wrap and microwave on high for 10-15 seconds – no more! Check at 10 – you want it warm but not scalding.
- For oven reheating: Place unwrapped ramekins in a 350°F oven for 5-7 minutes. The centers won’t be quite as lava-like but still delicious.
Pro tip: The microwave can be tricky – err on the side of underheating! You can always zap for a few more seconds, but you can’t undo an over-microwaved cake. And whatever you do, don’t freeze them – the texture turns weird and grainy. Better to share with neighbors than try to freeze!
Chocolate Lava Cake Nutritional Information
Okay, let’s be honest—we’re not eating chocolate lava cake for its health benefits! But since you’re curious, here’s the breakdown per serving (because yes, you absolutely deserve a whole one to yourself). Just remember, these values are estimates—your exact numbers will vary based on the specific chocolate and butter you use.
- Calories: 420 (Worth every single one!)
- Fat: 28g (14g saturated – thank you, glorious butter)
- Carbohydrates: 38g (32g sugars – most from that high-quality chocolate)
- Protein: 6g (Eggs to the rescue!)
- Fiber: 3g (Dark chocolate’s hidden superpower)
- Sodium: 120mg (Just enough salt to make the flavors pop)
- Cholesterol: 190mg (Special occasion indulgence, right?)
Now, before you panic about the numbers—remember this is a celebration dessert, not an everyday one. And here’s my nutritionist-approved justification: dark chocolate contains antioxidants, eggs provide protein, and happiness is calorie-free! I always balance mine with fresh berries for that virtuous feeling. 🤫
Nutritional values are estimates and vary based on ingredients used.
Frequently Asked Questions
Over the years, I’ve gotten so many questions about my chocolate lava cake recipe—here are the ones that pop up most often with all my hard-earned answers!
Q: Why didn’t my lava cake have a molten center?
Oh honey, I feel your pain! This usually means overbaking—even 1 extra minute can make the difference. Next time, set your timer for 12 minutes and peek—the edges should be set but the center still jiggly. Also check your oven temp with a thermometer; mine runs hot so I bake at 415°F instead of 425°F.
Q: Can I make the batter ahead of time?
Absolutely! Prepare the batter up to 24 hours ahead and keep it covered in the fridge. Just give it a quick stir before pouring into ramekins—you may need to add 1-2 extra minutes baking time since it’ll be cold. I do this for dinner parties all the time!
Q: What if I don’t have ramekins?
No worries! Oven-safe mugs work great (just grease them well). You can also use a muffin tin—fill cups 3/4 full and reduce baking time to 10-11 minutes. The cakes will be smaller but just as delicious!
Q: My cake stuck to the ramekin—help!
Been there! Next time, be extra generous with the butter when greasing—get into every nook. Also try dusting with cocoa powder instead of flour—it blends in better with chocolate cakes. If disaster strikes? Call it a “deconstructed” lava cake and serve with extra ice cream!
Q: Can I freeze chocolate lava cakes?
Honestly? I don’t recommend it. The texture changes and you lose that magical molten quality. Instead, freeze the unbaked batter in prepared ramekins (up to 1 month). Bake straight from frozen, adding 3-5 extra minutes.
Now that you’re armed with all my lava cake secrets—what are you waiting for? Grab that chocolate and get baking! Tag me @[YourHandle] when you make yours—I’d love to see your molten masterpieces!
Print
Irresistible Chocolate Lava Cake Recipe in Just 12 Minutes
- Total Time: 27 minutes
- Yield: 4 servings 1x
- Diet: Vegetarian
Description
A rich and decadent chocolate lava cake with a molten center.
Ingredients
- 1/2 cup unsalted butter
- 4 oz dark chocolate
- 1/2 cup granulated sugar
- 2 large eggs
- 2 large egg yolks
- 1/4 cup all-purpose flour
- 1/4 tsp salt
- 1 tsp vanilla extract
Instructions
- Preheat oven to 425°F (220°C).
- Grease and flour four ramekins.
- Melt butter and chocolate together.
- Whisk sugar, eggs, and egg yolks.
- Fold in chocolate mixture, flour, salt, and vanilla.
- Divide batter into ramekins.
- Bake for 12-14 minutes.
- Let cool slightly, then invert onto plates.
Notes
- Serve warm with ice cream.
- Do not overbake for molten center.
- Use high-quality chocolate.
- Prep Time: 15 minutes
- Cook Time: 12 minutes
- Category: Dessert
- Method: Baking
- Cuisine: French
Nutrition
- Serving Size: 1 cake
- Calories: 420
- Sugar: 32g
- Sodium: 120mg
- Fat: 28g
- Saturated Fat: 16g
- Unsaturated Fat: 10g
- Trans Fat: 0g
- Carbohydrates: 38g
- Fiber: 3g
- Protein: 6g
- Cholesterol: 190mg


