
Oh my gosh, you have to try this no-bake chocolate hazelnut rugelach! It’s my go-to when I’m craving something sweet but don’t want to turn on the oven – which, let’s be real, happens more often than I’d like to admit. The first time I made these, I couldn’t believe how easy they were. Just roll, fill, chill, and slice! No baking required, but you’d never guess from that rich chocolate-hazelnut flavor wrapped up in the most tender dough.
I originally stumbled upon this recipe when my oven broke right before a dinner party (panic mode!). These little spirals saved the day and became an instant favorite. Now they’re my secret weapon for last-minute guests or when I need a quick dessert fix. The best part? They taste fancy but take barely any effort – my kind of recipe!
Why You’ll Love This No-Bake Chocolate Hazelnut Rugelach
Let me count the ways this recipe will become your new best friend in the kitchen! First off, it’s perfect for those days when you’re craving something indulgent but can’t be bothered with baking. Trust me, I’ve been there more times than I can count.
Here’s what makes these little spirals so special:
- No oven required – Seriously, just mix, roll, and chill. Even on the hottest summer days when turning on the oven feels like torture, these come together beautifully.
- Rich, decadent flavor – That chocolate-hazelnut spread paired with toasted nuts? Absolute perfection. The first bite will have you closing your eyes in bliss.
- Foolproof technique – Unlike finicky baked pastries, these are nearly impossible to mess up. Even if your rolling isn’t perfect, they’ll still taste amazing.
- Ready in about an hour – Most of that’s chilling time, so you can multitask while they set up.
- Impresses everyone – They look fancy but couldn’t be simpler to make. Your guests will never guess how easy they were!
The best part? These taste even better the next day as the flavors meld together. Just try not to eat them all at once!
Ingredients for No-Bake Chocolate Hazelnut Rugelach
Gathering the right ingredients is half the battle with this recipe, and I’ve learned a few tricks along the way. The beauty of these ingredients? You probably have most in your pantry already! Here’s what you’ll need:
- 1 cup chocolate hazelnut spread – Use the good stuff here! I prefer the kind with real hazelnuts for maximum flavor.
- 1/2 cup finely chopped hazelnuts – Toast them first if you can – it brings out their incredible nutty aroma.
- 8 oz cream cheese, softened – Take it out of the fridge at least 30 minutes before. Trust me, cold cream cheese lumps are no fun to work with.
- 1/4 cup powdered sugar – Sift it if yours is clumpy for the smoothest dough.
- 1 tsp vanilla extract – Pure vanilla makes all the difference.
- 2 cups all-purpose flour – Spoon and level it – don’t scoop straight from the bag!
- 1/2 cup unsalted butter, softened – Room temp is key – it should give slightly when pressed.
- 1/4 tsp salt – Just a pinch to balance all that sweetness.
See? Simple ingredients, but when they come together, magic happens. Now let’s get mixing!
Equipment You’ll Need
You won’t need any fancy gadgets for these no-bake treats – just a few basics from your kitchen. Here’s what I always grab:
- Large mixing bowl (my trusty ceramic one works perfectly)
- Hand mixer or sturdy wooden spoon
- Rolling pin (or a wine bottle in a pinch!)
- Sharp knife for clean slices
- Parchment paper or silicone mat for rolling
That’s it! No special tools required – just simple, everyday items you probably already have on hand.
How to Make No-Bake Chocolate Hazelnut Rugelach
Okay, let’s get rolling – literally! This process is so simple, but I’ve got a few tricks up my sleeve to make sure your rugelach turns out perfect every time. Follow these steps, and you’ll have irresistible chocolate-hazelnut spirals in no time.
Step 1: Prepare the Dough
First, grab that softened cream cheese and butter – they should feel like they’ll give slightly when you press them. Toss them into your mixing bowl with the powdered sugar and vanilla. Now, here’s my secret: mix slowly at first to avoid that dreaded powdered sugar cloud!
Once combined, crank up the speed (or put some elbow grease into it if you’re using a spoon) until the mixture looks smooth and creamy. Little lumps now will turn into big lumps later, so take your time here. Gradually add the flour and salt, mixing just until the dough comes together. It should feel soft but not sticky – like perfect cookie dough!
Step 2: Roll and Fill
Flour your surface lightly – too much and your dough will be tough, too little and it’ll stick. Roll the dough into a rectangle about 1/4-inch thick. Don’t stress about perfection here! Mine always ends up more of a “rustic rectangle,” and they taste just as good.
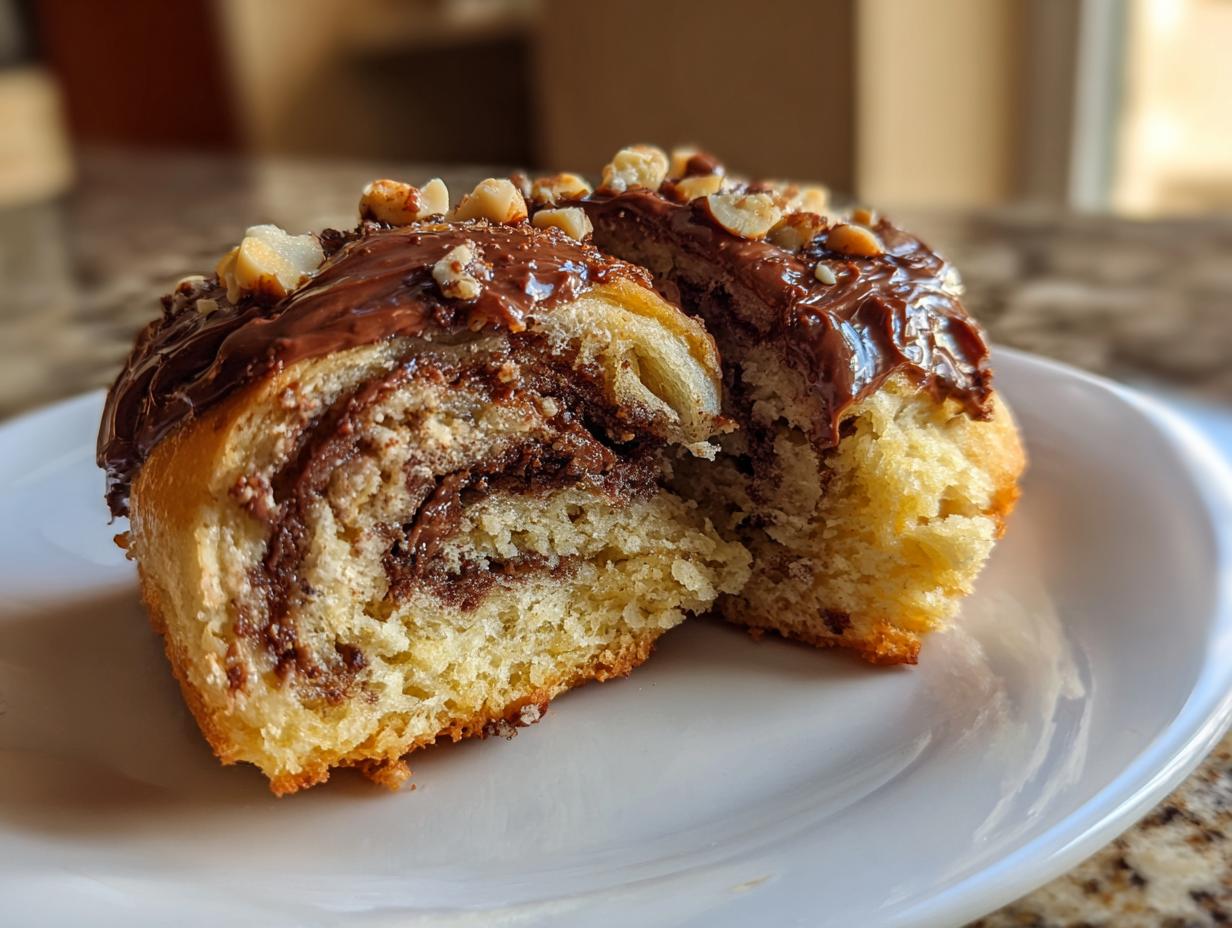
Now for the fun part: spread that glorious chocolate hazelnut spread evenly over the dough, leaving about a half-inch border. Sprinkle those toasted hazelnuts evenly over the top – I like to press them in slightly so they don’t all fall out when rolling.
Step 3: Chill and Slice
Starting from the long side, roll the dough tightly into a log. If it cracks a bit, don’t panic – just pinch it back together. Wrap it in plastic and pop it in the fridge for at least an hour. I know, waiting is hard, but this chilling step is crucial! It firms up the dough for clean slices.
When it’s time, use a sharp knife to slice the log into 1-inch pieces. Pro tip: wipe the knife between cuts for neat, pretty spirals. Arrange them on a plate and try not to eat them all at once – though I won’t judge if you do!
Tips for Perfect No-Bake Chocolate Hazelnut Rugelach
After making these dozens of times (okay, maybe hundreds – I have no self-control!), I’ve picked up some tricks that make all the difference:
- Flour lightly – When rolling, use just enough flour to prevent sticking. Too much makes the dough tough.
- Parchment paper is your friend – Roll directly on it for easy transfer to the fridge.
- Chill thoroughly – That hour in the fridge isn’t optional! It firms up the filling for clean slices.
- Warm your knife – Run it under hot water and dry before slicing for perfect spirals every time.
- Toast those nuts – Just 5 minutes in a dry pan transforms hazelnuts from good to incredible.
Remember – even “messy” rugelach tastes amazing, so don’t stress about perfection!
Variations and Substitutions
One of the best things about this recipe? It’s incredibly adaptable! Here are some of my favorite twists when I want to mix things up:
- Nut-free version: Swap the hazelnut spread for chocolate sunflower seed butter – it’s just as rich and delicious!
- Gluten-free: Use your favorite 1:1 gluten-free flour blend instead of all-purpose. The texture comes out perfect.
- Fruit lovers: Add a sprinkle of dried cherries or cranberries with the hazelnuts for a tart contrast.
- Almond joy: Try almond butter filling with chopped almonds and coconut flakes – so good!
- Dairy-free: Use plant-based cream cheese and butter alternatives – they work surprisingly well.
The possibilities are endless, so don’t be afraid to get creative with your favorite flavors!
Serving and Storing No-Bake Chocolate Hazelnut Rugelach
These little spirals are best served chilled – the filling firms up perfectly and makes them irresistible! I love arranging them on a pretty plate dusted with powdered sugar for special occasions, though honestly, we usually just grab them straight from the fridge (no judgment here). For storage, pop them in an airtight container in the fridge – they’ll stay perfect for up to 5 days… if they last that long! The flavors actually get better after a day or two, so feel free to make them ahead.
Nutritional Information
Just so you know, these nutritional estimates are per piece and can vary based on your specific ingredients. Each delicious spiral contains about 120 calories, with 7g of fat (3g saturated), 12g carbs, and 2g protein. The sugar comes mainly from that irresistible chocolate-hazelnut spread – totally worth it in my book!
Frequently Asked Questions
I get so many questions about these no-bake chocolate hazelnut rugelach – here are the ones that pop up most often from friends and readers:
Can I freeze these rugelach?
Absolutely! They freeze beautifully for up to 2 months. Just slice them first, then freeze in a single layer before transferring to an airtight container. Thaw in the fridge overnight when cravings strike.
Can I use store-bought dough instead?
While homemade dough gives the best texture, in a pinch you could use refrigerated pie crust. Just roll it thinner and expect a slightly different (but still delicious!) result.
Why did my filling ooze out when slicing?
This usually means the log wasn’t chilled enough. Pop it back in the fridge for another 30 minutes – patience pays off with perfect spirals!
Can I make these nut-free?
Of course! Swap the hazelnut spread for chocolate sunflower seed butter and omit the nuts. Still crazy delicious.
How long do they keep?
They’ll stay fresh in the fridge for 5 days – if they last that long! The flavors actually improve after a day or two.
Share Your Experience
I’d love to hear how your no-bake chocolate hazelnut rugelach turns out! Did you add any special twists? These little treats always spark fun kitchen stories – tell me yours below!
Print
Irresistible No-Bake Chocolate Hazelnut Rugelach in 1 Hour
- Total Time: 1 hour 20 mins
- Yield: 24 pieces 1x
- Diet: Vegetarian
Description
A simple no-bake dessert featuring chocolate and hazelnut flavors in a rugelach-style treat.
Ingredients
- 1 cup chocolate hazelnut spread
- 1/2 cup finely chopped hazelnuts
- 8 oz cream cheese, softened
- 1/4 cup powdered sugar
- 1 tsp vanilla extract
- 2 cups all-purpose flour
- 1/2 cup unsalted butter, softened
- 1/4 tsp salt
Instructions
- Mix cream cheese, butter, powdered sugar, and vanilla until smooth.
- Gradually add flour and salt until a dough forms.
- Roll dough into a rectangle on a floured surface.
- Spread chocolate hazelnut spread evenly over the dough.
- Sprinkle chopped hazelnuts on top.
- Roll the dough tightly into a log.
- Chill for 1 hour before slicing into pieces.
Notes
- Chill dough for easier handling.
- Use a sharp knife for clean slices.
- Store in an airtight container.
- Prep Time: 20 mins
- Cook Time: 0 mins
- Category: Dessert
- Method: No-Bake
- Cuisine: Jewish
Nutrition
- Serving Size: 1 piece
- Calories: 120
- Sugar: 8g
- Sodium: 45mg
- Fat: 7g
- Saturated Fat: 3g
- Unsaturated Fat: 3g
- Trans Fat: 0g
- Carbohydrates: 12g
- Fiber: 1g
- Protein: 2g
- Cholesterol: 10mg


