
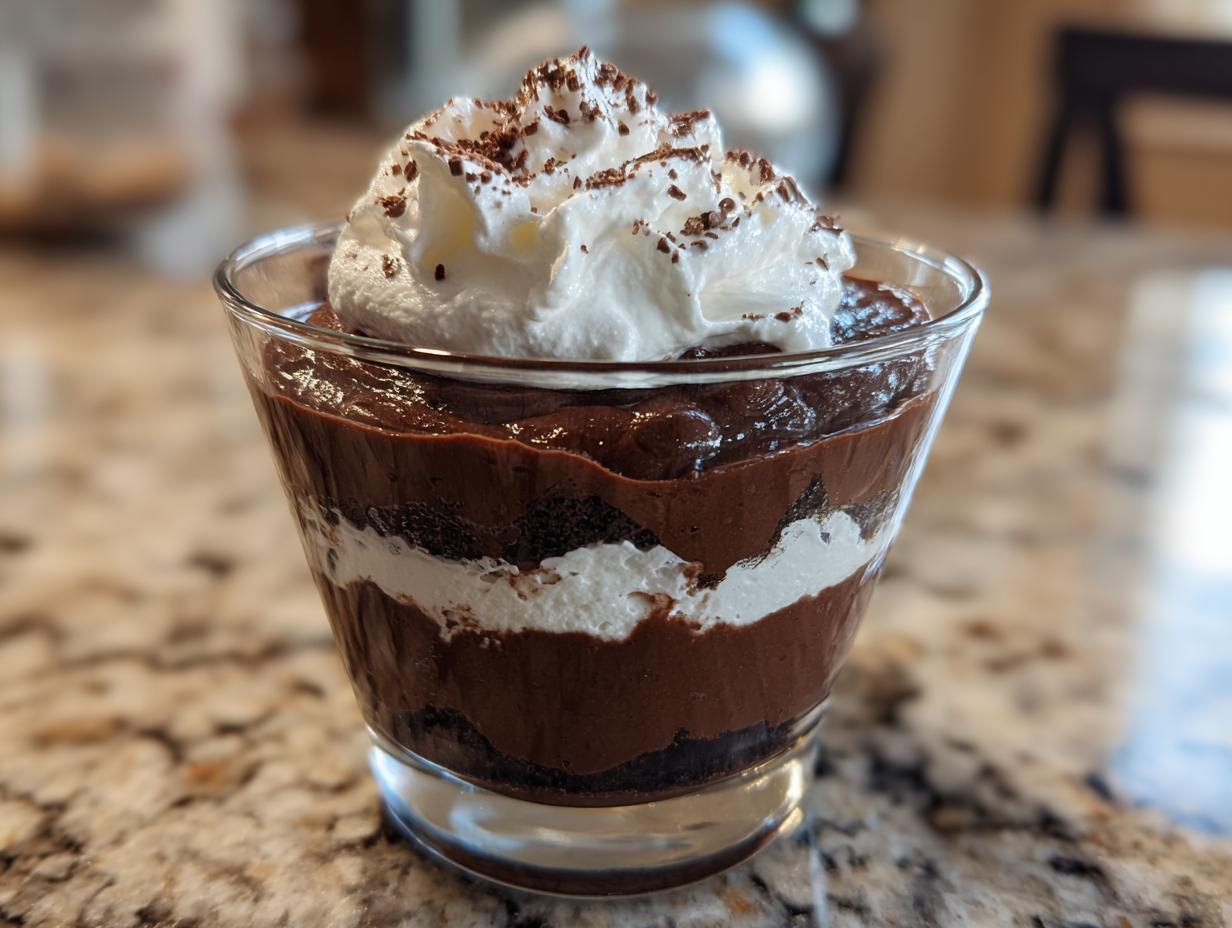
Oh my gosh, do I have a treat for you! I still remember sneaking into my grandma’s kitchen as a kid, fingers sticky from swiping chocolate pudding straight from the bowl. That deep, rich chocolate craving never left me, and these indulgent no-bake Brooklyn Blackout Cups? They’re my grown-up answer to those childhood sugar rushes. No oven, no fuss – just layers of chocolatey heaven in a cute little cup. Honestly, I make these when I need a quick chocolate fix or when friends pop over unexpectedly. They’re so easy, but taste like you spent hours in the kitchen!
Why You’ll Love These Indulgent No-Bake Brooklyn Blackout Cups
Let me tell you why these little cups of joy are about to become your new obsession:
- No oven required – Perfect for summer or when you just can’t be bothered to turn on the stove (we’ve all been there!)
- Rich chocolate flavor – Like biting into a slice of Brooklyn’s famous blackout cake, but in adorable single-serve portions
- Ready in a flash – 20 minutes of active prep, then just let the fridge do the rest of the work
- Crowd-pleaser – I bring these to every potluck and watch them disappear before the main course is served
- Endless topping options – Get creative with whipped cream, berries, or even a sprinkle of sea salt for that sweet-salty kick
Trust me, once you try these, you’ll be making them on repeat like I do!
Ingredients for Indulgent No-Bake Brooklyn Blackout Cups
Here’s what you’ll need to make these chocolatey wonders. I’m picky about my ingredients because, let’s be honest, with such a simple recipe, quality really shines through:
For the Crust:
- 1 1/2 cups chocolate cookie crumbs (I use Oreos – just the cookies, not the filling!)
- 1/4 cup melted butter (salted gives that nice contrast to the sweet)
For the Chocolate Ganache:
- 8 oz good-quality dark chocolate (chopped – I like 60-70% cacao for balance)
- 1 cup heavy cream (don’t skimp – full fat makes all the difference!)
- 1/4 cup powdered sugar (sifted to avoid lumps)
- 1 tsp vanilla extract (the real stuff, please!)
For Assembly:
- 1/2 cup chocolate pudding (homemade or store-bought – I won’t tell!)
- Whipped cream for topping (the cloud-like finish makes it extra special)
See? Nothing too crazy, but when these simple ingredients come together… oh boy, magic happens!
Equipment You’ll Need
Don’t worry – you won’t need any fancy equipment for these beauties! Here’s what I grab from my kitchen:
- 6 small serving cups or ramekins (I use 6-oz ones – perfect portion size!)
- Medium mixing bowl (for that glorious crust mixture)
- Small saucepan (to heat the cream just right)
- Whisk (trust me, better than a spoon for smooth ganache)
- Measuring cups and spoons (precision matters with chocolate)
That’s it! No stand mixer, no special gadgets – just simple tools you probably already have.
How to Make Indulgent No-Bake Brooklyn Blackout Cups
Alright, let’s get to the fun part – making these chocolate dreams come true! I’ll walk you through each step because, while this recipe is easy, there are a few tricks I’ve learned to make them absolutely perfect every time.
Step 1: Prepare the Crust
First things first – that buttery, chocolatey base! Mix your cookie crumbs and melted butter until it looks like wet sand. Now here’s my secret: use the bottom of a glass or measuring cup to really press the mixture firmly into your cups. You want an even layer about 1/4-inch thick – this keeps everything from crumbling when you dig in later. I always do a little test – if I tilt the cup and nothing moves, it’s perfect!
Step 2: Make the Chocolate Ganache
This is where the magic happens. Heat your cream just until you see little bubbles around the edges – don’t let it boil! Pour it over your chopped chocolate and here’s the important part: walk away for 2 full minutes. I know it’s tempting, but letting it sit allows the chocolate to melt gently. When you come back, start whisking from the center outwards until it’s gloriously smooth. Add your sugar and vanilla – the vanilla makes all the other flavors pop!
Step 3: Layer and Chill
Now the fun assembly! Pour half your ganache over the crusts – it should cover them completely. Pop them in the fridge for 15 minutes (set a timer – I’ve forgotten before!). Then comes the pudding layer – about a tablespoon per cup. Top with the remaining ganache, and here’s the hard part: walk away for 2 hours. I know, I know! But trust me, that patience pays off with perfect, sliceable layers that’ll make you look like a pastry pro.
Tips for Perfect Indulgent No-Bake Brooklyn Blackout Cups
Listen, I’ve made these enough times to learn all the little tricks that take them from good to “Oh my god, how did you make these?!” Here are my can’t-live-without tips:
- Full-fat is the way to go – That heavy cream? Don’t even think about substituting. The richness makes the ganache silky smooth.
- Chill before serving – I know the wait is torture, but that 2-hour chill sets the layers perfectly so you get clean spoonfuls.
- Room temp ingredients – Let your cream sit out for 10 minutes before heating – it prevents the chocolate from seizing up.
- Dust with love – A light sprinkle of cocoa powder or chocolate shavings right before serving? Chef’s kiss!
Follow these, and you’ll have cups worth bragging about!
Variations and Substitutions
One of my favorite things about this recipe? How easily you can mix it up! Here are some delicious twists I’ve tried (and loved):
- Gluten-free friends? Use gluten-free chocolate cookies for the crust – the texture stays perfect!
- Not a dark chocolate fan? Swap in milk chocolate for a sweeter, creamier ganache (just reduce the sugar a bit).
- Dairy-free option: Coconut cream works beautifully instead of heavy cream – it adds a subtle tropical note that’s amazing.
- Extra crunch: Stir some chopped nuts or toffee bits into the crust mixture for texture.
- Fruit lovers: Layer in some raspberry jam between the ganache and pudding for a chocolate-berry explosion.
Just remember – the richer your chocolate, the firmer your ganache will set. Play around and make it your own!
Serving and Storing Indulgent No-Bake Brooklyn Blackout Cups
Oh, the best part – eating these beauties! Always serve them chilled – I like to pull them out of the fridge just 5 minutes before serving to take the edge off the cold. A dollop of fresh whipped cream on top is non-negotiable in my house (and maybe a cherry if I’m feeling fancy). As for leftovers (ha! as if!), they’ll keep beautifully in the fridge for up to 3 days – just cover them tightly. Don’t freeze them though – the texture turns grainy and sad. Trust me, I learned that the hard way!
Nutritional Information
Now let’s be real – these are definitely an indulgent treat! Here’s the scoop on what’s in each heavenly cup (based on my exact recipe):
- 420 calories
- 30g fat (18g saturated)
- 35g carbs
- 28g sugar
- 5g protein
Remember, these numbers can change depending on your ingredients – like if you use milk chocolate instead of dark, or add extra toppings. But hey, when you’re enjoying something this delicious, who’s counting? Everything in moderation, right?
Frequently Asked Questions
Can I use store-bought pudding?
Absolutely! While homemade pudding gives that extra-rich flavor, store-bought works just fine in a pinch. I’ve done both – just make sure to get the chocolate kind (not vanilla!) and give it a quick stir before layering to smooth it out.
How do I make these vegan?
Easy peasy! Swap the butter for coconut oil in the crust, use coconut cream instead of heavy cream for the ganache, and pick up some dairy-free chocolate. The texture comes out slightly different (a bit softer), but still delicious! I’ve even used banana pudding for the middle layer when I was feeling adventurous.
Can I double the recipe?
You bet! Just use twice as many cups and keep an eye on chilling times – the ganache might take an extra 15-20 minutes to set completely when you make more. I’ve made quadruple batches for parties before – they disappear fast!
Share Your Experience
I’d love to hear how your Brooklyn Blackout Cups turn out! Drop me a comment below with your thoughts – did you add any fun twists? Snap a photo of your chocolatey creations too! Nothing makes me happier than seeing you all enjoy these little cups of joy as much as I do.
Print
20-Minute Indulgent No-Bake Brooklyn Blackout Cups You’ll Crave
- Total Time: 2 hours 20 minutes
- Yield: 6 servings 1x
- Diet: Vegetarian
Description
Rich and indulgent no-bake dessert cups inspired by Brooklyn blackout cake. Perfect for chocolate lovers.
Ingredients
- 1 1/2 cups chocolate cookie crumbs
- 1/4 cup melted butter
- 1 cup heavy cream
- 8 oz dark chocolate, chopped
- 1/4 cup powdered sugar
- 1 tsp vanilla extract
- 1/2 cup chocolate pudding
- Whipped cream for topping
Instructions
- Mix cookie crumbs and melted butter. Press into cups.
- Heat cream until steaming. Pour over chocolate and let sit for 2 minutes.
- Whisk chocolate and cream until smooth. Add sugar and vanilla.
- Pour half the chocolate mixture over the crust. Chill for 15 minutes.
- Add a layer of chocolate pudding. Top with remaining chocolate mixture.
- Chill for at least 2 hours. Serve with whipped cream.
Notes
- Use high-quality chocolate for best results.
- Chill cups before serving for a firmer texture.
- Garnish with chocolate shavings if desired.
- Prep Time: 20 minutes
- Cook Time: 0 minutes
- Category: Dessert
- Method: No-Bake
- Cuisine: American
Nutrition
- Serving Size: 1 cup
- Calories: 420
- Sugar: 28g
- Sodium: 180mg
- Fat: 30g
- Saturated Fat: 18g
- Unsaturated Fat: 9g
- Trans Fat: 0g
- Carbohydrates: 35g
- Fiber: 3g
- Protein: 5g
- Cholesterol: 45mg


