
Picture this: you’re craving something decadent, but the oven’s off-limits. Enter these Luxe No-Bake Mocha Tiramisu Cups—your ticket to effortless indulgence. I first fell for tiramisu in a tiny Venetian café, where the barista winked as he dusted cocoa over my cup. Years later, I’ve perfected this no-fuss version that captures that same magic. The secret? A generous splash of cold brew in the cream and just enough coffee liqueur to make it grown-up fancy. No baking, no stress—just layers of coffee-kissed ladyfingers and cloud-like mascarpone that’ll have everyone begging for your “recipe hack.”
Why You’ll Love These Luxe No-Bake Mocha Tiramisu Cups
Trust me, these little cups of joy will become your go-to dessert for every occasion. Here’s why:
- No oven required – perfect for hot summer days or lazy evenings
- Ready in 20 minutes (plus chilling time – but who’s counting?)
- That magical mocha flavor that coffee addicts (like me!) adore
- Looks fancy enough for dinner parties but easy enough for weeknights
Effortless Elegance
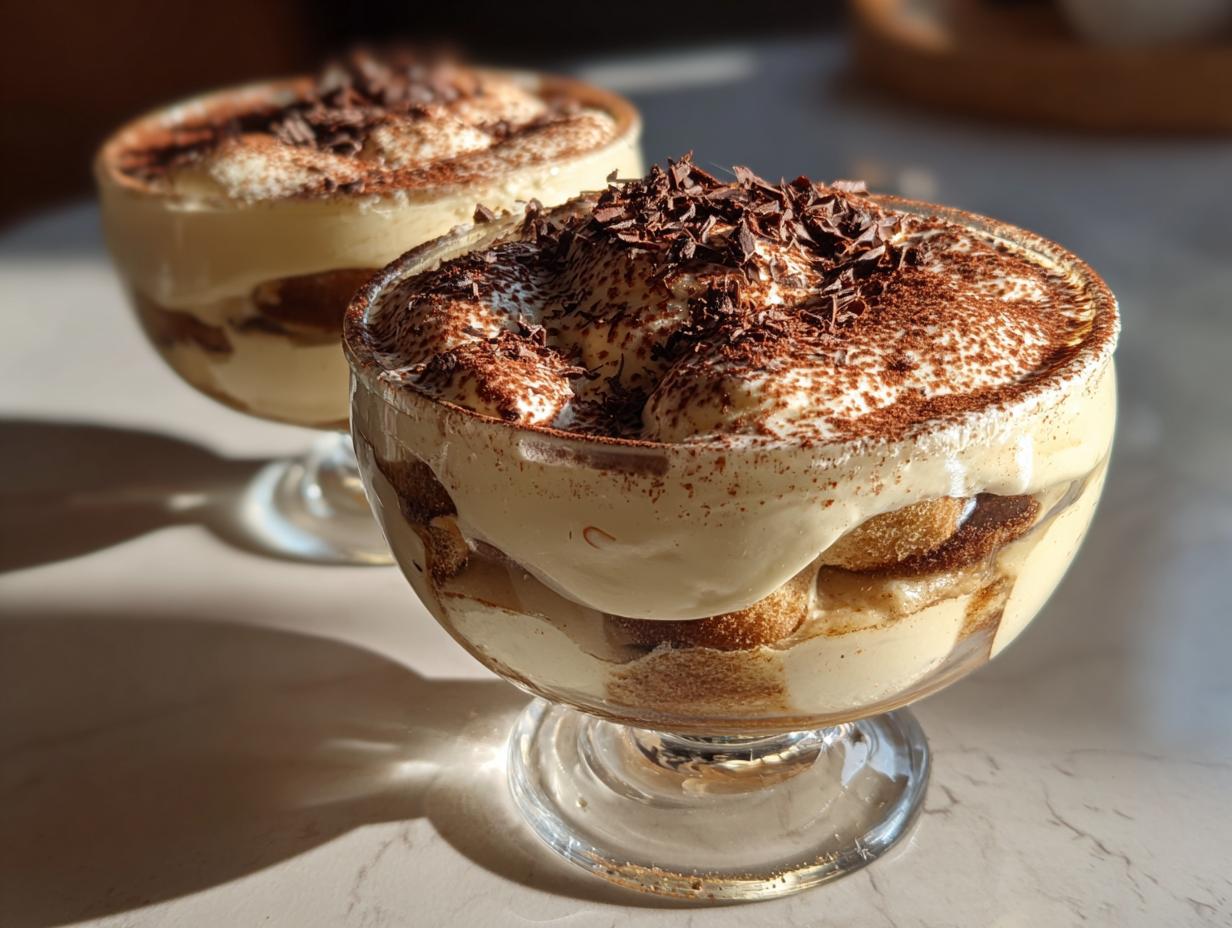
I love how these individual cups make everyone feel special – no messy slicing required! The layers practically assemble themselves, and that final dusting of cocoa powder? Pure magic. Pro tip: use a fine-mesh sieve for that picture-perfect finish that’ll have your guests thinking you spent hours in the kitchen.
Coffee Lover’s Dream
That first bite hits you with the perfect balance – rich mascarpone cream, the slight bitterness of good coffee, and just a hint of chocolate. I use a double shot of espresso in mine (because why not?), but regular strong brew works beautifully too. The mocha flavor develops as it chills, so by serving time, it’s absolute perfection.
Ingredients for Luxe No-Bake Mocha Tiramisu Cups
Gathering the right ingredients is half the battle with these beauties. Here’s what you’ll need (and a few insider tips I’ve picked up along the way):
- Creamy Dream Team:
- 1 cup heavy cream, ice cold (trust me, it whips better when chilled)
- 8 oz mascarpone cheese, softened at room temp for 30 mins
- 1/4 cup powdered sugar (sifted if you’re feeling fancy)
- 1 tsp pure vanilla extract (the good stuff makes all the difference)
- Coffee Soak Magic:
- 1 cup strong brewed coffee, completely cooled (I use cold brew concentrate for extra oomph)
- 2 tbsp coffee liqueur (optional but oh-so-worth-it – Kahlúa is my ride-or-die)
- The Foundation:
- 24 ladyfinger cookies (Savoiardi work best – they hold up without getting mushy)
- Finishing Touches:
- 2 tbsp cocoa powder (Dutch-processed gives that gorgeous dark color)
- 1 oz dark chocolate, finely grated (about 70% cacao – use a microplane for snow-like flakes)
Pro tip: Set everything out before you start. There’s nothing worse than realizing your mascarpone’s still rock-hard from the fridge when you’re mid-recipe (been there, cried over that).
How to Make Luxe No-Bake Mocha Tiramisu Cups
Now for the fun part – bringing all those gorgeous ingredients together! Don’t let the fancy name fool you; this is one of the easiest desserts you’ll ever make. I’ve broken it down into simple steps that even my coffee-crazed teenager can follow (and he’s mastered it after watching me make it weekly).
Step 1: Whip the Cream
First things first – grab your coldest bowl (I pop mine in the freezer for 10 minutes if I’m being extra) and pour in that heavy cream. Whip it on medium-high until you see soft peaks form – that’s when the whisk leaves trails that slowly disappear. Now here’s my secret: switch to hand-whisking for the last 30 seconds. This prevents overbeating (nobody wants grainy cream!) and gives you those perfect, cloud-like stiff peaks that hold their shape when you swipe your finger through.
Step 2: Mix the Mascarpone Layer
In another bowl, beat the softened mascarpone with powdered sugar and vanilla until it’s completely smooth – no lumps allowed! Now comes the magic: gently fold in the whipped cream with a rubber spatula. I do this in three batches, turning the bowl as I go. “Fold” means cut through the center, scrape along the bottom, and turn over – pretend you’re tucking a baby in with each motion. The mixture should look like billowy coffee clouds when you’re done.
Step 3: Assemble the Layers
Time for the dunk-and-layer dance! Mix your cooled coffee and liqueur in a shallow dish. Here’s the key: dip each ladyfinger for just 1-2 seconds per side – any longer and they’ll turn to mush (learned that the hard way at my first dinner party disaster). Arrange a layer in your cups, spread half the cream mixture, then repeat. Top with a final flourish of sifted cocoa and those beautiful chocolate curls. Pop them in the fridge for at least 4 hours – the waiting is torture, but the flavors need time to mingle and become best friends.
Pro tip: For picture-perfect layers, use a piping bag for the cream mixture. It gives you control and makes you feel like a pastry chef, even if you’re just wearing pajama pants!
Expert Tips for Perfect Luxe No-Bake Mocha Tiramisu Cups
After making these cups more times than I can count (and surviving a few kitchen disasters along the way), I’ve learned some tricks that’ll guarantee perfect results every time. Here are my can’t-live-without tips:
Chill everything for whipped cream success
I mean it – your bowl, your beaters, even your measuring cup if you’re feeling extra. Cold tools make the difference between billowy peaks and sad, soupy cream. If you’re short on time, toss your mixing bowl in the freezer for 10 minutes while you gather other ingredients. You’ll thank me later when your cream holds its shape like a dream.
Decaf works beautifully too
Want to enjoy these after dinner without the caffeine jitters? Swap in decaf coffee – no one will know the difference. I’ve served these at late-night gatherings using decaf cold brew, and they disappeared just as fast as the regular version. The flavor’s all there, just without the midnight energy boost.
The ladyfinger dip test
Here’s how I know my coffee soak is perfect: dip one ladyfinger for exactly 2 seconds, then break it in half. If the center is still dry-ish with just a hint of moisture creeping in, you’ve nailed it. If it’s soggy all the way through, dilute your coffee mixture with a tablespoon of water. This little test has saved me from mushy tiramisu disasters more times than I’d like to admit.
Make-ahead magic
These cups actually taste better after 24 hours in the fridge – the flavors meld together beautifully. I often assemble them the night before a party, then just add the final cocoa dusting right before serving. The mascarpone cream firms up perfectly, making each spoonful pure heaven.
Variations & Substitutions
One of the best things about this recipe? It’s crazy adaptable! Here are some of my favorite twists for when I’m feeling creative or need to work with what’s in my pantry:
- Liqueur Swap: Out of coffee liqueur? Try amaretto for an almond kick or dark rum for extra richness. My friend swears by a splash of Irish cream – I won’t argue!
- Vegan Vibes: Use coconut cream (chilled overnight) instead of heavy cream, and there are some fantastic vegan mascarpone alternatives now. Just add a teaspoon of lemon juice to mimic that slight tang.
- Chocolate Lover’s Dream: Stir 2 tablespoons of cocoa powder into the mascarpone mixture for double chocolate action. Top with chocolate shavings instead of grated – because why not?
- Spiced Version: Add a pinch of cinnamon or cardamom to the coffee soak for a warm, cozy twist that’s perfect for fall gatherings.
- Ladyfinger Hack: In a pinch, soft sponge cake cut into fingers works too – just dip even quicker (like 1 second per side) since it’s more absorbent.
The beauty of these cups is how forgiving they are – almost any tweak turns out delicious. Just promise me you’ll always use good coffee; that’s the one non-negotiable in my book!
Serving & Storing Luxe No-Bake Mocha Tiramisu Cups
Here’s the thing about these beauties – they need a little patience (I know, torture!) but the payoff is absolutely worth it. After assembling, tuck them into the fridge for at least 4 hours, though overnight is even better. That waiting time lets the flavors really get to know each other – the coffee mellows, the cream sets up perfectly, and every bite becomes pure magic.
When it’s showtime, I love adding a few extra touches to make them feel extra special:
- A light second dusting of cocoa powder right before serving (it looks so professional!)
- Fresh coffee beans or chocolate-covered espresso beans as garnish
- A sprig of mint for color contrast (my mom’s trick)
- Mini chocolate spoons for serving – because why not be extra?
As for storage, these cups keep beautifully in the fridge for up to 3 days – just cover them with plastic wrap. The texture actually improves on day two! If you need to store them longer, you can freeze them for up to a month (though the ladyfingers will be softer when thawed). Pro tip: Add any fresh garnishes after thawing, not before freezing.
One last serving note: take them out of the fridge about 10 minutes before eating. That slight softening makes the cream even more luscious. Now grab your spoon and dive in – you’ve earned this moment of pure indulgence!
Nutritional Information
Now, I’m no nutritionist, but I do believe in enjoying dessert without guilt – especially when you know exactly what’s going into it! Here’s the breakdown for one of these heavenly cups (because let’s be real, no one’s stopping at half):
- Calories: 320 (worth every single one!)
- Fat: 22g (13g saturated – hello, luxurious mascarpone!)
- Carbs: 25g (15g sugar – mostly from those lovely ladyfingers)
- Protein: 5g (Surprise! There’s actually some protein in there)
A quick heads-up: these numbers can vary depending on the brands you use. My Italian-market mascarpone tends to be richer than the grocery store version, and homemade whipped cream makes all the difference. The coffee liqueur adds about 15 extra calories per serving if you include it – but trust me, it’s a flavor investment you won’t regret.
For my gluten-free friends: swap in gluten-free ladyfingers and you’re golden. And if you’re watching sugar, you can reduce the powdered sugar by a tablespoon – the coffee flavor still shines through beautifully.
FAQs About Luxe No-Bake Mocha Tiramisu Cups
After sharing this recipe with countless friends (and fielding their frantic texts mid-baking), I’ve rounded up the most common questions—plus all my hard-earned solutions. Consider this your tiramisu troubleshooting guide!
Can I make these ahead for a party?
Absolutely! These cups actually taste better after 24 hours in the fridge—the flavors meld like old friends. Assemble them the night before (skip the final cocoa dusting), then add that picture-perfect topping just before serving. The cream firms up beautifully, making each spoonful pure heaven.
Help! My ladyfingers turned to mush—what went wrong?
Ah, the classic rookie mistake (I’ve been there!). The key is the 1-2 second dip rule—any longer and they’ll disintegrate. Test one first: dip, count “one Mississippi,” flip, count again, then break it open. If the center’s still slightly dry, you’ve nailed it. Too wet? Dilute your coffee mix with a tablespoon of water.
What’s the best substitute for coffee liqueur?
No Kahlúa? No problem! Try 1 tbsp rum + 1 tsp vanilla extract, or 2 tbsp cold brew concentrate for extra coffee punch. My sister swears by almond extract for a nutty twist—just use half the amount since it’s stronger.
Can I freeze these for later?
You can, but with a caveat: freeze them before adding cocoa powder, and expect slightly softer ladyfingers after thawing. They’ll keep for a month—just thaw overnight in the fridge. Pro tip: freeze in mason jars for cute single-serve portions!
Why did my whipped cream deflate?
Two likely culprits: overbeating (stop at stiff peaks!) or warm bowls. Chill everything—even your mixing bowl—before starting. If disaster strikes, fold in another 1/4 cup cold cream and re-whip gently. And remember: even slightly droopy cream still tastes amazing!
Ready to Try This Recipe?
Now that you’ve got all my best tips and tricks, I can’t wait for you to experience these Luxe No-Bake Mocha Tiramisu Cups for yourself! Trust me, once you see how easy they are and taste that first perfect bite, you’ll be hooked just like I was back in Venice. Whip these up for your next girls’ night, date night, or just because it’s Tuesday – no occasion needed when dessert’s this good.
When you make them (because you totally should!), I’d love to hear how they turned out. Did you add any fun twists? Did your family go crazy for them like mine does? Snap a pic of your gorgeous layered creations and tag me – I live for those kitchen victory moments! And if you’re feeling generous, drop a rating below to let others know what they’re missing. Happy no-bake indulging, my friend – may your cream always whip perfectly and your coffee always be strong!
Print
21 Irresistible Luxe No-Bake Mocha Tiramisu Cups Bliss
- Total Time: 4 hours 20 minutes
- Yield: 6 servings 1x
- Diet: Vegetarian
Description
Indulge in these luxurious no-bake mocha tiramisu cups. Perfect for any occasion, they combine rich coffee flavors with creamy mascarpone for a delightful dessert.
Ingredients
- 1 cup heavy cream
- 8 oz mascarpone cheese
- 1/4 cup powdered sugar
- 1 tsp vanilla extract
- 1 cup strong brewed coffee, cooled
- 2 tbsp coffee liqueur (optional)
- 24 ladyfinger cookies
- 2 tbsp cocoa powder
- 1 oz dark chocolate, grated
Instructions
- Whip the heavy cream until stiff peaks form.
- In a separate bowl, mix mascarpone, powdered sugar, and vanilla until smooth.
- Fold the whipped cream into the mascarpone mixture.
- Combine cooled coffee and coffee liqueur in a shallow dish.
- Dip each ladyfinger into the coffee mixture for 1-2 seconds.
- Layer the soaked ladyfingers and cream mixture in serving cups.
- Repeat layers, finishing with the cream mixture.
- Dust with cocoa powder and sprinkle grated chocolate on top.
- Refrigerate for at least 4 hours before serving.
Notes
- For a non-alcoholic version, omit the coffee liqueur.
- Store in the refrigerator for up to 3 days.
- Use decaf coffee if preferred.
- Prep Time: 20 minutes
- Cook Time: 0 minutes
- Category: Dessert
- Method: No-Bake
- Cuisine: Italian
Nutrition
- Serving Size: 1 cup
- Calories: 320
- Sugar: 15g
- Sodium: 80mg
- Fat: 22g
- Saturated Fat: 13g
- Unsaturated Fat: 7g
- Trans Fat: 0g
- Carbohydrates: 25g
- Fiber: 1g
- Protein: 5g
- Cholesterol: 90mg


