
You should’ve seen my dog Max’s face when I surprised him with these Party Chocolate Peanut Butter Pupcakes for his birthday last year—total tail-wagging, drool-worthy excitement! There’s something magical about baking treats for your pup that’s just as fun as making human desserts (minus the sugar crash, of course). These pupcakes are packed with dog-safe ingredients like xylitol-free peanut butter and unsweetened cocoa, so you can celebrate your furry friend without worry. Whether it’s a birthday, adoption anniversary, or just a “because-you’re-awesome” day, these moist, chocolatey bites will have your pup doing happy spins. Trust me, the look on their face is worth every minute of mixing!
Why You’ll Love These Party Chocolate Peanut Butter Pupcakes
Let me count the ways these pupcakes will become your go-to for spoiling your four-legged best friend:
- So easy even a distracted dog parent can make them – Just 6 simple ingredients and one bowl? Yes please!
- 100% pup-approved ingredients – No sneaky sugars or xylitol here, just wholesome stuff that makes tails wag
- Instant party mood – Nothing says “you’re special” like serving cupcakes at doggy birthday celebrations
- Healthier than store treats – You control exactly what goes in (no mystery “meat meal” here!)
Seriously, watching your dog’s nose twitch as these bake is half the fun. The other half? Seeing them demolish their special treat with zero guilt on your part!
Ingredients for Party Chocolate Peanut Butter Pupcakes
Gather these simple, pup-friendly ingredients – I promise you probably have most in your pantry already! The key is using xylitol-free peanut butter (this is non-negotiable for safety) and unsweetened cocoa powder (regular baking cocoa works great). Here’s what you’ll need:
- 1 cup whole wheat flour (or oat flour for sensitive tummies)
- 1/4 cup unsweetened cocoa powder – the good stuff dogs go crazy for!
- 1/4 cup xylitol-free peanut butter – creamy or chunky, your pup’s choice
- 1/4 cup unsweetened applesauce – for natural sweetness and moisture
- 1 large egg – helps bind everything together
- 1/2 cup water – to bring the batter to perfect pupcake consistency
See? Nothing weird or complicated – just real ingredients you can feel good about feeding your best furry friend!
How to Make Party Chocolate Peanut Butter Pupcakes
Okay, let’s get baking! These pupcakes come together so easily—you’ll be done before your pup finishes their first nap of the day. Just follow these simple steps for perfect, tail-wagging results every time.
Preparing the Batter
First things first: grab two bowls—one for dry ingredients, one for wet. In the first bowl, whisk together that whole wheat flour and cocoa powder until they’re totally combined (no sneaky flour lumps!). In the second bowl, mix the peanut butter, applesauce, and egg until they’re smooth and creamy. Pro tip: if your peanut butter is super thick, warm it for 10 seconds to make mixing easier—just don’t let it get hot!
Now, slowly pour the dry ingredients into the wet mixture while stirring. Add the water a little at a time—you want a thick but spoonable batter, like pancake mix. If it looks too dry, add an extra splash of water. Too wet? A sprinkle more flour. Easy-peasy!
Baking and Cooling
While you mix, preheat your oven to 350°F (175°C) and line a muffin tin with cupcake liners (or grease it lightly). Fill each cup halfway—these pupcakes puff up just enough! Pop them in the oven for 15-20 minutes. You’ll know they’re done when the tops spring back when lightly touched, and a toothpick comes out clean (no wet batter).
Here’s the hard part: let them cool completely before serving! I know those puppy eyes are irresistible, but warm pupcakes can be crumbly. Once cooled, frost them or serve plain—either way, prepare for serious tail wags!
Tips for Perfect Party Chocolate Peanut Butter Pupcakes
Want foolproof pupcakes every time? Here are my hard-earned tricks from countless batches (and many happy taste-testers!):
- Peanut butter patrol: Always double-check labels for xylitol—it’s toxic to dogs and hides in surprising places!
- Mix with love (but not too much): Stir just until combined—overmixing makes tough pupcakes.
- Storage smarts: Keep unfrosted pupcakes in an airtight container for 3 days, or freeze for up to a month.
Bonus tip: Let your pup “help” clean the bowl—licking peanut butter is half the fun!
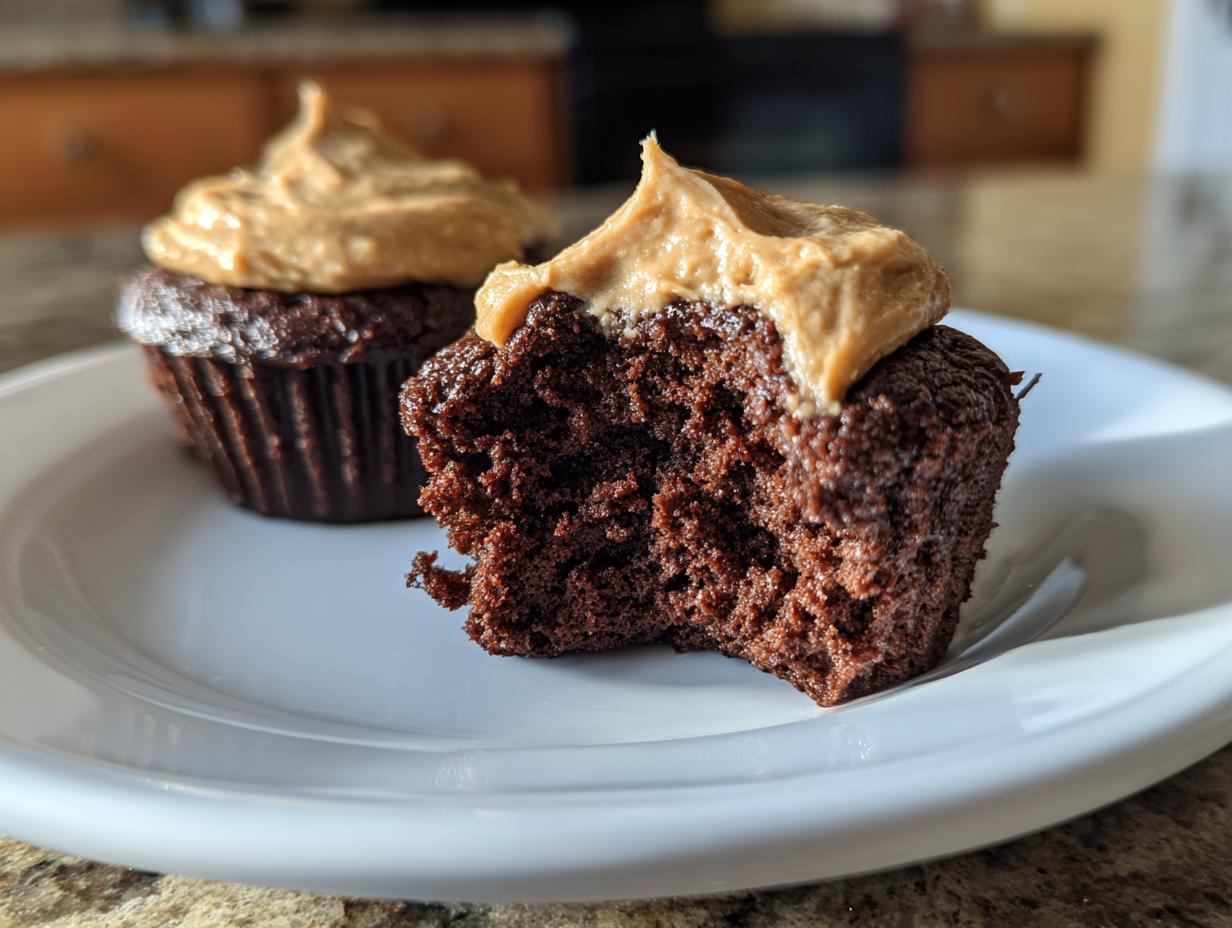
Frosting and Decoration Ideas
Now for the really fun part—dressing up these pupcakes! My go-to is a simple mix of plain Greek yogurt and xylitol-free peanut butter (about 2:1 ratio). Chill it for 20 minutes, then pipe or spread it on cooled pupcakes. For special occasions, I top with a tiny carrot slice or a sprinkle of crushed dog biscuits. Just remember: no human frosting (way too much sugar!), and if your dog’s lactose-sensitive, skip the yogurt and use peanut butter alone. Trust me, your pup won’t care how fancy it looks—they’ll be too busy licking their chops!
Storage and Serving Suggestions
These pupcakes stay fresh in an airtight container at room temperature for up to 3 days—if they last that long! If you’ve used yogurt frosting, pop them in the fridge (your pup won’t mind a cold treat!). I usually cut them in halves or quarters for smaller dogs—portion control is key unless you want one very hyper pup on your hands!
Nutritional Information
Just like us, our pups need balanced treats! Nutritional values are estimates and vary by ingredients. Per pupcake (without frosting): about 120 calories, 5g fat, and 4g protein – enough to feel special without overdoing it. Perfect for celebrating responsibly!
Frequently Asked Questions
Can I use regular flour instead of whole wheat?
Absolutely! All-purpose flour works just fine if that’s what you have. Some dogs with sensitive stomachs actually do better with oat flour—just swap it 1:1.
Are these pupcakes safe for puppies?
Yes, but in moderation! Puppies can enjoy these from about 12 weeks old. Just cut them into smaller pieces—their little tummies don’t need a whole cupcake at once.
How long do these stay fresh?
Unfrosted pupcakes last 3 days in an airtight container. The yogurt-peanut butter frosting keeps for 2 days in the fridge. Pro tip: Freeze extras and thaw as needed for impromptu pup parties!
My dog is allergic to peanut butter—any substitutions?
No problem! Try pumpkin puree or mashed banana instead. The texture will be slightly different, but the tail wags will be just as enthusiastic.
Share Your Pupcake Success
Did your pup go crazy for these treats? Snap a pic of their frosting-covered snoot and tag #PupcakeParty – I’d love to see your four-legged food critics in action! Your baking adventures might just inspire other dog parents too.
Print
7 Party Chocolate Peanut Butter Pupcakes Your Dog Will Devour
- Total Time: 30 mins
- Yield: 6 pupcakes 1x
- Diet: Low Lactose
Description
Delicious chocolate peanut butter pupcakes perfect for your dog’s party or special occasion. These treats are safe and tasty for your furry friend.
Ingredients
- 1 cup whole wheat flour
- 1/4 cup unsweetened cocoa powder
- 1/4 cup peanut butter (xylitol-free)
- 1/4 cup unsweetened applesauce
- 1 egg
- 1/2 cup water
Instructions
- Preheat oven to 350°F (175°C). Line a muffin tin with cupcake liners.
- Mix flour and cocoa powder in a bowl.
- Add peanut butter, applesauce, egg, and water. Stir until combined.
- Fill each muffin cup halfway with batter.
- Bake for 15-20 minutes or until a toothpick comes out clean.
- Let cool completely before serving.
Notes
- Use xylitol-free peanut butter to keep it safe for dogs.
- Store in an airtight container for up to 3 days.
- For frosting, mix plain yogurt with peanut butter and chill before piping.
- Prep Time: 10 mins
- Cook Time: 20 mins
- Category: Dog Treats
- Method: Baking
- Cuisine: Pet-Friendly
Nutrition
- Serving Size: 1 pupcake
- Calories: 120
- Sugar: 2g
- Sodium: 50mg
- Fat: 5g
- Saturated Fat: 1g
- Unsaturated Fat: 3g
- Trans Fat: 0g
- Carbohydrates: 15g
- Fiber: 2g
- Protein: 4g
- Cholesterol: 20mg


