
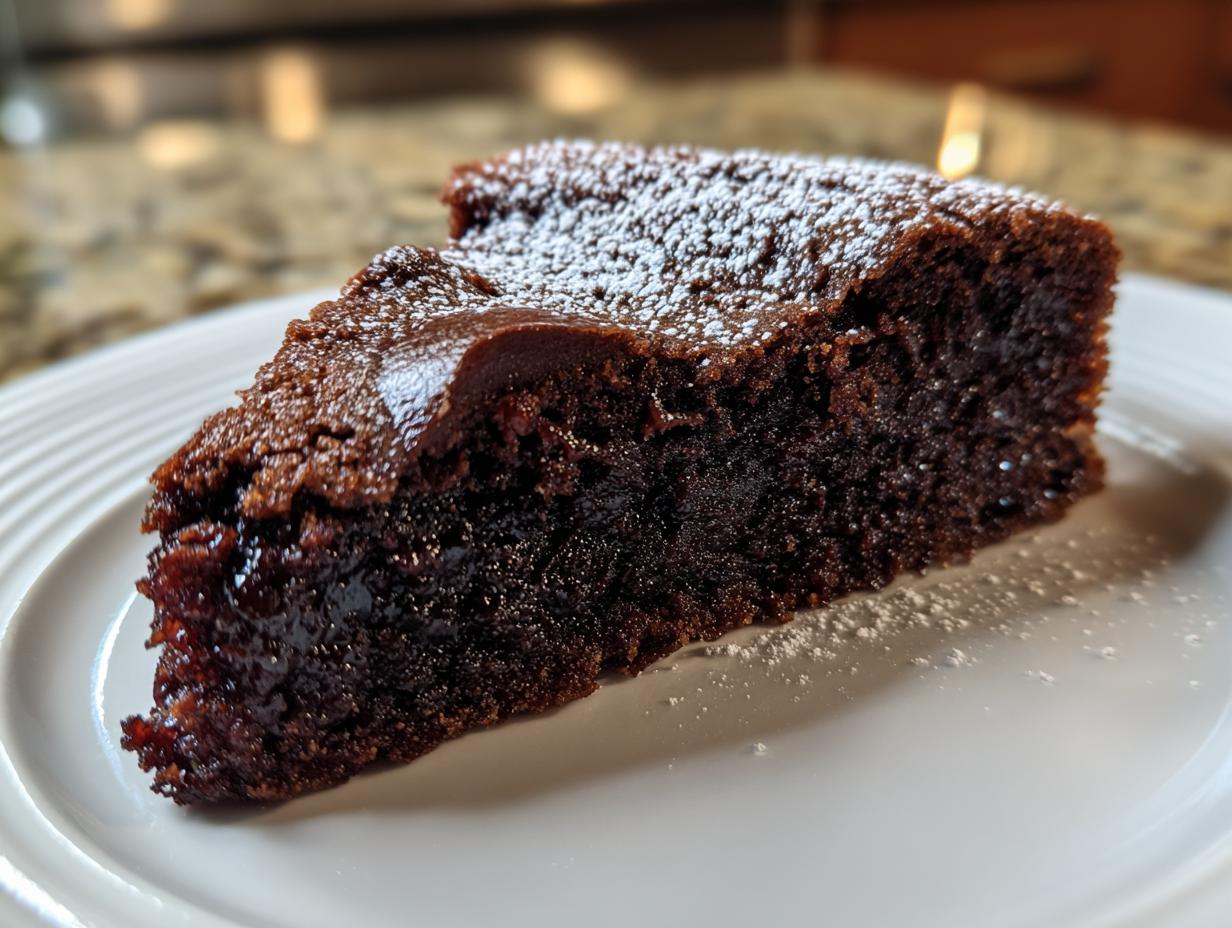
There’s something magical about winter desserts that just wrap you in warmth, isn’t there? When the wind howls outside, I crave this gooey butter cake with chocolate—it’s like a hug in dessert form! The secret? That rich, fudgy layer on top that stays gloriously soft, paired with the buttery cake base. I first made this during a snowstorm when we were stuck inside, and now my family demands it every chilly season. It’s ridiculously easy (hello, cake mix shortcut!) but tastes like you spent hours baking. Trust me, one bite of this winter comfort gooey butter cake chocolate, and you’ll be hooked.
Why You’ll Love This Winter Comfort Gooey Butter Cake Chocolate
Oh my goodness, where do I even start? This cake is pure magic, and here’s why you’re going to fall head over heels for it:
- Effortless baking joy: With a cake mix base, you’re just minutes away from mixing up something spectacular. No fancy techniques needed—just dump, stir, and bake!
- That dreamy texture: The contrast between the tender cake bottom and the luscious, fudgy chocolate topping? Absolute perfection. It’s like biting into a cloud that’s been dipped in chocolate ganache.
- Winter coziness in every bite: When that first warm slice hits your tongue with its rich chocolate and vanilla notes? Suddenly, snow days don’t seem so bad anymore.
- Crowd-pleasing magic: I’ve never brought this to a gathering without getting recipe requests. It disappears faster than you can say “seconds please!”
- Nostalgia with a chocolate twist: Takes that classic gooey butter cake we all adore and gives it a decadent chocolate makeover. Because really—who doesn’t want more chocolate in their life?
Seriously, this cake is like wrapping yourself in a warm blanket while sitting by the fire—but edible. And let’s be honest, edible blankets are way better!
Ingredients for Winter Comfort Gooey Butter Cake Chocolate
Okay, let’s talk ingredients – because this isn’t just any cake, and every single component matters. I’ve made this enough times to know exactly what works and what doesn’t. Here’s what you’ll need to create your own little bowl of winter heaven:
- 1 box yellow cake mix – The surprising hero! I use the plain yellow kind (no pudding in the mix) for the perfect buttery base. Trust me, this shortcut saves hours without sacrificing flavor.
- 1/2 cup unsalted butter, melted – I always use real butter (never margarine!) and melt it until just liquid with tiny bubbles around the edges. That nutty aroma? That’s flavor building right there.
- 4 eggs total – Two for the base, two for the topping. And yes, room temperature makes all the difference – they incorporate so much better!
- 8 oz cream cheese, softened – Here’s where I get picky. It must be full-fat, brick-style cream cheese (none of that whipped stuff in a tub). Let it sit out until your finger leaves an indent without resistance.
- 1 teaspoon vanilla extract – The good stuff, please! That imitation vanilla just won’t give you those warm, complex notes we’re after.
- 4 cups powdered sugar – Sift it if you’ve got lumps. I know it’s a pain, but lumpy sugar means lumpy topping, and we don’t want that.
- 1/2 cup cocoa powder – My secret weapon for winter warmth! I prefer Dutch-process for its deep chocolatey richness, but natural works too. Either way, sift it to avoid those pesky dry clumps.
See? Nothing too fancy – just quality ingredients treated right. That’s what turns this simple list into pure magic. Now grab your bowls – let’s make some memories!
Equipment You’ll Need
Listen, I’m all for keeping things simple, but having the right tools makes this winter comfort gooey butter cake chocolate come together like a dream. Here’s what you’ll want to grab before you start:
- 9×13-inch baking pan – My trusty glass pan works best, but metal is fine too. Just give it a good greasing or line it with parchment paper for easy removal.
- 2 mixing bowls – One for the cake layer, one for that glorious chocolate topping. Medium size is perfect – no need to break out the giant ones.
- Electric mixer – A hand mixer works great for the cream cheese topping. You could use a whisk and some elbow grease, but why make life harder?
- Measuring cups and spoons – Precision matters, especially with the powdered sugar and cocoa. No eyeballing this one!
- Spatula – For scraping every last bit of that delicious batter into the pan. Waste not, want not!
- Wire whisk – My secret weapon for getting rid of cocoa powder lumps before mixing. A quick whisk beats sifting any day.
That’s it! Nothing fancy required – just the basics from your kitchen. Now let’s get to the fun part: making magic happen with butter and chocolate!
How to Make Winter Comfort Gooey Butter Cake Chocolate
Alright, let’s dive into the good stuff! Making this cake is like conducting a sweet symphony – each step builds on the last to create pure magic. Follow along, and you’ll have a winter masterpiece in no time.
Preparing the Cake Layer
First things first – preheat that oven to 350°F (175°C). While it’s warming up, grab your biggest mixing bowl and let’s make the base. Dump in the yellow cake mix (just the dry powder), then pour in that glorious melted butter. Crack in 2 eggs – I like to do this one at a time, giving each a quick mix before adding the next. The dough will be thick and slightly sticky – that’s perfect! Now here’s my trick: use slightly damp hands to press it evenly into your greased 9×13 pan. This prevents sticking and gives you that perfect, even layer. Don’t worry if it seems thin – it’ll puff up beautifully!
Making the Gooey Chocolate Topping
Now for the star of the show! In another bowl, beat the softened cream cheese until it’s smooth as silk – about 1 minute with your mixer. Add the remaining 2 eggs and vanilla, mixing until just combined. Here’s where the magic happens: gradually add the powdered sugar and cocoa powder. I do this in 3 batches, mixing well after each addition. The mixture will transform from lumpy to luxuriously smooth. Pro tip: scrape down the sides often to catch any stubborn sugar pockets. When it’s silky and pourable (but still thick), you’re golden!
Baking and Cooling
Pour that chocolate dream over your cake layer, using a spatula to spread it evenly to the edges. Pop it in the oven and set your timer for 40 minutes. Here’s the key – you want the edges to be set (they’ll pull slightly away from the pan) but the center should still jiggle just a tiny bit when you gently shake the pan. That jiggle means gooey perfection! Let it cool completely in the pan – I know it’s hard to wait, but this gives the topping time to set properly. The wait is worth it when you cut into those fudgy, dreamy slices!
Tips for Perfect Winter Comfort Gooey Butter Cake Chocolate
After making this cake more times than I can count (what can I say? My family’s obsessed!), I’ve picked up some tricks that make all the difference. These aren’t just suggestions – they’re the secrets to that perfect slice every single time!
Watch that clock like a hawk: The biggest mistake? Overbaking. That beautiful jiggle in the center when you pull it out? That’s your golden ticket. The cake continues to set as it cools, so pull it at 40 minutes even if you’re tempted to leave it longer. If the edges are pulling away and the center just barely moves, you’re done!
Temperature matters more than you think: Room temperature cream cheese and eggs aren’t just a suggestion – they’re the law in my kitchen. Cold cream cheese leaves lumps no matter how long you mix, and cold eggs don’t incorporate properly. Plan ahead and leave them out for at least an hour.
Sift that cocoa like your cake depends on it: Because honestly, it kinda does. I used to skip this step (who has time?), but then I’d get those annoying little cocoa lumps in my smooth topping. Now I whisk my cocoa powder through a fine mesh strainer right into the bowl. Two minutes that make all the difference!
The finger test never lies: Not sure if your cream cheese is soft enough? Press it with your finger – it should leave an indent without sticking or feeling stiff. If it’s still cool to the touch or resists your finger, give it more time. Patience pays off!
Grease with love (and butter): That pan needs a good coating to prevent sticking. I use butter and a light dusting of flour, but for extra insurance, you can line the bottom with parchment paper. Nothing worse than your masterpiece sticking to the pan!
Follow these tips, and you’ll have that perfect balance of tender cake and fudgy topping that makes this dessert legendary in my house. Now go forth and bake with confidence!
Ingredient Substitutions and Notes
Okay, let’s talk swaps and solutions – because I know sometimes you’re staring at your pantry thinking “I don’t have that exact thing!” Don’t worry, I’ve tested plenty of variations over the years. Here’s what works (and what doesn’t) when you need to make adjustments:
Cake Mix Variations
Gluten-free friends, rejoice! A gluten-free yellow cake mix works beautifully here – just check that it’s a 15-16 oz size to match standard mixes. My favorite brand actually makes the base even more tender! Avoid almond flour mixes though – they make the texture too dense.
No yellow cake mix? White cake mix can sub in a pinch, but you’ll lose some of that buttery richness. Add 1/4 teaspoon butter extract if you’ve got it to compensate. Chocolate cake mix? Now we’re talking a double chocolate situation – not traditional, but delicious!
Dairy Dilemmas
Butter swaps: Margarine technically works, but the flavor won’t be as rich. For dairy-free, I’ve had success with vegan butter sticks (the kind that come wrapped like real butter). Coconut oil works too, but gives a subtle coconut flavor that might compete with the chocolate.
Cream cheese alternatives: Full-fat coconut cream cheese makes a decent substitute if you’re dairy-free – just make sure it’s the block style, not the spreadable kind. I’ve tried tofu-based versions too, but they lack the tang we love. If you must use low-fat cream cheese, add 1 tablespoon cornstarch to help thicken the topping.
Cocoa Powder Options
Dutch-process vs natural: I prefer Dutch-process for its smooth flavor, but natural cocoa works fine here. Just don’t use hot chocolate mix – the added sugar and milk powder will throw everything off!
Out of cocoa powder? Melted chocolate isn’t a direct swap (it changes the liquid ratios), but in a pinch, you can use 3 oz melted semisweet chocolate + reduce the powdered sugar by 1/4 cup. The texture will be denser but still delicious.
Egg Concerns
Egg-free options: For each egg, try 1/4 cup applesauce or 1 tablespoon ground flaxseed + 3 tablespoons water. The texture changes slightly (it’s more cake-like than gooey), but still tasty. Commercial egg replacers work too – just follow package directions.
Remember – every substitution changes the final product a bit. The original recipe is perfection, but life happens! The most important thing? However you make it, enjoy every warm, chocolatey bite.
Serving and Storing Winter Comfort Gooey Butter Cake Chocolate
Oh, the joy of serving this cake – it’s practically a winter ceremony in my house! Here’s how I make sure every slice is pure perfection:
Garnishing like a pro: A dusting of powdered sugar right before serving makes it look bakery-worthy. I use a fine mesh strainer for that perfect snowy effect. For special occasions? A drizzle of chocolate ganache or a dollop of whipped cream takes it over the top. My kids love it with a scoop of vanilla ice cream – the warm cake melts it just enough to create this magical sauce!
The perfect slice: Use a sharp knife dipped in hot water between cuts for clean edges. Wipe it dry each time – this keeps the gooey layers intact. I cut smaller squares than you’d think because this cake is rich! About 2-inch squares are perfect for satisfying that chocolate craving without overwhelming.
Storing leftovers (if you have any!): Cover the pan tightly with plastic wrap or transfer slices to an airtight container. It keeps beautifully at room temperature for 2-3 days – the topping stays soft and fudgy. The flavor actually improves slightly on day two as the chocolate mellows!
Freezing for later: This cake freezes surprisingly well! Cut cooled slices and wrap individually in plastic wrap, then place in a freezer bag. They’ll keep for up to 2 months. To serve, let thaw at room temperature for an hour or pop in the microwave for 15-20 seconds if you can’t wait.
Reheating magic: For that fresh-from-the-oven feel, microwave a slice for 10-15 seconds until just warm. The topping gets extra gooey again – pure bliss! You can also warm the whole cake in a 300°F oven for 10 minutes if serving a crowd.
Trust me, this cake disappears fast in my house – but when it does last, these tips keep every bite as dreamy as the first. Now go enjoy your winter comfort masterpiece!
Nutritional Information
Okay, let’s be real – when you’re indulging in this winter comfort gooey butter cake chocolate, you’re not exactly counting calories! But for those who like to know what they’re enjoying, here’s the breakdown per serving (about a 2-inch square):
- Calories: 380
- Sugar: 45g
- Sodium: 290mg
- Fat: 18g (10g saturated, 6g unsaturated)
- Carbohydrates: 52g
- Fiber: 1g
- Protein: 4g
- Cholesterol: 90mg
Important note: These values are estimates based on standard ingredients. Your actual numbers may vary depending on specific brands and any substitutions you make. I always say – focus on the joy each bite brings rather than the numbers! This cake is meant to be savored as a special treat, not an everyday indulgence (though I won’t judge if you sneak an extra sliver).
Frequently Asked Questions
Q: Can I freeze this gooey butter cake for later?
Absolutely! This cake freezes like a dream. Just let it cool completely, then cut into slices and wrap each one tightly in plastic wrap. Pop them in a freezer bag and they’ll keep for up to 2 months. When the craving hits, thaw at room temperature for about an hour or microwave for 15-20 seconds if you’re impatient like me!
Q: Help! My center came out too soggy – what did I do wrong?
Oh no! That usually means it needed just a few more minutes in the oven. Remember, we want a slight jiggle in the center, not a liquidy wobble. Next time, give it 3-5 more minutes and check again. If it’s already baked, you can pop individual slices back in a 350°F oven for 5 minutes to firm up that center. Crisis averted!
Q: Can I make this in a different pan size?
You bet! For a 9-inch square pan, just halve all the ingredients – it bakes in about 30-35 minutes. Want to get fancy? A 10-inch round springform pan works beautifully too. Just watch the baking time – start checking at 35 minutes. The key is filling whatever pan you use about 2/3 full for that perfect rise.
Q: Why does my topping have little lumps?
Ah, the dreaded cream cheese lumps! Two likely culprits: either your cream cheese wasn’t soft enough (remember that finger test!), or you didn’t sift the cocoa powder. Next time, let your cream cheese sit out longer (I leave mine out 2 hours) and whisk that cocoa through a fine mesh strainer. Smooth sailing from there!
Q: Can I add nuts or chocolate chips to this recipe?
Oh honey, now you’re speaking my language! A half cup of chopped walnuts or pecans in the cake layer adds wonderful crunch. And chocolate chips? Fold 1/4 cup into the topping for extra chocolatey pockets. Just don’t go overboard – we want to keep that perfect gooey texture!
Irresistible Winter Comfort Gooey Butter Cake Chocolate Bliss
- Total Time: 60 mins
- Yield: 12 servings 1x
- Diet: Vegetarian
Description
A rich and gooey butter cake with chocolate, perfect for winter comfort.
Ingredients
- 1 box yellow cake mix
- 1/2 cup unsalted butter, melted
- 4 eggs
- 8 oz cream cheese, softened
- 1 teaspoon vanilla extract
- 4 cups powdered sugar
- 1/2 cup cocoa powder
Instructions
- Preheat oven to 350°F (175°C).
- Mix cake mix, melted butter, and 2 eggs in a bowl.
- Press the mixture into a greased 9×13-inch baking pan.
- Beat cream cheese, remaining eggs, and vanilla until smooth.
- Gradually add powdered sugar and cocoa powder, mixing well.
- Pour over the cake layer and spread evenly.
- Bake for 40-45 minutes until edges are set but center is still slightly gooey.
- Let cool before serving.
Notes
- Do not overbake—cake should remain gooey in the center.
- Store leftovers in an airtight container at room temperature.
- Dust with extra powdered sugar before serving if desired.
- Prep Time: 15 mins
- Cook Time: 45 mins
- Category: Dessert
- Method: Baking
- Cuisine: American
Nutrition
- Serving Size: 1 slice
- Calories: 380
- Sugar: 45g
- Sodium: 290mg
- Fat: 18g
- Saturated Fat: 10g
- Unsaturated Fat: 6g
- Trans Fat: 0g
- Carbohydrates: 52g
- Fiber: 1g
- Protein: 4g
- Cholesterol: 90mg


