
Oh my goodness, let me tell you about my absolute favorite emergency dessert – these No-Bake Rocky Road Chocolate Squares! You know those days when you need something chocolatey NOW, but turning on the oven feels like too much effort? That’s when I whip up this lifesaver recipe. It’s become my go-to for last-minute bake sales, movie nights, and “I just need chocolate” moments.
I first discovered this magic when my niece begged for cookies during a heatwave – no way was I baking in that weather! A rummage through the pantry yielded chocolate, marshmallows and biscuits, and voila – rocky road squares were born. Now my friends request them constantly. The best part? They come together in about 15 minutes flat (plus chilling time, but who’s counting?).
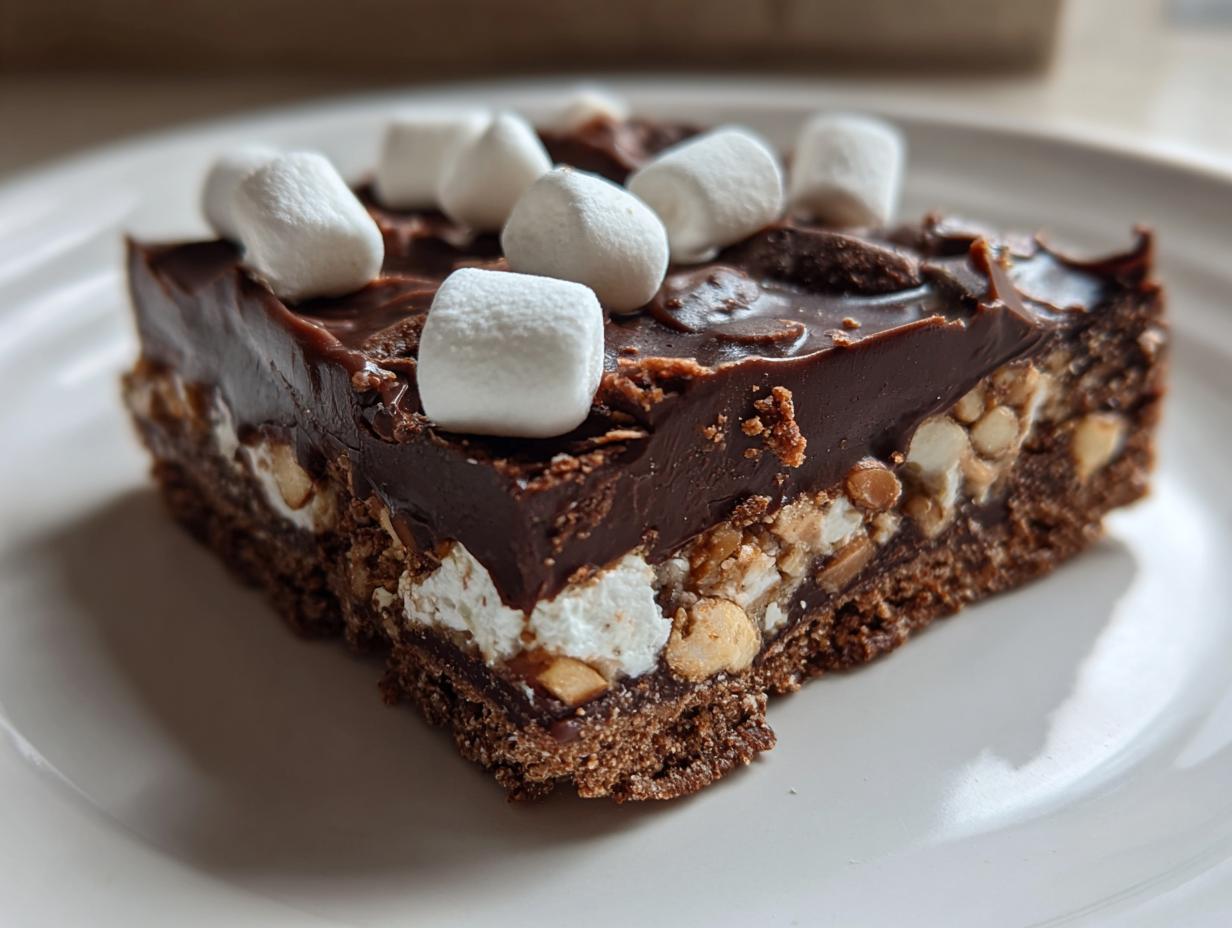
These squares have everything – crunchy biscuits, melty chocolate, pillowy marshmallows, and that perfect hit of salt from the nuts. They’re like edible happiness in square form. And because there’s no baking involved, even kitchen newbies can make them with confidence. Trust me, once you try these, you’ll always keep the ingredients on hand!
Why You’ll Love These No-Bake Rocky Road Chocolate Squares
Let me count the ways these squares will become your new obsession:
- No oven required – Perfect for hot summer days or when you just can’t be bothered to preheat
- Ready in a flash – 15 minutes hands-on time (plus chilling) means instant chocolate satisfaction
- Endlessly customizable – Swap nuts for pretzels, add dried fruit, or go wild with different chocolates
- Crowd-pleaser magic – Kids and adults alike go crazy for that marshmallow-chocolate-crunch combo
- Foolproof baking – No worrying about overmixing or oven temperatures going wrong
Honestly, I’ve lost count of how many times this recipe has saved me when unexpected guests arrive or I need a quick sweet fix. The marshmallows stay delightfully squishy, the chocolate stays gloriously rich, and you stay gloriously unstressed – it’s a win all around!
Ingredients for No-Bake Rocky Road Chocolate Squares
Okay, let’s talk ingredients – and I mean the good stuff! Here’s exactly what you’ll need to make these heavenly squares (I’ve learned the hard way that measurements matter with no-bake treats):
- 200g dark chocolate – Chopped roughly (I like 70% cocoa for that perfect bittersweet balance)
- 100g unsalted butter – Cubed (cold butter works fine since we’re melting it anyway)
- 3 tbsp golden syrup – That sticky British staple (honey works in a pinch, but the flavor changes slightly)
- 150g digestive biscuits – Crushed (I whack them in a bag and roll with a pin – stress relief and prep in one!)
- 100g mini marshmallows – The star of the show (regular ones cut small work too)
- 50g chopped nuts – I’m team hazelnut, but walnuts or almonds are fabulous
Quick note for my gluten-free friends: swap the digestives for gluten-free biscuits – they work just as well! And if you’re out of golden syrup, corn syrup or maple syrup can sub in, though the flavor will be slightly different. The beauty? You probably have most of this in your pantry already!
Equipment You’ll Need
Don’t worry – you won’t need any fancy gadgets for these squares! Just grab:
- A medium saucepan (for melting that chocolatey goodness)
- An 8×8 inch square baking tin (mine’s looking well-loved and chocolate-stained)
- Parchment paper (trust me, you’ll want this for easy lifting)
- A wooden spoon (my favorite one has chocolate marks from years of rocky road making)
- A measuring spoon (for that golden syrup perfection)
That’s it! No mixer, no fancy pans – just simple tools for maximum chocolate joy.
How to Make No-Bake Rocky Road Chocolate Squares
Alright, let’s get to the fun part – making these dreamy chocolate squares! I’ve made this recipe so many times I could do it in my sleep, but I’ll walk you through every step so yours turn out perfect. The key? Don’t rush the melting stage, and give them proper chill time (I know, the waiting is torture!).
Step 1: Prepare the Tin
First things first – grab your baking tin and line it with parchment paper, leaving some overhang on the sides. This little trick makes lifting the whole slab out SO much easier later. I learned this the hard way after my first batch stuck like cement!
Step 2: Melt the Chocolate Mixture
Now for the magic potion: combine your chopped chocolate, cubed butter, and golden syrup in a saucepan over low heat. I can’t stress this enough – keep that flame low! Chocolate burns faster than you’d think. Stir constantly with your wooden spoon until everything melts into a glossy, smooth pool of deliciousness. This should take about 3-4 minutes – patience pays off here.
Step 3: Combine Ingredients
Remove the pan from heat and immediately stir in your crushed biscuits until they’re fully coated. Now the fun part – gently fold in the mini marshmallows and nuts. Work quickly but carefully here – we want those marshmallows to stay plump and not melt completely. The mixture will be thick and chunky, like edible cookie dough!
Step 4: Chill and Slice
Press the mixture firmly into your prepared tin – I use the back of a spoon then wash my hands and press it down smooth. Pop it in the fridge for at least 2 hours (overnight is even better). When it’s set, use the parchment “handles” to lift it out onto a cutting board. Pro tip: run your knife under hot water before slicing for cleaner cuts through all those yummy chunks!
Tips for Perfect No-Bake Rocky Road Chocolate Squares
After making these squares more times than I can count, I’ve picked up some foolproof tricks to make them absolutely perfect every time:
- Room temperature butter is your friend – It melts more evenly with the chocolate, preventing that dreaded separation
- Fold, don’t stir – When adding marshmallows, use a gentle folding motion to keep them from melting into goo
- Chill thoroughly – I know it’s tempting, but wait the full 2 hours! They slice much cleaner when properly set
- Warm your knife – A quick dip in hot water between cuts gives you those picture-perfect squares
- Taste your chocolate first – Since it’s the star ingredient, make sure you love its flavor before melting
Oh, and here’s my secret weapon – a pinch of sea salt sprinkled on top before chilling. It makes all the flavors pop in the most magical way!
Variations for No-Bake Rocky Road Chocolate Squares
Oh, the possibilities! One of my favorite things about this recipe is how easily you can switch it up. Here are some delicious twists I’ve tried (and loved):
- White chocolate dream – Swap the dark chocolate for white and add dried cranberries for a festive version
- Pretzel power – Replace nuts with crushed pretzels for that perfect salty-sweet crunch
- Tropical twist – Use macadamia nuts and mix in some chopped dried pineapple (trust me on this one!)
- Cookie monster – Add crushed Oreos instead of digestives for an extra chocolate hit
- Peanut butter bliss – Swirl in 2 tablespoons of peanut butter with the melted chocolate
The beauty? You can make these squares a dozen different ways and they’re always delicious. What combo will you try first?
Serving and Storing No-Bake Rocky Road Chocolate Squares
Here’s the best part – these squares actually get better as they sit! I usually keep them in an airtight container at room temperature (because let’s be real, they never last more than a day in my house). They’ll stay perfect for up to 3 days this way – if you can resist eating them all at once!
For special occasions, I love arranging them on a pretty plate with a dusting of cocoa powder. They’re fantastic slightly chilled straight from the fridge too – that chocolate gets extra fudgy. Pro tip: layer them between parchment paper in your container so they don’t stick together. Now, who’s ready for seconds?
Nutritional Information
Now, let’s be real – we’re not eating rocky road squares for their health benefits! But for those who like to know, here’s the scoop (based on 12 squares):
- Calories: 220 per square
- Fat: 12g (6g saturated)
- Carbs: 25g
- Sugar: 15g
- Protein: 3g
Remember, these are estimates – actual values change based on your specific ingredients. I say enjoy every chocolaty bite guilt-free! Life’s too short to stress over dessert nutrition labels when there’s marshmallow-y goodness involved.
FAQs About No-Bake Rocky Road Chocolate Squares
I get asked about these squares ALL the time – here are the most common questions (and my hard-earned answers!):
Can I freeze rocky road squares?
Absolutely! They freeze beautifully for up to 1 month. Just wrap individual squares in parchment paper, then pop them in an airtight container. Thaw at room temperature for about 30 minutes when that chocolate craving hits.
Why did my marshmallows melt completely?
Ah, this happens if the chocolate mixture is too hot when you add them. Let it cool for a minute or two off the heat before folding in those fluffy clouds. And work fast – the residual heat will still soften them slightly (which we want!).
Can I use milk chocolate instead of dark?
Of course! Just know the squares will be sweeter. I sometimes do half dark, half milk for the perfect balance. White chocolate works too – though you might want to reduce the golden syrup slightly.
Help! My mixture is too crumbly!
No panic! Just add an extra tablespoon of golden syrup or melted butter. The binder needs a bit more help sometimes, especially if your biscuits were particularly dry.
How do I get clean cuts?
My foolproof method: chill thoroughly, use a sharp knife dipped in hot water, and wipe it clean between cuts. Works like a charm every time!

Oh my goodness, let me tell you about my absolute favorite emergency dessert – these No-Bake Rocky Road Chocolate Squares! You know those days when you need something chocolatey NOW, but turning on the oven feels like too much effort? That’s when I whip up this lifesaver recipe. It’s become my go-to for last-minute bake sales, movie nights, and “I just need chocolate” moments.
I first discovered this magic when my niece begged for cookies during a heatwave – no way was I baking in that weather! A rummage through the pantry yielded chocolate, marshmallows and biscuits, and voila – rocky road squares were born. Now my friends request them constantly. The best part? They come together in about 15 minutes flat (plus chilling time, but who’s counting?).
These squares have everything – crunchy biscuits, melty chocolate, pillowy marshmallows, and that perfect hit of salt from the nuts. They’re like edible happiness in square form. And because there’s no baking involved, even kitchen newbies can make them with confidence. Trust me, once you try these, you’ll always keep the ingredients on hand!
Why You’ll Love These No-Bake Rocky Road Chocolate Squares
Let me count the ways these squares will become your new obsession:
- No oven required – Perfect for hot summer days or when you just can’t be bothered to preheat
- Ready in a flash – 15 minutes hands-on time (plus chilling) means instant chocolate satisfaction
- Endlessly customizable – Swap nuts for pretzels, add dried fruit, or go wild with different chocolates
- Crowd-pleaser magic – Kids and adults alike go crazy for that marshmallow-chocolate-crunch combo
- Foolproof baking – No worrying about overmixing or oven temperatures going wrong
Honestly, I’ve lost count of how many times this recipe has saved me when unexpected guests arrive or I need a quick sweet fix. The marshmallows stay delightfully squishy, the chocolate stays gloriously rich, and you stay gloriously unstressed – it’s a win all around!
Ingredients for No-Bake Rocky Road Chocolate Squares
Okay, let’s talk ingredients – and I mean the good stuff! Here’s exactly what you’ll need to make these heavenly squares (I’ve learned the hard way that measurements matter with no-bake treats):
- 200g dark chocolate – Chopped roughly (I like 70% cocoa for that perfect bittersweet balance)
- 100g unsalted butter – Cubed (cold butter works fine since we’re melting it anyway)
- 3 tbsp golden syrup – That sticky British staple (honey works in a pinch, but the flavor changes slightly)
- 150g digestive biscuits – Crushed (I whack them in a bag and roll with a pin – stress relief and prep in one!)
- 100g mini marshmallows – The star of the show (regular ones cut small work too)
- 50g chopped nuts – I’m team hazelnut, but walnuts or almonds are fabulous
Quick note for my gluten-free friends: swap the digestives for gluten-free biscuits – they work just as well! And if you’re out of golden syrup, corn syrup or maple syrup can sub in, though the flavor will be slightly different. The beauty? You probably have most of this in your pantry already!
Equipment You’ll Need
Don’t worry – you won’t need any fancy gadgets for these squares! Just grab:
- A medium saucepan (for melting that chocolatey goodness)
- An 8×8 inch square baking tin (mine’s looking well-loved and chocolate-stained)
- Parchment paper (trust me, you’ll want this for easy lifting)
- A wooden spoon (my favorite one has chocolate marks from years of rocky road making)
- A measuring spoon (for that golden syrup perfection)
That’s it! No mixer, no fancy pans – just simple tools for maximum chocolate joy.
How to Make No-Bake Rocky Road Chocolate Squares
Alright, let’s get to the fun part – making these dreamy chocolate squares! I’ve made this recipe so many times I could do it in my sleep, but I’ll walk you through every step so yours turn out perfect. The key? Don’t rush the melting stage, and give them proper chill time (I know, the waiting is torture!).
Step 1: Prepare the Tin
First things first – grab your baking tin and line it with parchment paper, leaving some overhang on the sides. This little trick makes lifting the whole slab out SO much easier later. I learned this the hard way after my first batch stuck like cement!
Step 2: Melt the Chocolate Mixture
Now for the magic potion: combine your chopped chocolate, cubed butter, and golden syrup in a saucepan over low heat. I can’t stress this enough – keep that flame low! Chocolate burns faster than you’d think. Stir constantly with your wooden spoon until everything melts into a glossy, smooth pool of deliciousness. This should take about 3-4 minutes – patience pays off here.
Step 3: Combine Ingredients
Remove the pan from heat and immediately stir in your crushed biscuits until they’re fully coated. Now the fun part – gently fold in the mini marshmallows and nuts. Work quickly but carefully here – we want those marshmallows to stay plump and not melt completely. The mixture will be thick and chunky, like edible cookie dough!
Step 4: Chill and Slice
Press the mixture firmly into your prepared tin – I use the back of a spoon then wash my hands and press it down smooth. Pop it in the fridge for at least 2 hours (overnight is even better). When it’s set, use the parchment “handles” to lift it out onto a cutting board. Pro tip: run your knife under hot water before slicing for cleaner cuts through all those yummy chunks!
Tips for Perfect No-Bake Rocky Road Chocolate Squares
After making these squares more times than I can count, I’ve picked up some foolproof tricks to make them absolutely perfect every time:
- Room temperature butter is your friend – It melts more evenly with the chocolate, preventing that dreaded separation
- Fold, don’t stir – When adding marshmallows, use a gentle folding motion to keep them from melting into goo
- Chill thoroughly – I know it’s tempting, but wait the full 2 hours! They slice much cleaner when properly set
- Warm your knife – A quick dip in hot water between cuts gives you those picture-perfect squares
- Taste your chocolate first – Since it’s the star ingredient, make sure you love its flavor before melting
Oh, and here’s my secret weapon – a pinch of sea salt sprinkled on top before chilling. It makes all the flavors pop in the most magical way!
Variations for No-Bake Rocky Road Chocolate Squares
Oh, the possibilities! One of my favorite things about this recipe is how easily you can switch it up. Here are some delicious twists I’ve tried (and loved):
- White chocolate dream – Swap the dark chocolate for white and add dried cranberries for a festive version
- Pretzel power – Replace nuts with crushed pretzels for that perfect salty-sweet crunch
- Tropical twist – Use macadamia nuts and mix in some chopped dried pineapple (trust me on this one!)
- Cookie monster – Add crushed Oreos instead of digestives for an extra chocolate hit
- Peanut butter bliss – Swirl in 2 tablespoons of peanut butter with the melted chocolate
The beauty? You can make these squares a dozen different ways and they’re always delicious. What combo will you try first?
Serving and Storing No-Bake Rocky Road Chocolate Squares
Here’s the best part – these squares actually get better as they sit! I usually keep them in an airtight container at room temperature (because let’s be real, they never last more than a day in my house). They’ll stay perfect for up to 3 days this way – if you can resist eating them all at once!
For special occasions, I love arranging them on a pretty plate with a dusting of cocoa powder. They’re fantastic slightly chilled straight from the fridge too – that chocolate gets extra fudgy. Pro tip: layer them between parchment paper in your container so they don’t stick together. Now, who’s ready for seconds?
Nutritional Information
Now, let’s be real – we’re not eating rocky road squares for their health benefits! But for those who like to know, here’s the scoop (based on 12 squares):
- Calories: 220 per square
- Fat: 12g (6g saturated)
- Carbs: 25g
- Sugar: 15g
- Protein: 3g
Remember, these are estimates – actual values change based on your specific ingredients. I say enjoy every chocolaty bite guilt-free! Life’s too short to stress over dessert nutrition labels when there’s marshmallow-y goodness involved.
FAQs About No-Bake Rocky Road Chocolate Squares
I get asked about these squares ALL the time – here are the most common questions (and my hard-earned answers!):
Can I freeze rocky road squares?
Absolutely! They freeze beautifully for up to 1 month. Just wrap individual squares in parchment paper, then pop them in an airtight container. Thaw at room temperature for about 30 minutes when that chocolate craving hits.
Why did my marshmallows melt completely?
Ah, this happens if the chocolate mixture is too hot when you add them. Let it cool for a minute or two off the heat before folding in those fluffy clouds. And work fast – the residual heat will still soften them slightly (which we want!).
Can I use milk chocolate instead of dark?
Of course! Just know the squares will be sweeter. I sometimes do half dark, half milk for the perfect balance. White chocolate works too – though you might want to reduce the golden syrup slightly.
Help! My mixture is too crumbly!
No panic! Just add an extra tablespoon of golden syrup or melted butter. The binder needs a bit more help sometimes, especially if your biscuits were particularly dry.
How do I get clean cuts?
My foolproof method: chill thoroughly, use a sharp knife dipped in hot water, and wipe it clean between cuts. Works like a charm every time!

Irresistible 15-Minute No-Bake Rocky Road Chocolate Squares
- Total Time: 2 hours 20 minutes
- Yield: 12 squares 1x
- Diet: Vegetarian
Description
Easy no-bake chocolate squares with marshmallows and nuts.
Ingredients
- 200g dark chocolate
- 100g butter
- 3 tbsp golden syrup
- 150g digestive biscuits, crushed
- 100g mini marshmallows
- 50g chopped nuts
Instructions
- Line a square baking tin with parchment paper.
- Melt chocolate, butter, and syrup in a saucepan over low heat.
- Remove from heat and stir in crushed biscuits.
- Fold in marshmallows and nuts.
- Press mixture into the tin and chill for 2 hours.
- Cut into squares and serve.
Notes
- Store in an airtight container for up to 3 days.
- Use gluten-free biscuits if needed.
- Prep Time: 15 minutes
- Cook Time: 5 minutes
- Category: Dessert
- Method: No-Bake
- Cuisine: International
Nutrition
- Serving Size: 1 square
- Calories: 220
- Sugar: 15g
- Sodium: 50mg
- Fat: 12g
- Saturated Fat: 6g
- Unsaturated Fat: 4g
- Trans Fat: 0g
- Carbohydrates: 25g
- Fiber: 2g
- Protein: 3g
- Cholesterol: 10mg


