
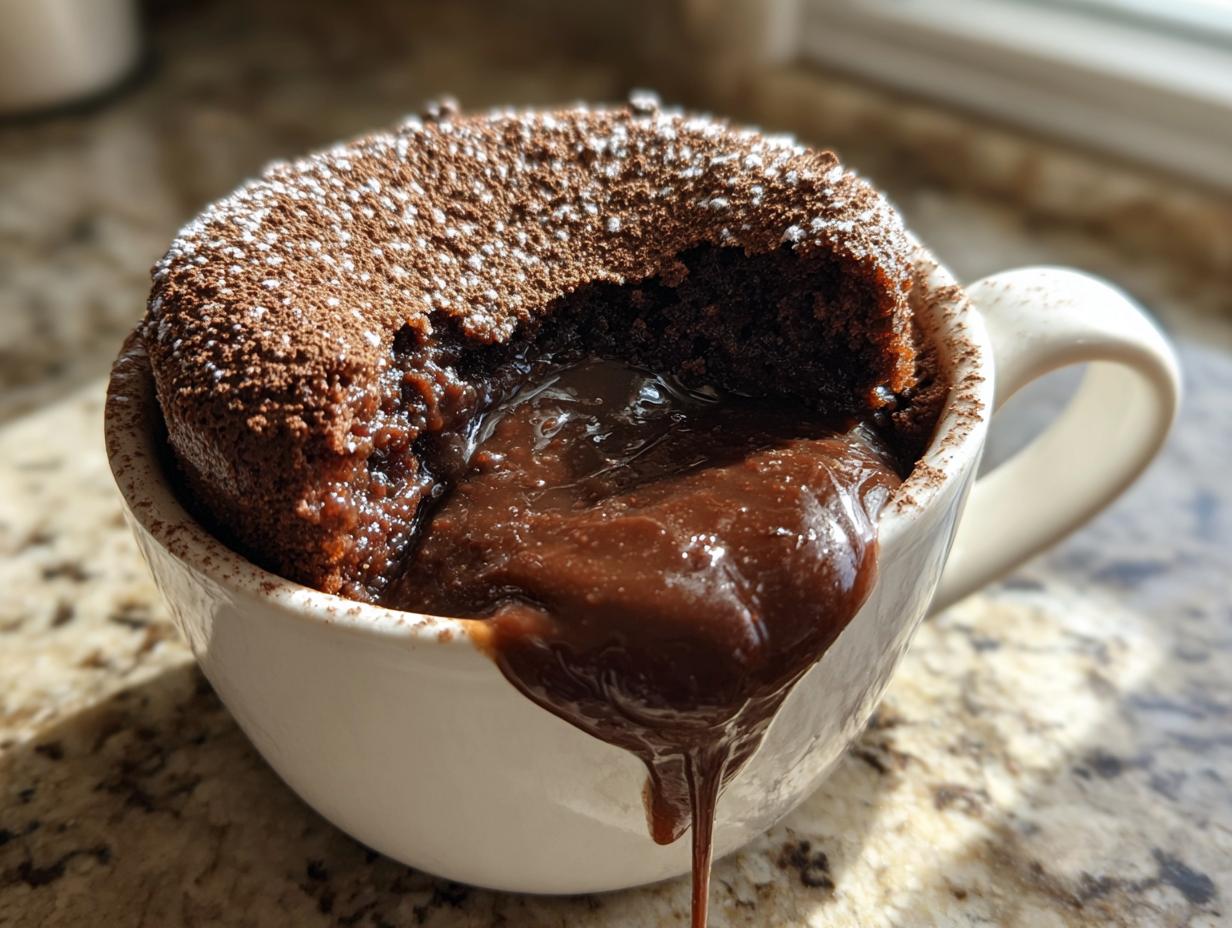
You know those nights when a chocolate craving hits hard, and all you can think about is that gooey, molten-centered lava cake from your favorite bakery? Yeah, me too. That’s exactly why I started making these Bakery Copycat Chocolate Lava Mug Cakes—because sometimes you need a rich, decadent dessert NOW, not after preheating the oven and waiting 30 minutes. The best part? This little miracle takes just six minutes from craving to first bite. Trust me, it’s dangerously easy—flour, sugar, cocoa, a splash of milk, and a hidden chocolate center that oozes like magic when you dig in. No fancy tools, no patience required. Just pure, bakery-quality indulgence in a mug.
Why You’ll Love These Bakery Copycat Chocolate Lava Mug Cakes
Let me count the ways you’ll adore these little miracles:
- Instant gratification: From craving to first bite in under 6 minutes—no oven required!
- Bakery-worthy taste: That rich, molten center will make you swear it came from a fancy patisserie.
- Pantry staples only: No special trips to the store—just basic ingredients you probably have right now.
- Single-serving perfection: No leftovers tempting you all night (unless you make seconds… which you will).
Ingredients for Bakery Copycat Chocolate Lava Mug Cakes
Here’s all you need to create magic in a mug (and yes, I’ve made this enough times to know exact measurements matter!):
- 4 tbsp all-purpose flour (spooned & leveled—no packing!)
- 4 tbsp granulated sugar (the regular white stuff works best here)
- 2 tbsp unsweetened cocoa powder (trust me, Dutch-processed makes it extra rich)
- ⅛ tsp baking powder (just a pinch—too much makes it taste metallic)
- Tiny pinch of salt (balances the sweetness perfectly)
- 3 tbsp milk (any kind works, but whole milk gives that bakery-style richness)
- 1 tbsp vegetable oil (or melted butter if you’re feeling fancy)
- ¼ tsp vanilla extract (real stuff, not imitation!)
- 1 tbsp chocolate chips or a square of chocolate (the secret lava center!)
How to Make Bakery Copycat Chocolate Lava Mug Cakes
Okay, let’s get to the fun part—making that molten magic happen! I’ve made this so many times I could do it in my sleep, but here’s the foolproof method I’ve perfected (with a few oops moments along the way).
Step 1: Mix Dry Ingredients
Grab your favorite microwave-safe mug—I like using one that holds at least 12 oz so it doesn’t overflow. Whisk together the flour, sugar, cocoa powder, baking powder, and that tiny pinch of salt until you don’t see any lumps. Pro tip: Sift the cocoa if it’s clumpy! This step makes all the difference for that smooth, bakery-quality texture.
Step 2: Add Wet Ingredients
Now pour in the milk, oil, and vanilla. Stir gently—just until the batter comes together. Don’t overmix! A few small lumps are totally fine. Overworking the batter makes it tough, and we want that tender, cakey goodness. The consistency should be like thick pancake batter.
Step 3: Add Chocolate Center
Here’s where the lava magic happens: drop your chocolate chips or that little square of chocolate right into the center of the batter. Don’t stir! Just push it down slightly so it’s submerged. This little treasure will melt into that gooey core we’re all obsessed with.
Step 4: Microwave and Serve
Microwave on high for 60 seconds first—peek to see if the edges look set but the center still jiggles slightly. If needed, add 10-15 second bursts (microwaves vary wildly!). Let it cool for 1 minute—this is crucial for the lava to thicken just enough. Then grab a spoon and dive in! Warning: That first molten bite is pure bliss.
Tips for Perfect Bakery Copycat Chocolate Lava Mug Cakes
After dozens of test runs (and a few chocolate explosions), here are my foolproof secrets:
- Microwave magic: Start with 60 seconds—overcooking kills the lava! Add time in 10-second bursts if needed.
- Room temp wins: Cold milk makes batter lumpy. Let it sit out 10 minutes first.
- Chocolate upgrade: Use a chocolate truffle center for an extra-luxurious lava flow.
- Don’t peek! Resist opening the microwave door—steam escape ruins the rise.
Variations for Bakery Copycat Chocolate Lava Mug Cakes
Once you’ve mastered the basic recipe (and licked the mug clean), try these fun twists—my family fights over which version is best!
- Peanut butter bliss: Drop a spoonful of creamy peanut butter into the batter before microwaving—it melts into a salty-sweet river.
- Mint chip magic: Swap vanilla for peppermint extract and use Andes mints as your chocolate center.
- Espresso kick: Add ½ tsp instant coffee to the dry ingredients for a mocha upgrade that’ll wake up your taste buds.
- Salty surprise: Top with flaky sea salt right after microwaking—trust me, it makes the chocolate sing.
Serving Suggestions
Take your mug cake to bakery-level luxury by topping it with a scoop of vanilla ice cream (watch it melt into the lava!) or fresh raspberries for a tart contrast. A dusting of powdered sugar never hurts either—go wild!
Storage & Reheating
Let’s be real—these mug cakes rarely last long enough to store! But if you must, cover and refrigerate for up to 1 day. A quick 15-second microwave zap brings back that just-made warmth. Fresh is always best though—no shame in eating it straight from the mug!
Nutritional Information
Here’s the scoop—each mug cake runs about 350 calories (worth every bite!). Values vary slightly based on your exact ingredients and chocolate choices. Enjoy responsibly!
FAQ About Bakery Copycat Chocolate Lava Mug Cakes
Got questions? I’ve got answers after making approximately a zillion of these mug cakes (all in the name of research, of course!). Here’s what people ask me most:
Q: Why didn’t my cake have a lava center?
A: You likely microwaved too long! Start with 60 seconds—the center should still look slightly wet. It keeps cooking as it cools.
Q: Can I use a different sweetener?
A: Granulated sugar works best for texture. Honey or maple syrup make it gummy, but you can try swapping half with brown sugar for caramel notes.
Q: My cake overflowed—help!
A: Oops! Your mug’s too small. Use at least a 12-oz mug and fill only halfway. Also, don’t overmix—that creates extra bubbles.
Q: Can I bake this in the oven instead?
A: Sure! Bake at 350°F in ramekins for 12-15 minutes. But honestly, the microwave’s instant magic is half the charm.
Q: What’s the best chocolate for the center?
A: Chocolate chips work, but a truffle or Lindt square melts into pure luxury. Dark chocolate lovers—go for 70% cacao!
Now quit reading and go make one—I wanna see your molten masterpiece! Tag me @YourMugCakeQueen (I made that up, but you get the idea).
Print
Bakery Copycat Chocolate Lava Mug Cakes in Just 6 Minutes
- Total Time: 6 minutes
- Yield: 1 serving 1x
- Diet: Vegetarian
Description
A quick and easy recipe for chocolate lava mug cakes that taste just like your favorite bakery treat. Perfect for when you need a rich, chocolaty dessert in minutes.
Ingredients
- 4 tbsp all-purpose flour
- 4 tbsp granulated sugar
- 2 tbsp unsweetened cocoa powder
- 1/8 tsp baking powder
- 1 pinch salt
- 3 tbsp milk
- 1 tbsp vegetable oil
- 1/4 tsp vanilla extract
- 1 tbsp chocolate chips or a small piece of chocolate
Instructions
- In a microwave-safe mug, mix flour, sugar, cocoa powder, baking powder, and salt.
- Add milk, vegetable oil, and vanilla extract. Stir until smooth.
- Drop chocolate chips or a small piece of chocolate into the center of the batter.
- Microwave on high for 60-90 seconds until the edges are firm but the center is still soft.
- Let cool for 1 minute before serving.
Notes
- Do not overmix the batter to keep the texture light.
- Adjust microwave time based on wattage—start with 60 seconds and add more if needed.
- Serve with ice cream or whipped cream for extra indulgence.
- Prep Time: 5 minutes
- Cook Time: 1 minute
- Category: Dessert
- Method: Microwave
- Cuisine: American
Nutrition
- Serving Size: 1 mug cake
- Calories: 350
- Sugar: 30g
- Sodium: 100mg
- Fat: 12g
- Saturated Fat: 4g
- Unsaturated Fat: 6g
- Trans Fat: 0g
- Carbohydrates: 55g
- Fiber: 3g
- Protein: 4g
- Cholesterol: 5mg


